Tenda EE3 Pro handleiding
Handleiding
Je bekijkt pagina 22 van 159
15
Document version: V1.0
If the mesh device to be added is in a different package with the primary node, refer to the
following instructions.
Method 1: Wireless networking
You can add a new node by using MESH button, web user interface, or Tenda WiFi App.
The node to be added must be located within the signal coverage of the networked node (primary node or
networked secondary node).
If networking fails (the indicator blinks green slowly for more than 3 minutes), try the following solutions:
Ensure that all nodes are powered on.
Ensure that only one node (the primary node) is connected to the internet while other nodes are in
factory settings.
Move the new node closer to the networked node and try again.
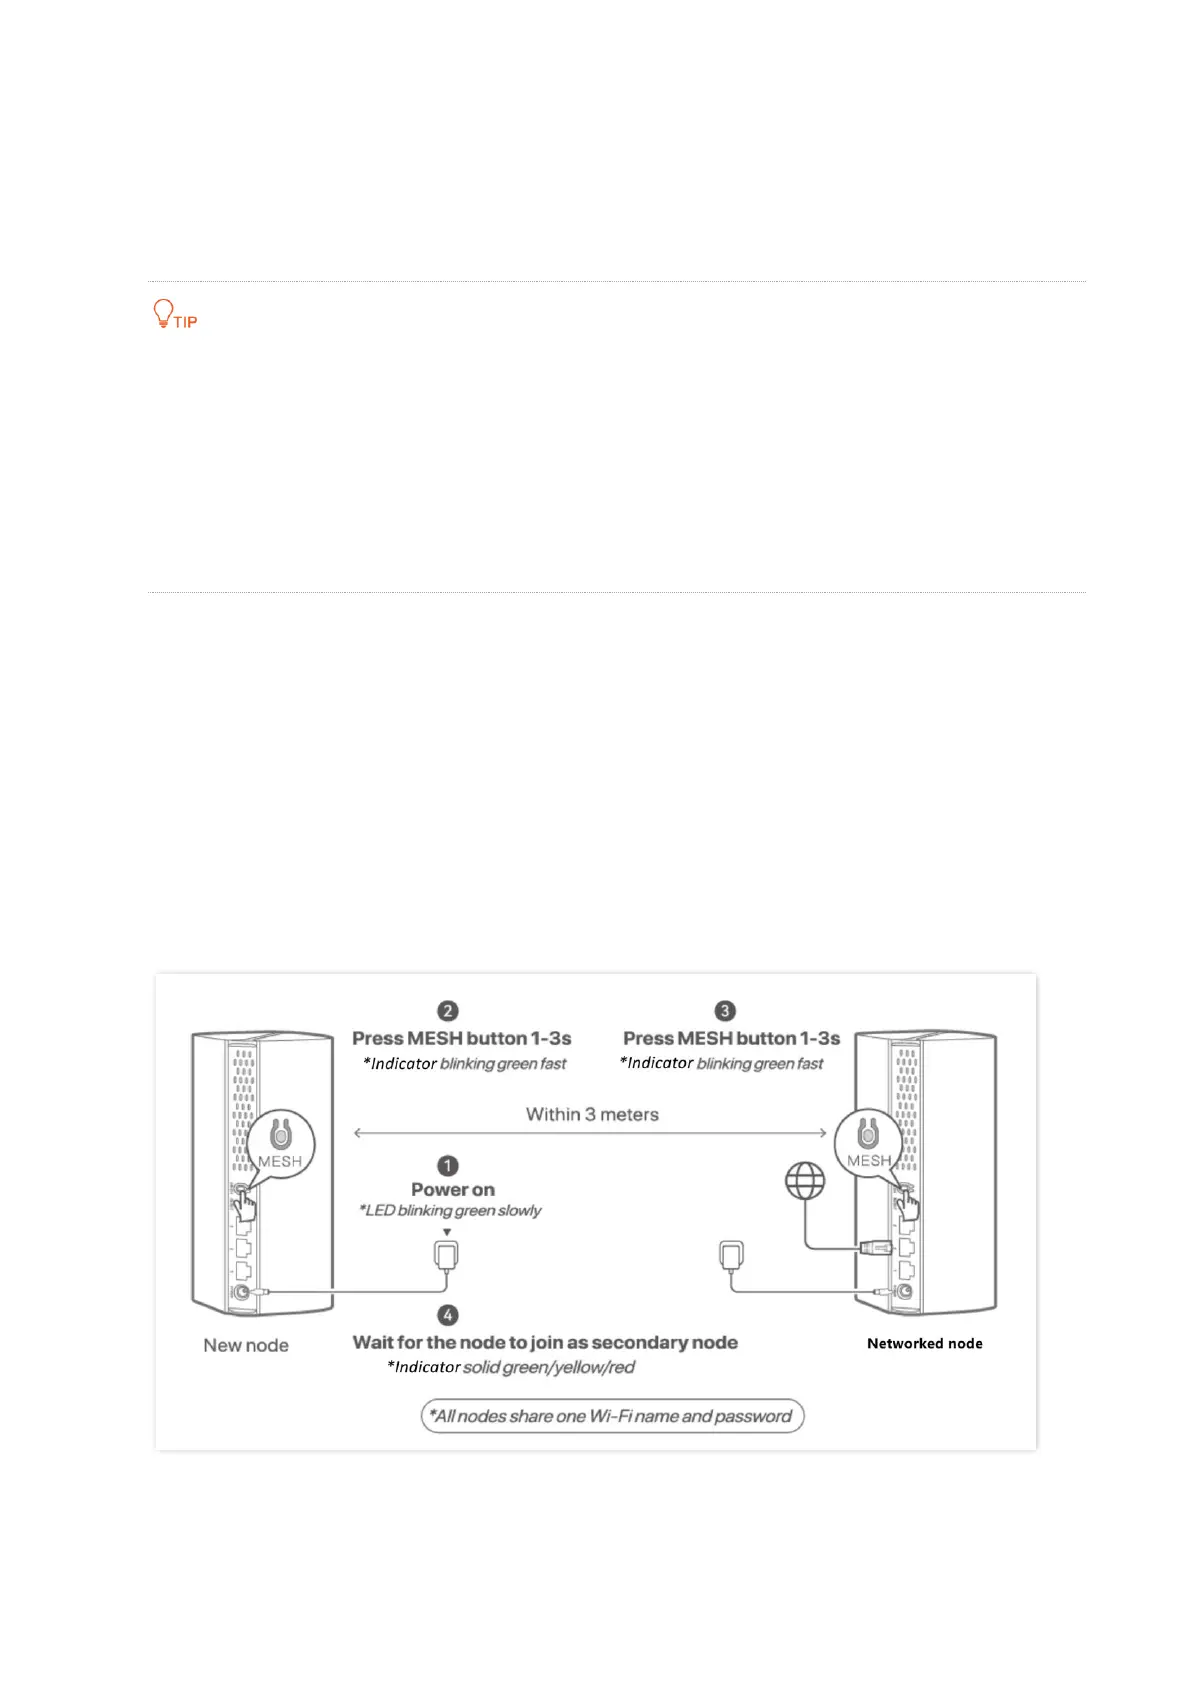
Using MESH button
1. Power on the router with the mesh function (new node) and long-press (8 seconds) the reset
button to reset it. Then, place the device within 3 meters of the networked node (primary node
or networked secondary node).
Wait until the indicator of new node blinks green.
2. Press (1-3 seconds) the MESH or WPS button on the new node, and its indicator blinks fast.
3. Within 2 minutes, press (1-3 seconds) the MESH or WPS button on the networked node, and its
indicator blinks fast. The indicator of the new node is solid green, indicating that the
networking succeeded.
Bekijk gratis de handleiding van Tenda EE3 Pro, stel vragen en lees de antwoorden op veelvoorkomende problemen, of gebruik onze assistent om sneller informatie in de handleiding te vinden of uitleg te krijgen over specifieke functies.
Productinformatie
| Merk | Tenda |
| Model | EE3 Pro |
| Categorie | Niet gecategoriseerd |
| Taal | Nederlands |
| Grootte | 24960 MB |


