Carrier 39S handleiding
Handleiding
Je bekijkt pagina 33 van 64
33
Fig. 36 — Slide Economizer Assembly into Unit
7. To install barometric hood:
For bottom return applications:
a. Take the barometric hood and secure to economizer
using screws as shown in Fig. 38.
For horizontal return applications:
a. Connect field-installed horizontal return ductwork to
duct flange. Ensure that bottom return on unit is capped.
b. Install barometric hood over exhaust opening in
field-installed ductwork. For exhaust and horizontal
return opening sizes see duct flange dimensions in
Fig. 39.
8. Install the outside air hood. The upper flange of the hood
should rest against the top of the economizer. See Fig. 40.
9. Apply 1/8 x 1/2 in. gasketing along mounting flanges. Slide
economizer assembly fully into unit and secure with the sup-
plied no. 10-16 x 1/2 screws. See Fig. 41.
10. Replace all panels and restore power to the unit.
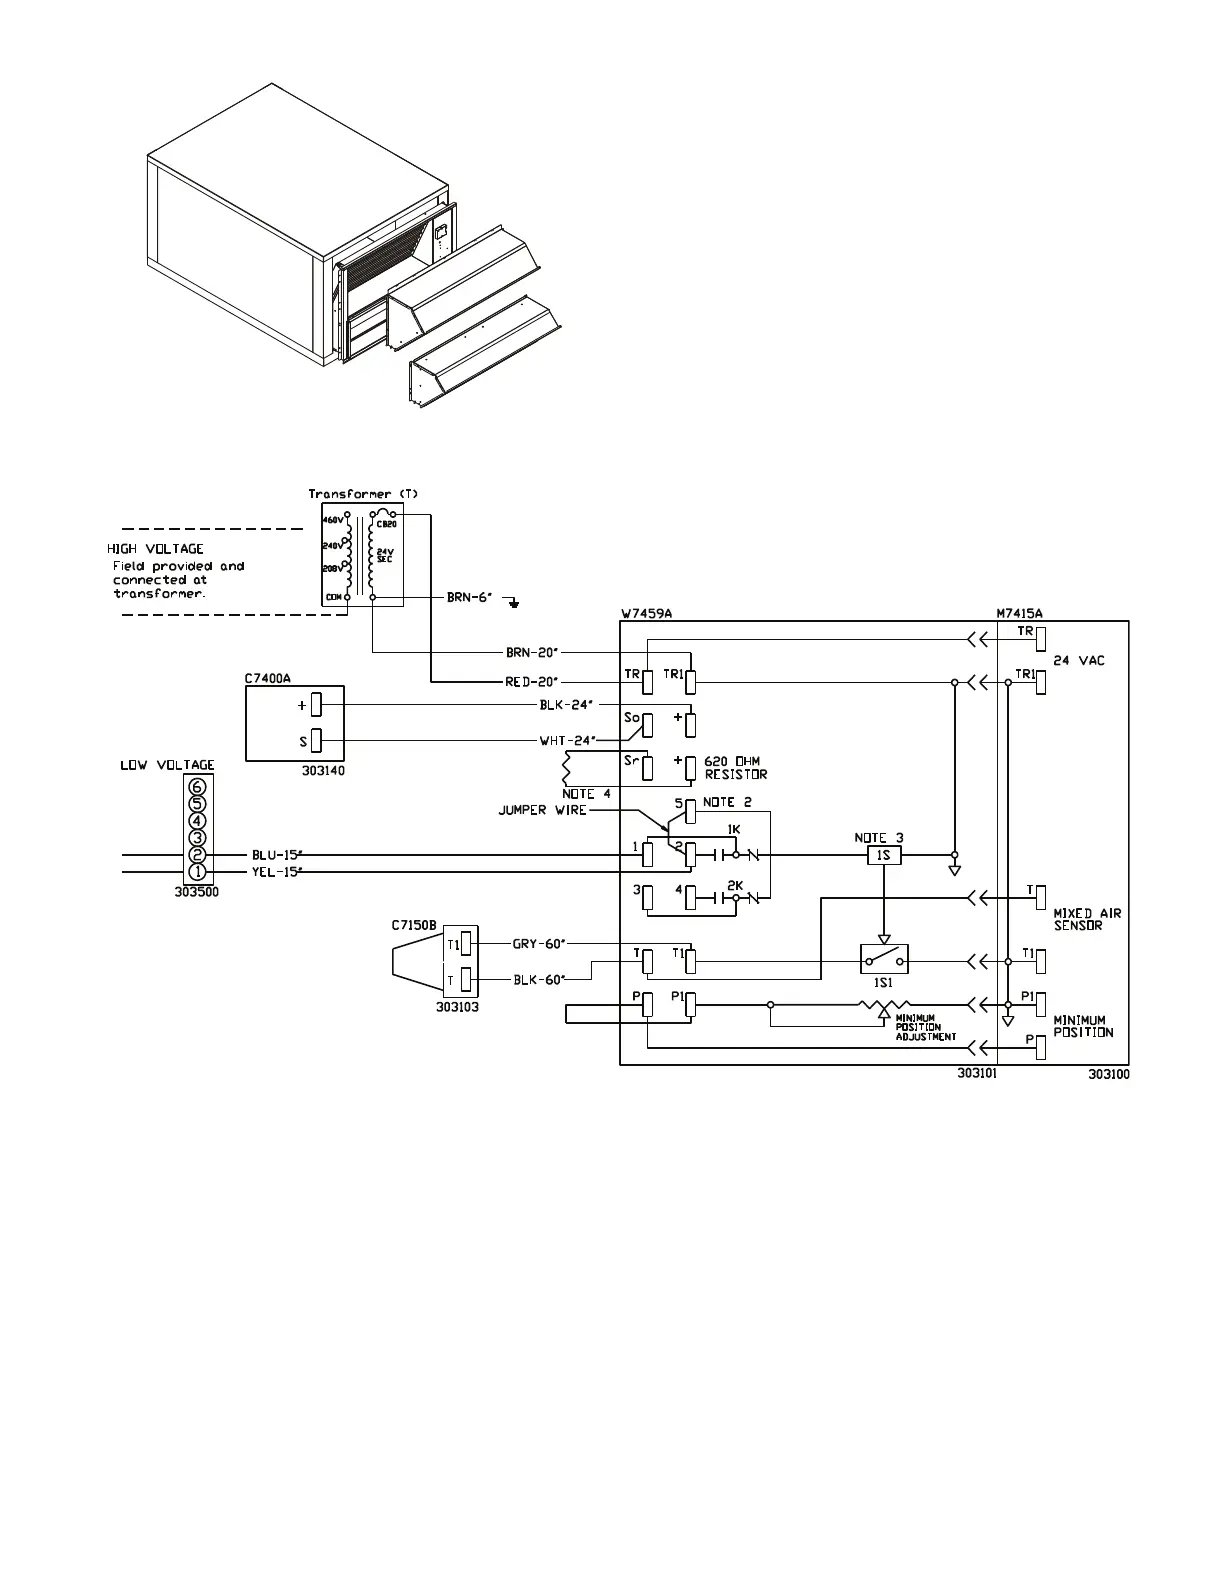
Fig. 37 — Modulating Gear Economizer with Relief for Sizes 07-17 BREP Units
NOTES:
1. Unit wiring shown as reference only. Check unit wiring for actual unit wiring.
2. Relays 1K and 2K actuate when the outdoor air enthalpy is higher than the return air enthalpy.
3. 1S is an electronic switch that closes when powered by a 24 VAC input.
4. Factory-installed resistor should be removed only if C7400 differential enthalpy sensor is added.
Bekijk gratis de handleiding van Carrier 39S, stel vragen en lees de antwoorden op veelvoorkomende problemen, of gebruik onze assistent om sneller informatie in de handleiding te vinden of uitleg te krijgen over specifieke functies.
Productinformatie
| Merk | Carrier |
| Model | 39S |
| Categorie | Niet gecategoriseerd |
| Taal | Nederlands |
| Grootte | 10967 MB |


