Zeiss DTI 6/20 handleiding
Handleiding
Je bekijkt pagina 11 van 100
11 | 100 EN
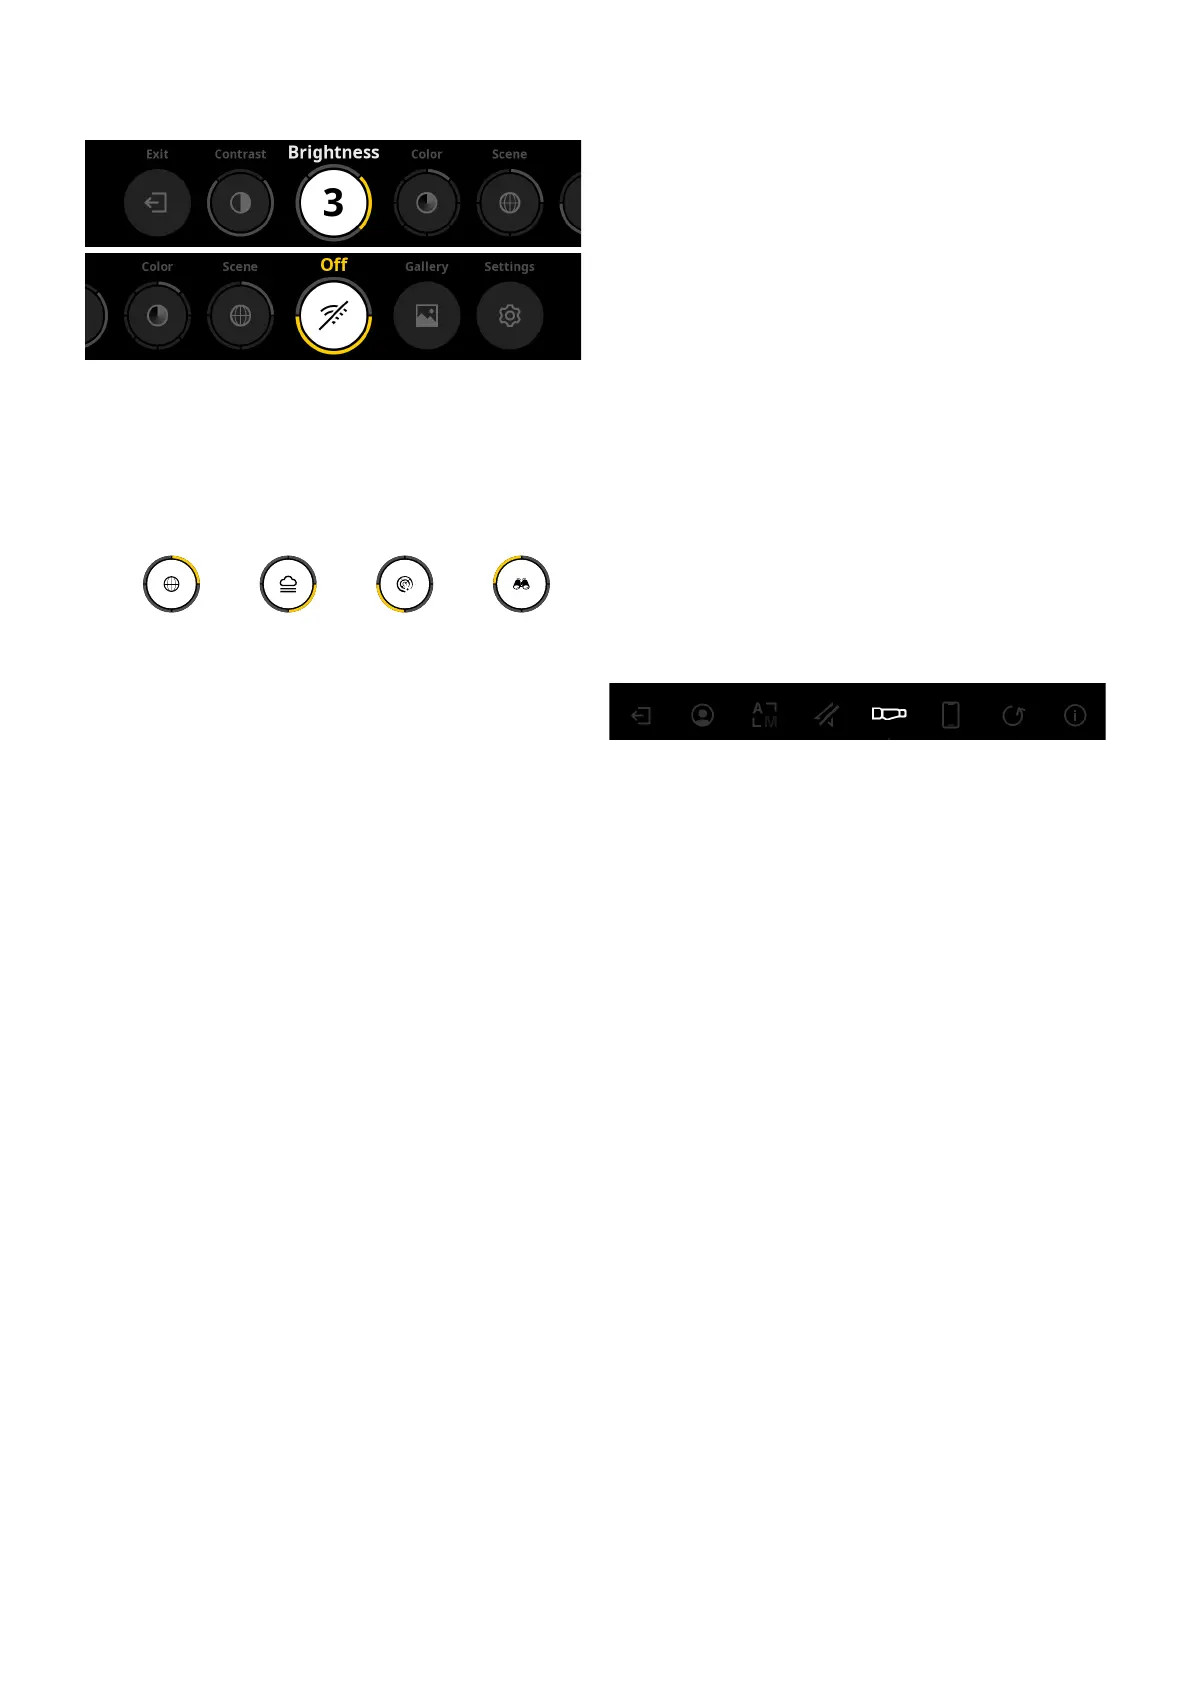
Menu
The main menu oers the following options:
• Exit: Select Exit to get from the menu to observation mode.
• Contrast: Adjust the contrast of the scene here. There are nine contrast levels
to choose from. The contrast is lowest at level 1. The contrast is highest at
level 9.
• Brightness: Set the brightness of the display here. There are nine brightness
levels to choose from. The brightness is lowest at level 1. The brightness is
highest at level 9.
• Color: Set the color modes for the observation mode here and create a
selection for the color mode shortcut.
• Scene: Select from four dierent scenes: Universal, Fog, Discover, Identify.
Universal IdentifyDiscoverFog
• Connectivity: Turn the connectivity “On” or “O” to enable a connection to
another device (e.g. smartphone) through Bluetooth or WLAN if necessary.
• Gallery: View all your captured photos here. Videos can only be retrieved via
the ZEISS Hunting App.
• Settings: Make all system-relevant settings for the device here.
Color
The scene can be displayed in ve pre-dened and three user-dened color modes.
The following color modes can be selected:
• White Hot: Cold areas are displayed here in black and warm areas in white.
• Black Hot: Cold areas are displayed here in white and warm areas in black.
• Red Hot: Cold areas are displayed here in black and warm areas in white. In
addition, the warmest areas are shown in yellow to red.
• Rainbow: A varied color palette displays cold areas in black to blue and warm
areas in yellow to white.
• Night Eye: Cold areas are displayed here dark and warm areas yellowish.
• User 1–3: Select a color mode previously created in the ZEISS Hunting App.
To change the color modes, select “Color” in the main menu. Then navigate to the
desired color mode. Briey press the menu button (6) to conrm your selection and
return to the main menu.
Alternatively, color modes can be created through a shortcut in observation mode.
To switch between the color modes, briey press the menu button (6).
The shortcut list can store up to three color modes. The following color modes are
preset: White Hot, Black Hot, Red Hot. It is possible to swap the preset color modes
as you like.
To swap, select the color mode to be swapped in the observation mode. Then
select “Color” from the main menu. Briey press the menu button (6) to open the
submenu. Select the color mode to be added. Briey press the menu button (6) to
conrm the selection. The color mode for the shortcut was changed.
Connectivity
With the ZEISS DTI 6 you can connect your smarthphone with your device via
Bluetooth, and if needed, additionally via WLAN by means of the ZEISS Hunting App.
To do this, switch on the Bluetooth function on both your smartphone and your
device.
To set the Bluetooth function on your device, select “Connectivity” in the main
menu. Then select “On” or “O”. Briey press the menu button (6) to conrm the
selection.
Then select “Settings” from the main menu and navigate to “Settings Pairing Menu”.
Briey press the menu button (6) to open the submenu. Here you nd a list of the
devices already known.
Note: Switch the connectivity on so that the ZEISS DTI 6 is visible for a short time via
Bluetooth. Alternatively, switch the connectivity on and navigate to “Settings Pairing
Menu”. The ZEISS DTI 6 is visible as long as you are in the submenu “Settings Pairing
Menu”.
Use the ZEISS Hunting App on your smartphone to connect with the ZEISS DTI 6.
Note: The Bluetooth connection must only be established when rst connecting
with a new smartphone. After that, an automatic connection is made if the
connectivity is enabled.
With connectivity enabled and a connection to the ZEISS Hunting App, the following
functions are now available to you:
• Livestream
• Make device settings via the app
• View captured photos and videos
When transferring data of videos and photos or when transferring a livestream, an
additional WLAN function is required. The connection is established automatically
by the device as needed. Follow the instructions on your smartphone to connect it
to the device.
Settings
The “Settings” submenu has the following options:
• Prole: Choose from user-dened proles here.
• Calibration: Set automatic calibration or manual calibration here.
• Location: Set the GPS function “On” or “O” here.
• Device: Make all system-relevant settings here, including standby and
language.
• Pairing: Here you nd a list of all devices already known for connecting to
Bluetooth.
• Reset: Format your device memory here or reset the device to factory
settings.
• Information: Here you nd information on regulations and current rmware.
Settings Prole Menu
With the ZEISS Hunting App you have the option of creating various user-dened
proles and to transfer these to the ZEISS DTI 6. In the proles the same settings can
be made as on the device. Since the ZEISS DTI 6 can store up to ve proles, several
proles for dierent ambient conditions and users can be created. In this way, the
settings of the device can be quickly adapted to the changing environment with a
change of prole.
To store proles and transfer them to the ZEISS DTI 6, go to the ZEISS Hunting App
and follow the instructions.
To set and change the proles on the ZEISS DTI 6, select “Settings” in the main
menu. Then navigate to “Settings Prole Menu”. Briey press the menu button (6) to
open the submenu. Select one of the stored proles. Here you can choose between
storing the current settings on the prole or to load an existing prole. Briey press
the menu button (6) to conrm the selection. Press and hold the menu button (6) to
return to observation mode.
Bekijk gratis de handleiding van Zeiss DTI 6/20, stel vragen en lees de antwoorden op veelvoorkomende problemen, of gebruik onze assistent om sneller informatie in de handleiding te vinden of uitleg te krijgen over specifieke functies.
Productinformatie
| Merk | Zeiss |
| Model | DTI 6/20 |
| Categorie | Niet gecategoriseerd |
| Taal | Nederlands |
| Grootte | 19336 MB |


