Zeiss DTI 6/20 handleiding
Handleiding
Je bekijkt pagina 10 van 100
10 | 100 EN
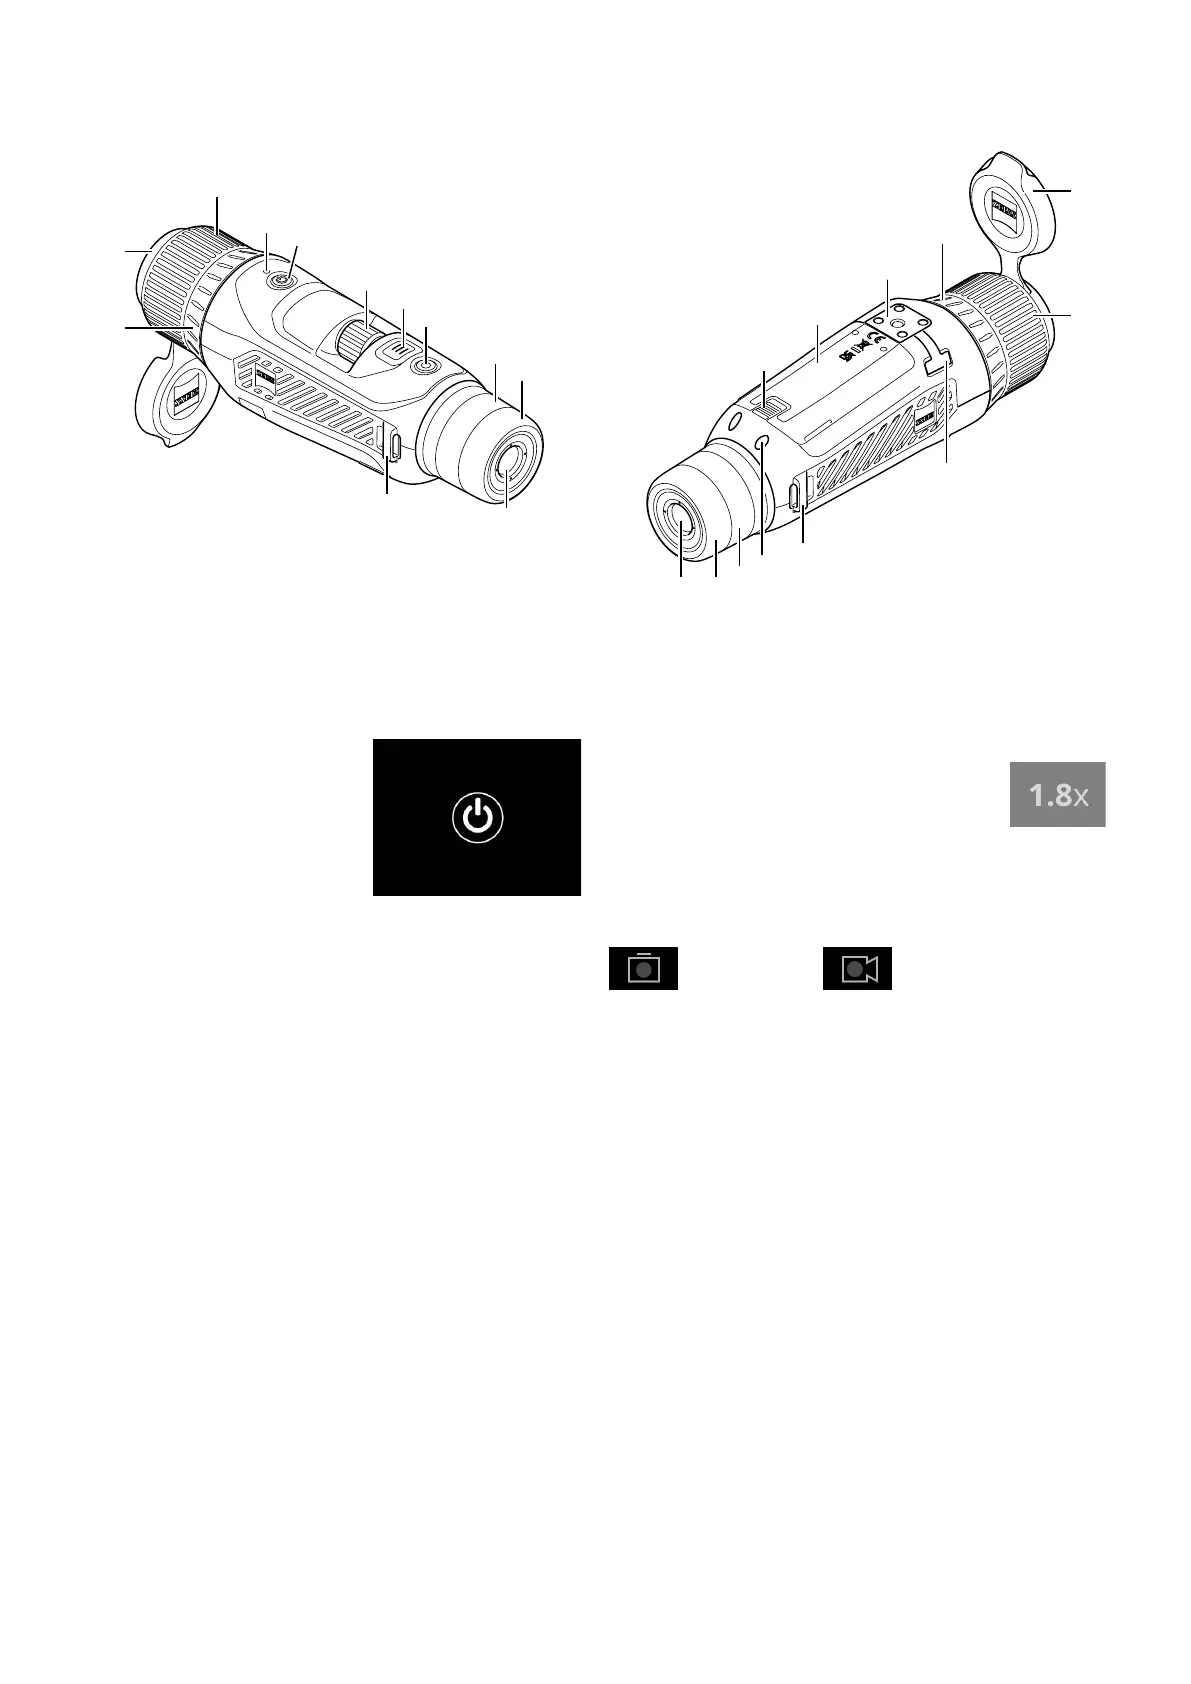
(5)
(6)
(7)
(8)
(9)
(11)
(10)
(1)
(18)
(2)
(3)
(4)
(1)
(2)
(13)
(14)
(11)
(17)
(16)
(8)
(9)(10)
(15)
(18)
Power on/o
Press the on/o button (4) for a longer time to switch on the device. The LED (3) is
green. The LED (3) lights up red when the charge level is low.
Press the on/o button (4) for a longer time to switch o the device again. The LED
is then o.
Note: The on/o button (4) must be pressed
until the OFF symbol appears on the display.
Only then can the on/o button (4) be released
and the device switches o. If the on/o
button (4) is released before the OFF symbol is
displayed, the device does not switch o but
switches to standby mode.
Navigation
Press and hold the menu button (6) to show the
main menu on the display. Look through the viewnder (10). The rotary wheel (5)
and the menu button (6) are used to navigate in the main menu.
Turn the rotary wheel (5) to the right to scroll right or down. Turn the rotary wheel
(5) to the left to scroll left or up.
Briey press the menu button (6) to select a menu item. This opens the submenu.
Make your settings using the rotary wheel (5). Briey press the menu button (6) to
conrm your selection and return to the main menu.
Press and hold the menu button (6) to exit the main menu and return to observation
mode. Alternatively, navigate to “Exit”. Briey press the menu button (6) to return to
observation mode.
Automatic standby
A built-in proximity sensor (17) on the viewnder (10) oers a touchless auto
standby. When the function is enabled, the standby is activated automatically after
a few seconds as soon as the viewnder (10) is removed from the eye. When the
viewnder (10) is placed against the eye again, the device automatically switches to
observation mode.
To deactivate automatic standby, select “Settings” from the main menu. Then
navigate to “Settings Device Menu”. Briey press the menu button (6) to open
the submenu. Navigate to “Automatic Standby” and briey press the menu
button(6). Select a time after which the device switches to standby as soon as
the viewnder(10) is removed from the eye. Briey press the menu button (6) to
conrm the selection.
Standby
Briey press the on/o button (4) to switch the device to standby mode. The LED (3)
blinks green. Briey press the on/o button (4) again to switch the device back to
observation mode. The LED (3) is permanently green.
In standby mode, the LED (3) ashes red when the charge level is low.
Observation mode
Look through the viewnder (10) to observe the scene. Turn the diopter wheel (8)
to focus the screen.
Turn the focus ring (2) on the lens (18) to focus on the scene.
Zoom
In observation mode, the rotary wheel (5) can be used to zoom in and zoom out the
scene. You can zoom between 1.0x and 10x. The zoom speed can
be set via the ZEISS Hunting App. The currently set digital
magnication is shown in the upper right corner of the display.
Shooting mode
You have the possibility to capture a photo or record a video. Press and hold the
Shutter button (7) to switch between the two shooting modes. The symbol at the
top left of the display changes to indicate the selected mode.
Briey press the Shutter button (7) once to capture a photo or record a video. Briey
press the Shutter button (7) again to stop a video recording in progress.
Photo mode
Video mode
Bekijk gratis de handleiding van Zeiss DTI 6/20, stel vragen en lees de antwoorden op veelvoorkomende problemen, of gebruik onze assistent om sneller informatie in de handleiding te vinden of uitleg te krijgen over specifieke functies.
Productinformatie
| Merk | Zeiss |
| Model | DTI 6/20 |
| Categorie | Niet gecategoriseerd |
| Taal | Nederlands |
| Grootte | 19336 MB |


