Whirlpool WDT550SAPZ handleiding
Handleiding
Je bekijkt pagina 17 van 64
17
Custom Panel Installation (on some
models)
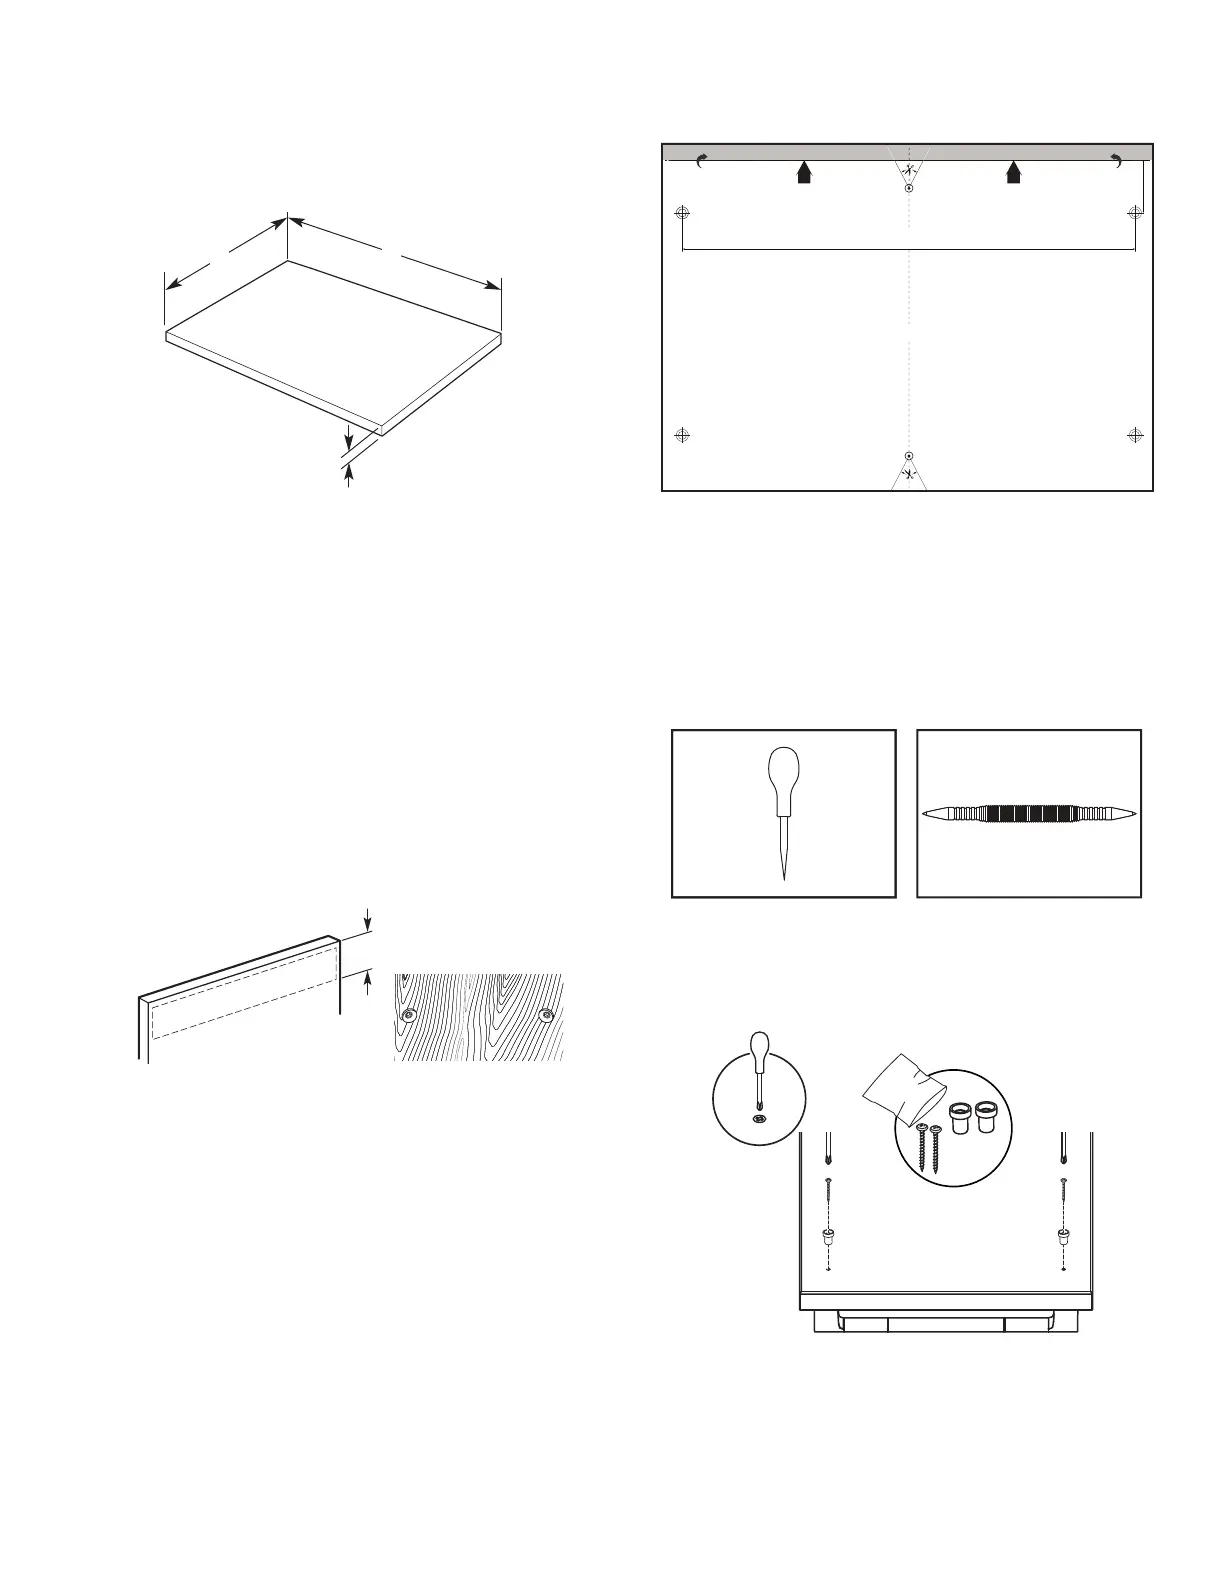
Custom Panel Dimension
Make sure that the custom panel is as per the recommended
dimensions. See below image for the recommended dimensions.
A
B
C
A. 23
9
/
16
" (598 mm)
B. 28
3
/
8
"-30" (720-762 mm)
C. 5/8"-1" (16-25 mm)
A customer supplied door panel must weigh no more than 16 lbs
(7.3 kg) with the handle (together). And must be made to specific
dimensions as given above. It is recommended that a cabinet
maker cut the custom panel because of the precise dimensions
needed.
NOTE: The handle for the custom panel is not included.
Custom Panel Installation steps
1. In an area that is flat and clear of debris, place down a blanket
as a work surface.
2. Attach the custom panel handle as you would any other
cabinet handle. Be sure to protect the finished surface with
painters tape when preparing and recessing the rear panel to
conceal attachment hardware.
3. Install the custom hardware handle(s) on the front of the
custom panel, inside dotted line as shown below
A
A. 6" (152.4 mm)
IMPORTANT: If the handle is attached from the back of the
custom panel, the screw holes should be countersunk for the
screw heads to be flush with the panel. If the handle is
attached to the front of the custom panel, the screw lengths
cannot exceed the panel thickness.
4. Place the custom panel with the face side down on the
blanket, and note the planned top and bottom of the panel if
applicable.
A
B
C
A. 23
5
/
8
" (600 mm)
B. 22
1
/
16
" (560 mm)
C. 2
9
/
16
" (65 mm)
5. Using a tape measure, measure the top, center and bottom
width of the panel, and mark the center location with either the
edge of a tape piece or with a fine point pencil.
6. Using the straight edge draw a line connecting all the marked
center lines so that the center of the panel is identified.
7. Using the provided template, align the centerline of the
template with the center line of the door.
Awl Center punch
8. Using a center punch or awl, mark the 2 locations on the
template to be used for attaching the door studs. Remove the
template. Attach the 2 door studs to custom panel using the
included screws.
B
A
C
A. 3.5 mm x 18 mm Phillips head screw (2)
B. #2 Phillips screwdriver
C. Studs
Bekijk gratis de handleiding van Whirlpool WDT550SAPZ, stel vragen en lees de antwoorden op veelvoorkomende problemen, of gebruik onze assistent om sneller informatie in de handleiding te vinden of uitleg te krijgen over specifieke functies.
Productinformatie
| Merk | Whirlpool |
| Model | WDT550SAPZ |
| Categorie | Wasmachine |
| Taal | Nederlands |
| Grootte | 11080 MB |


