Warmup VLo Econna-12 handleiding
Handleiding
Je bekijkt pagina 8 van 28
8
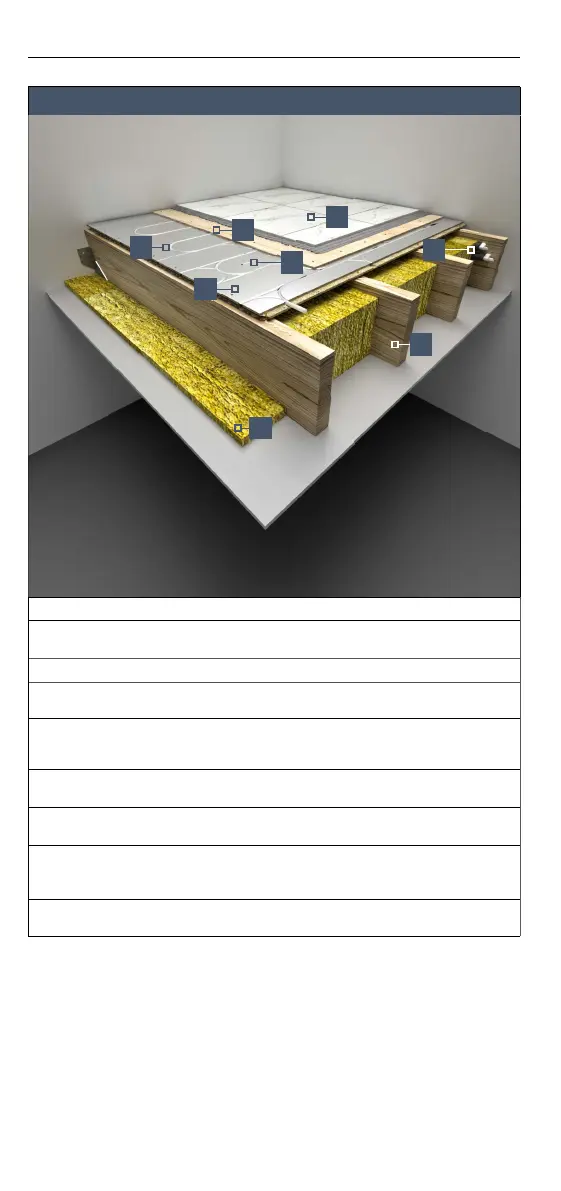
All oor nishes
1
Floor nish
2
6 mm minimum plywood deck
This layer must be screwed to the Econna-12 panels to complete the structural deck
3
Warmup 12 mm PE-RT pipe
4
Floor sensor
Must be recessed into the Econna-12 panel and taped in position.
5
Econna-12 panels
Panels secured together using a D4 adhesive on BOTH sides of the tongue and groove
and t together. Panels then glued and screwed to the joists.
6
Joists ≤ 600 mm centres
Refer to tiling standards for maximum joist centres for oors to receive tiles
7
Insulation layer
Thickness in line with building regulations
8
Flow and return pipes
*
Installed beneath the Econna-12 panels, notched or through holes drilled in the joists
in line with building regulations.
*
Service pipes must be insulated within the joist space and supported at 300 mm
intervals on horizontal runs and 500 mm on vertical runs using pipe clips
Typical oor build-up
2
3
1
6
4
5
7
8
Bekijk gratis de handleiding van Warmup VLo Econna-12, stel vragen en lees de antwoorden op veelvoorkomende problemen, of gebruik onze assistent om sneller informatie in de handleiding te vinden of uitleg te krijgen over specifieke functies.
Productinformatie
| Merk | Warmup |
| Model | VLo Econna-12 |
| Categorie | Niet gecategoriseerd |
| Taal | Nederlands |
| Grootte | 6226 MB |


