Vevor HMR1200 handleiding
Handleiding
Je bekijkt pagina 28 van 320
- 27 -
13.3.1 Remove the trowel blades from the trowel arm by removing the two
hex head bolts from the trowel arm. Set blades aside.
13.3.2 Wire brush any build-up of concrete from all six sides of the trowel
arm. Repeat this for the remaining three arms.
13.4 Re-Assembly
13.4.1 Clean and examine the upper/lower wear plates and thrust the
collar.
13.4.2 Examine the entire spider assembly. Wire brush any concrete or
rust build-up. If any spider components are found to be damaged or
misshaped, replace it.
13.4.3 Reinstall bronze bushing on the trowel arms.
13.4.4 Repeat above steps for each trowel arm.
13.4.5 Make sure that the spring tensioner is in the correct position to exert
tension on the trowel arm.
13.4.6 With the bronze bushing already installed, insert all the trowel arms
with levers into the spider plate.
13.4.7 Use care to align the grease hole on the bronze bushing with the
grease hole fitting on the spider plate.
13.4.8 Lock the trowel arms in place by tightening the hex head bolt with
zerk grease fitting and jam nut.
13.4.9 Re-install the blades onto the trowel arms.
13.4.10 Install the stabilizer ring onto the spider assembly.
WARNING
Disconnect the spark plug wire from the spark plug and secure away from
the engine before performing maintenance or adjustments on the machine.
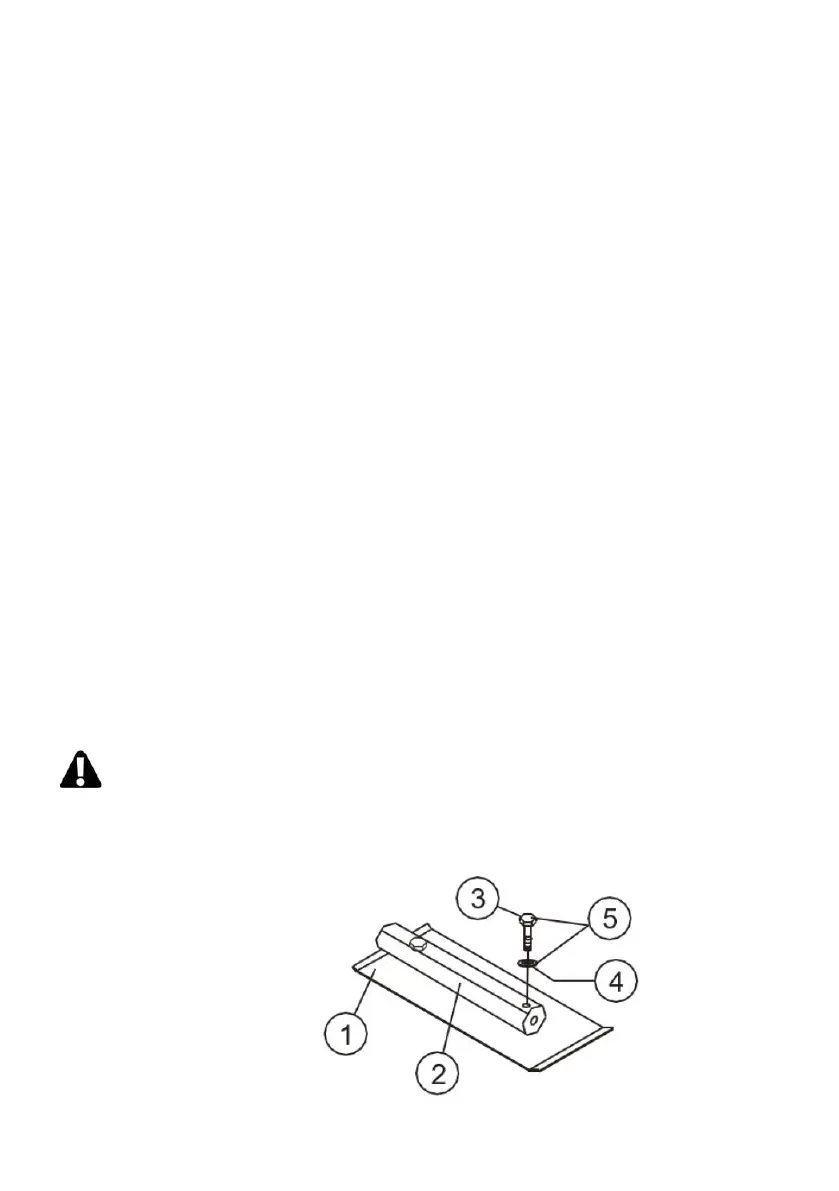
①Blade
②Blade Arm
③Hex Head Bolt
④Lock Washer
⑤Remove from Arm
13.5 Changing
Blades
FIG.18
Bekijk gratis de handleiding van Vevor HMR1200, stel vragen en lees de antwoorden op veelvoorkomende problemen, of gebruik onze assistent om sneller informatie in de handleiding te vinden of uitleg te krijgen over specifieke functies.
Productinformatie
| Merk | Vevor |
| Model | HMR1200 |
| Categorie | Niet gecategoriseerd |
| Taal | Nederlands |
| Grootte | 59152 MB |


