Vevor HMR1200 handleiding
Handleiding
Je bekijkt pagina 27 van 320
- 26 -
use?
• Look at the machine while it is running; do the guard rings “rock up and
down” relative to the ground?
13.2.1 Place the trowel in a FLAT, LEVEL area.
A level, clean area to test the trowel prior to and after is essential. Any
unlevel spots in the floor or debris under the trowel blades will give an
incorrect perception of adjustment. Ideally, a 5 x 5 Ft. (1.5 x 1.5 Meter)
three-quarter inch (19 mm) thick FLAT steel plate should be used for
testing.
13.2.2 Pitch the blades as flat as possible. The adjustment bolts should all
barely make contact with the lower wear plate on the spiderbox. If one is
not making contact, adjustment will be necessary. (FIG.17,FIG.4).
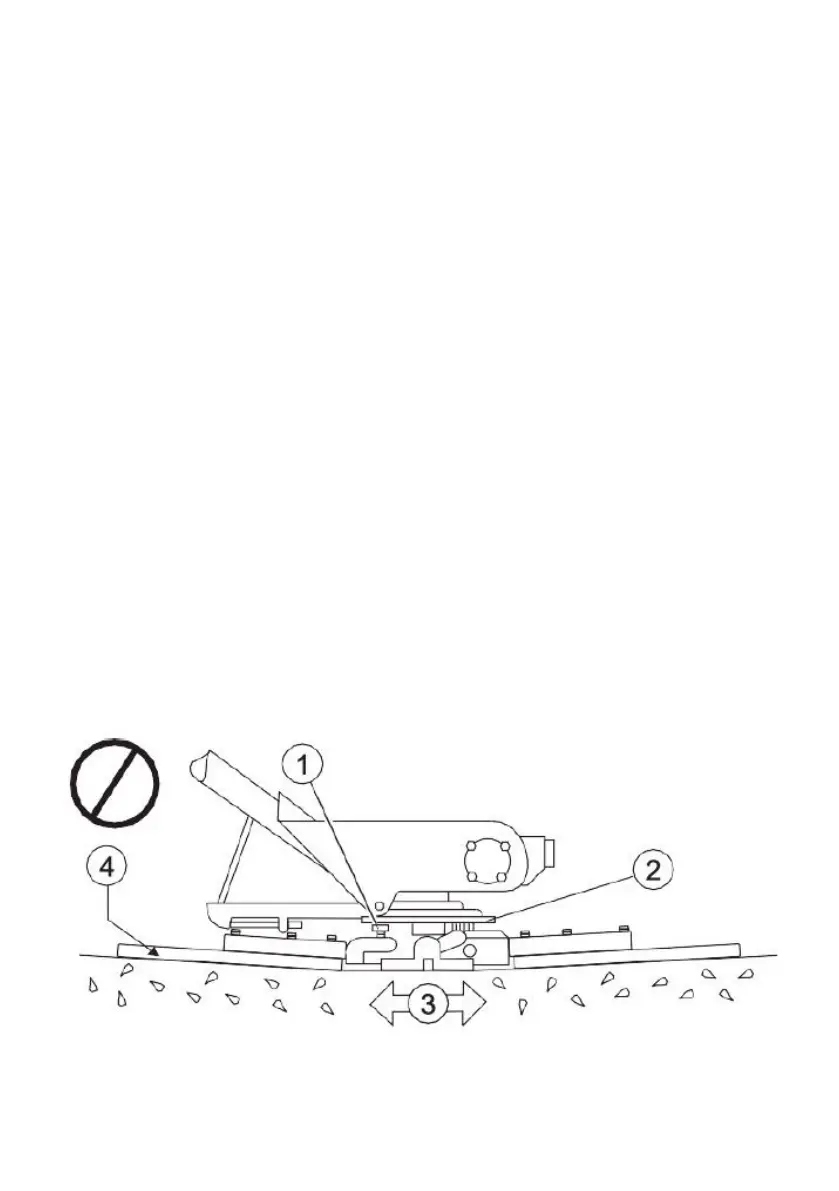
13.2 Trowel Arm Adjustment Continued
FIG.17 illustrates, "incorrect alignment", worn spider bushings or bent
trowel arms. Check that the adjustment bolt is barely touching (0.10" max.
clearance) lower wear plate. All alignment bolts should be spaced the
same distance from the lower wear plate.
1 Adjustment Bolt
2 Lower Wear Plate
3 Surface
4 "Dished" Effect on Finished Concrete
FIG.17
13.3 Trowel Blade Removal
Bekijk gratis de handleiding van Vevor HMR1200, stel vragen en lees de antwoorden op veelvoorkomende problemen, of gebruik onze assistent om sneller informatie in de handleiding te vinden of uitleg te krijgen over specifieke functies.
Productinformatie
| Merk | Vevor |
| Model | HMR1200 |
| Categorie | Niet gecategoriseerd |
| Taal | Nederlands |
| Grootte | 59152 MB |


