Vestil HOP-LP handleiding
Handleiding
Je bekijkt pagina 5 van 10
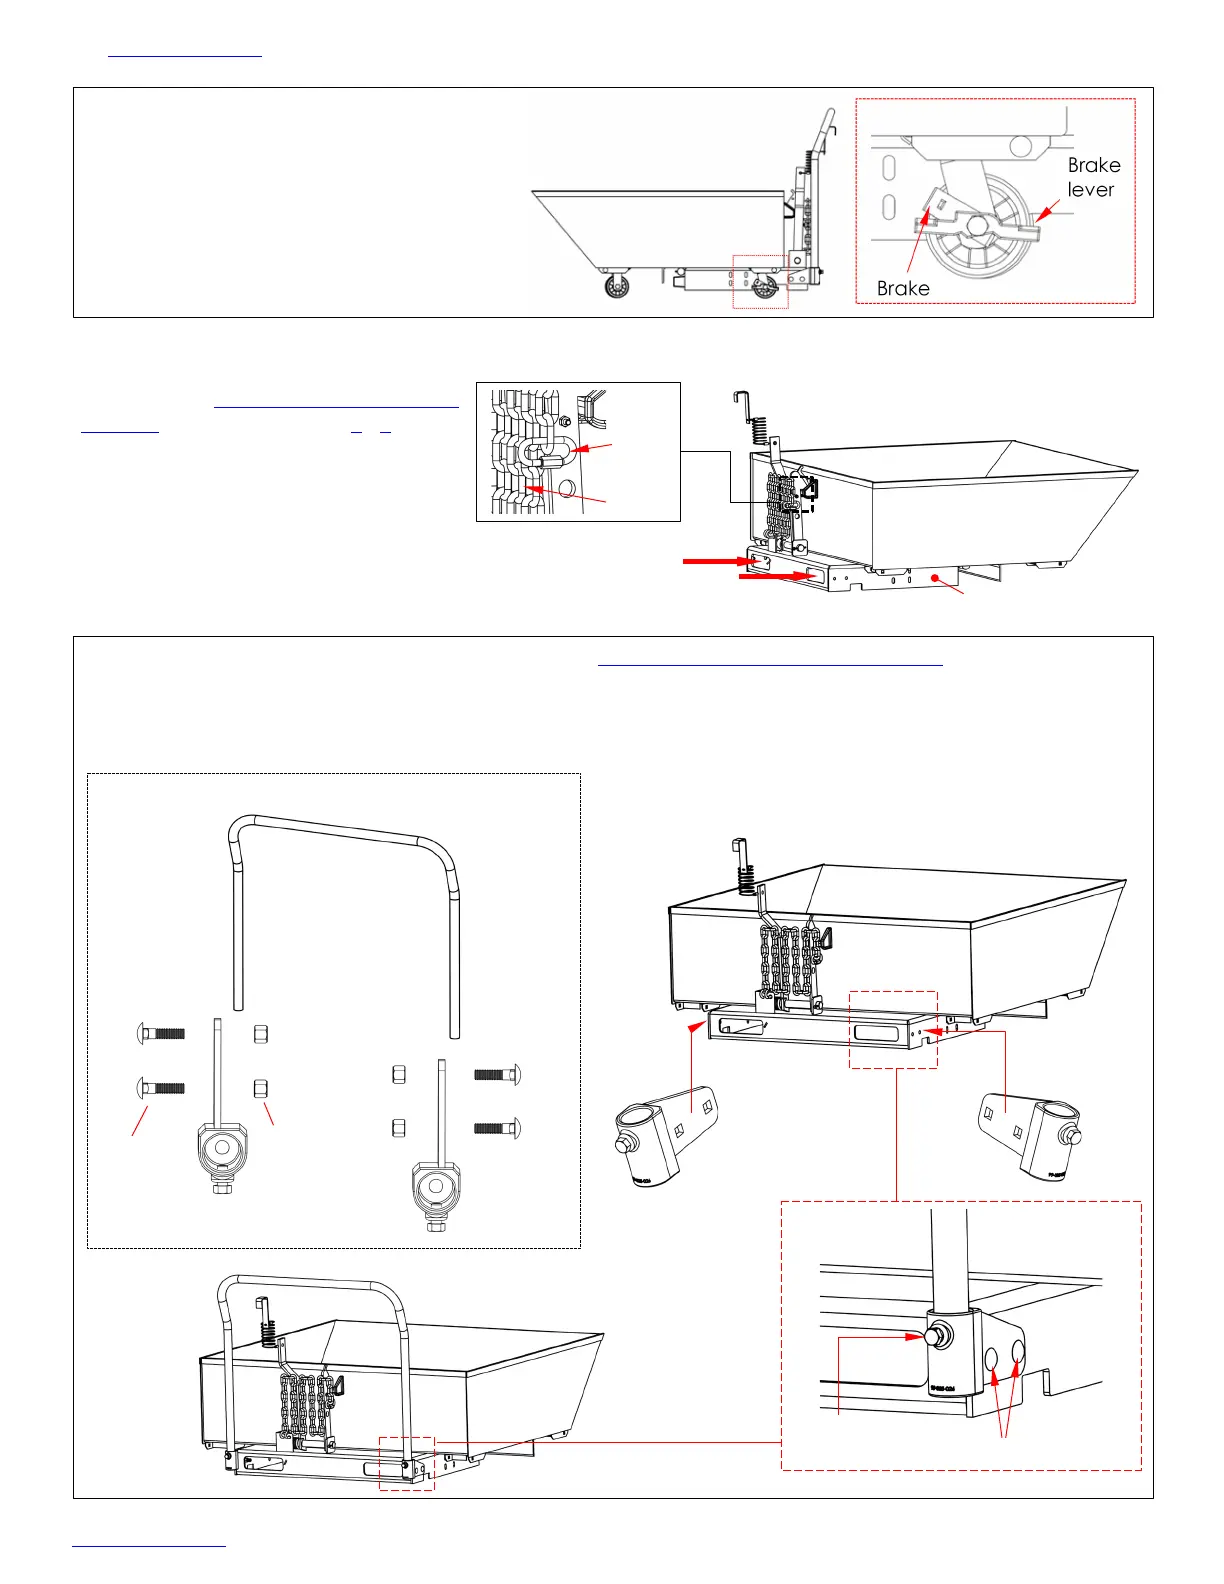
Table of Contents Rev. 3/18/2022 HOP-LP, MANUAL
Table of Contents Copyright 2021 Vestil Manufacturing Co. Page 5 of 10
ASSEMBLING THE HOPPER
Wear gloves while assembling this product. Assembly consists of installing the handle and the casters.
1. [Refer to LOADING & USING THE
HOPPER, steps 1-3 & 5 on p. 7 - 8.]
Insert the forks of your lift truck into the
fork pockets of the hopper. Wrap the
safety chain around the fork carriage
and attach the quick link to the chain.
There should be no slack in the chain.
Lift the hopper and bring the base
frame to a comfortable working
height; then dump the chute.
2. Install the handle: a) Attach the handle socket kit (EXPLODED VIEW, item no. 19 on p. 4)--Bolt the left and
right handle sockets onto the base frame by inserting
3
/
8
” – 16 UNC x 1
1
/
2
” carriage bolts through the 2 lower
bolt holes in each bracket; b) insert the bolts through the 2 bolt holes in the base frame; c) Secure each bolt
with a
3
/
8
” lock nut; then d) Insert the handle legs into the sockets as shown below and tighten the
3
/
8
” -16 x
3
/
4
” set screws against the legs.
USING THE CASTER BRAKE
Each HOP-LP-series hopper has 2
swiveling casters in back, one of which is
equipped with a brake. To engage the
brake, press the brake lever down. When
the brake is engaged, the wheel will not
rotate. To disengage the brake, lift the
brake lever up.
Handle
Carriage
bolt
Lock
nut
Left socket bracket
Right socket
bracket
Insert forks
into fork
Safety
chain
Quick
link
Base frame
Carriage bolts
Tighten set screw
against leg
PARTS
Bekijk gratis de handleiding van Vestil HOP-LP, stel vragen en lees de antwoorden op veelvoorkomende problemen, of gebruik onze assistent om sneller informatie in de handleiding te vinden of uitleg te krijgen over specifieke functies.
Productinformatie
| Merk | Vestil |
| Model | HOP-LP |
| Categorie | Niet gecategoriseerd |
| Taal | Nederlands |
| Grootte | 2725 MB |


