Vestil HOP-LP handleiding
Handleiding
Je bekijkt pagina 6 van 10
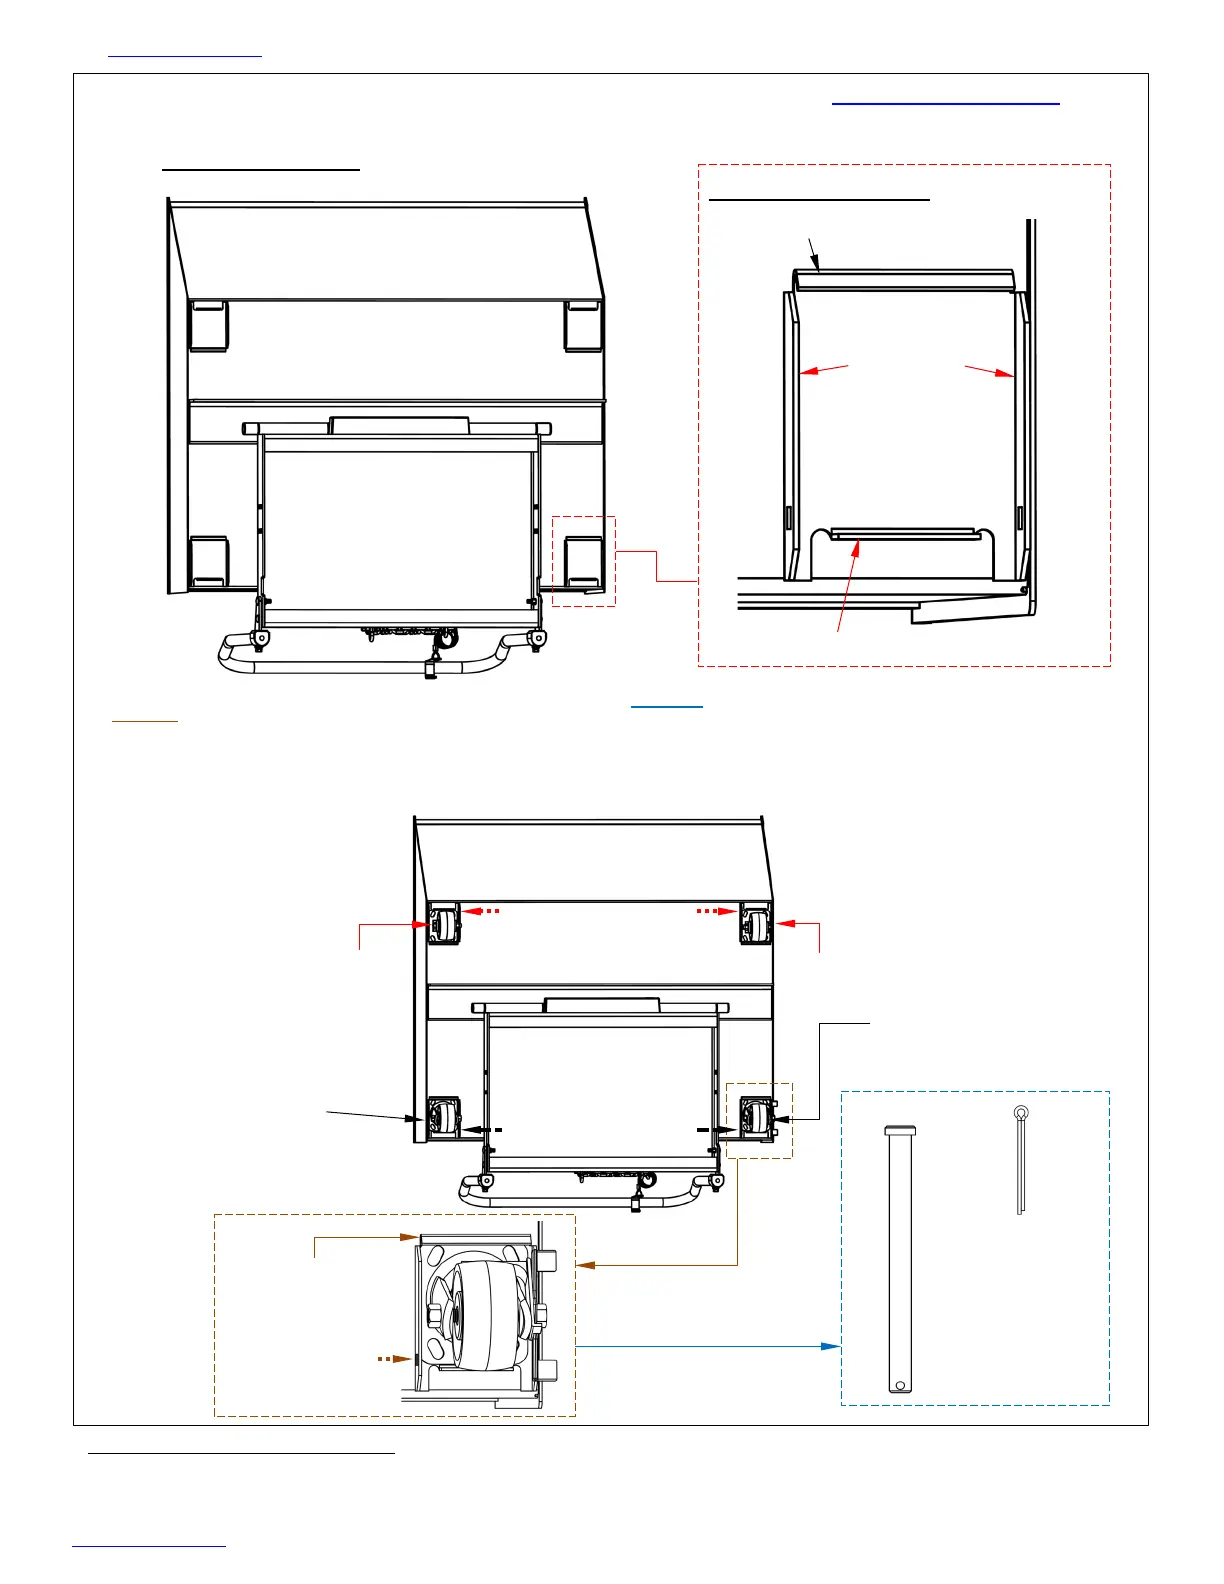
Table of Contents Rev. 3/18/2022 HOP-LP, MANUAL
Table of Contents Copyright 2021 Vestil Manufacturing Co. Page 6 of 10
3. To install the casters, follow steps A & B as diagrammed below. Refer to the EXPLODED VIEW on p. 4 to
properly identify casters. [NOTE: The chute should still be in the dumped position.]
Step A: Insert one edge of the caster mounting
plate under the formed nose plate of the caster
receiver. Press the mounting plate against the
underside of the hopper.
Step B: Insert 4
5
/
8
in. clevis pins (99-112-006)
through the holes in the receivers. Insert the clevis
pins through the inside holes (see dashed arrows
in diagram). Secure the clevis pins with
1
/
8
in. – 1”
cotter pins (65076).
Underside of hopper:
Step 4 [See Diagram 1 on p. 7]: Lower the forks until the hopper rests on the ground. The chute will pivot
towards the frame. Press the back end of the chute onto the base until the latch lever engages the latch
bar. Push the finger tab at the top end of the latch lock bracket until the bracket engages the latch bar.
Side plates
with bolt
holes
Formed nose plate
End plate
Parts of caster receiver:
Swivel caster
Rigid caster
Rigid caster
Caster mounting
plate slides under
formed nose
Insert clevis pin
through holes
in receiver
Clevis pin
Step B
Step A
Caster
receiver
Swivel caster
with brake
Extended
prong cotter
pin
Insert through
pin hole;
bend arms
around clevis
pin.
Bekijk gratis de handleiding van Vestil HOP-LP, stel vragen en lees de antwoorden op veelvoorkomende problemen, of gebruik onze assistent om sneller informatie in de handleiding te vinden of uitleg te krijgen over specifieke functies.
Productinformatie
| Merk | Vestil |
| Model | HOP-LP |
| Categorie | Niet gecategoriseerd |
| Taal | Nederlands |
| Grootte | 2725 MB |


