Vestil FHS-4-10 handleiding
Handleiding
Je bekijkt pagina 10 van 16
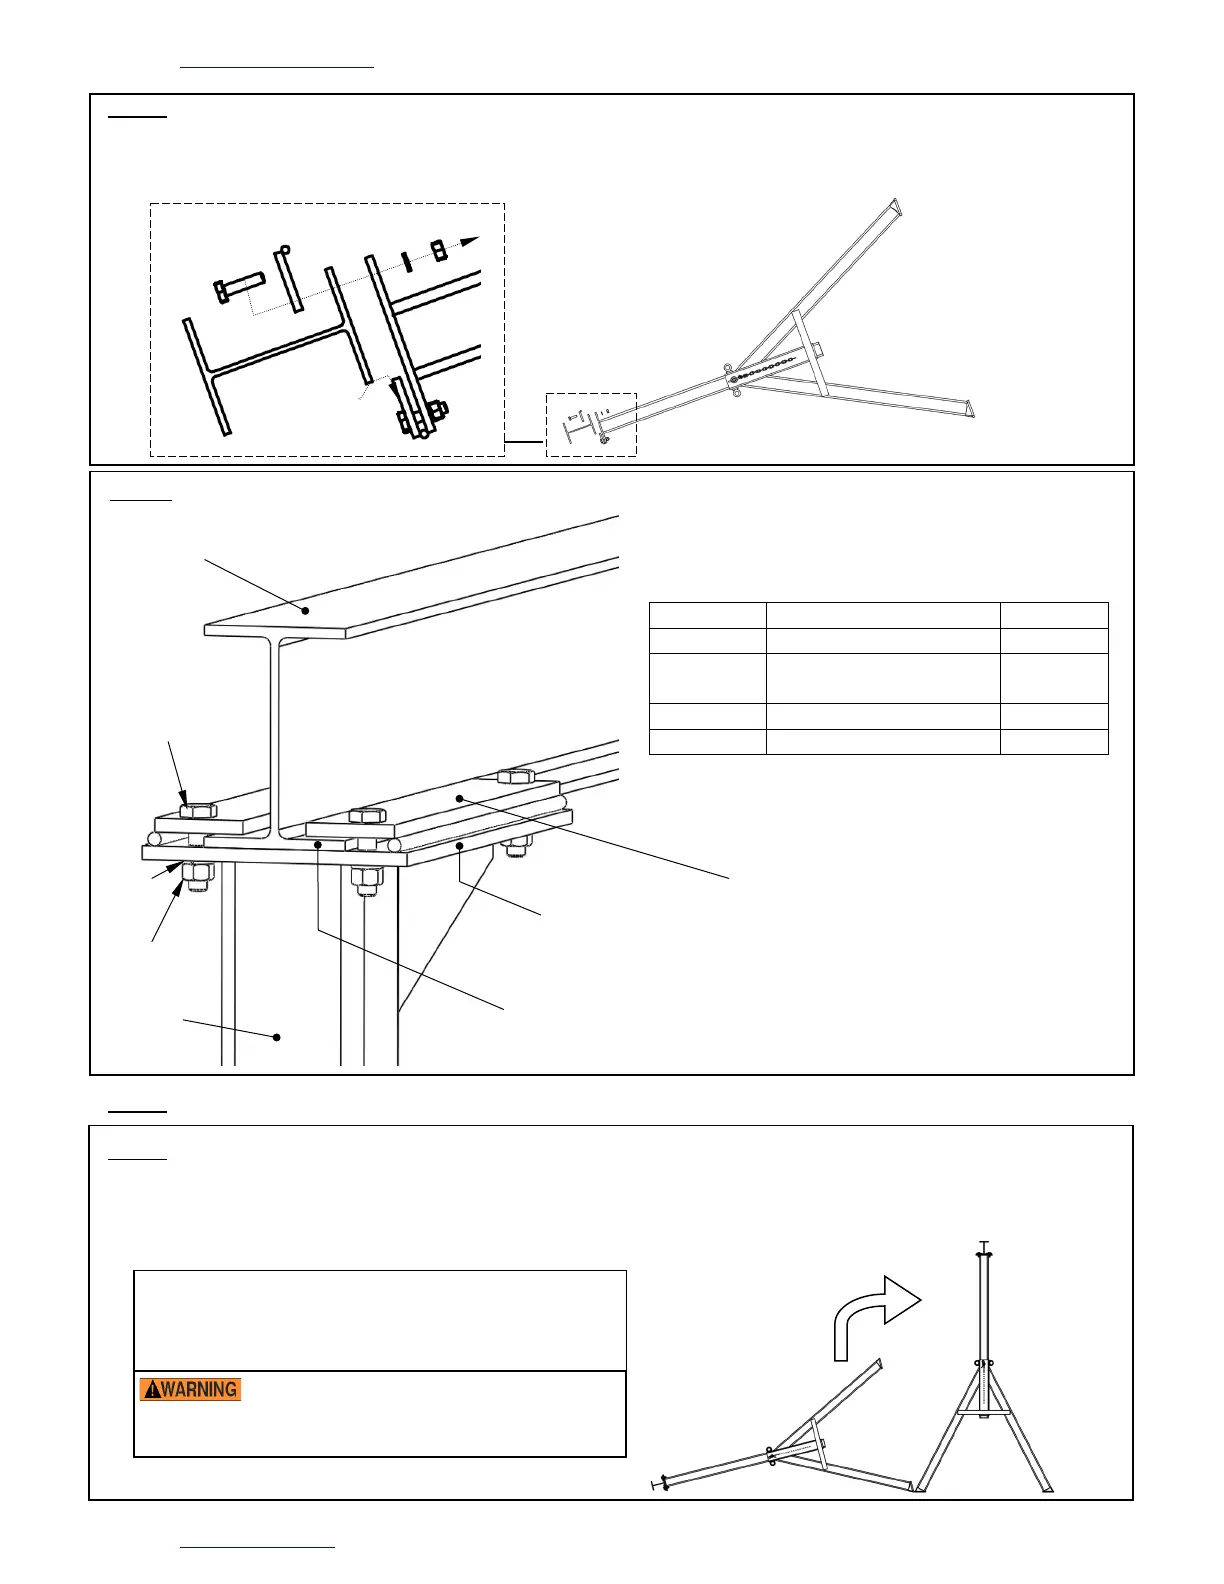
TABLE OF CONTENTS 6/15/2021 FHS MANUAL
TABLE OF CONTENTS Vestil Manufacturing Corp. Page 10 of 16
Step 2: Fasten I-beam to telescoping tubes
Insert the flange of the I-beam into the gap between the beam clamp and the top of the upright; then
secure the flange on the opposite side by installing the remaining beam clamps as shown in the
diagram below.
Step 3: Tighten the bolts and nuts to 50 - 52 ft·lb using a torque wrench.
Step 4: Stand the crane upright.
Rotate the crane onto its feet in a controlled manner. For instance, attach a hoist chain to the I-beam
and slowly raise the beam until the crane stands on its feet. Alternatively, raise the crane with a fork
truck. Position the forks under the I-beam and slowly raise the beam until the crane rotates onto its feet
in a controlled manner.
Part no.
Description
Quantity
33626
½ in. lock washer
8
19211-A
½ in. – 13 structural
nut
8
19211-B
½ in. – 13 x 2 in. bolt
8
28-516-053
Welded beam clamp
4
*Part numbers match item numbers from exploded
parts diagrams on p. 4 - 8.
Beam
bracket
Upright
I-beam
Lower beam flange
Fig. 2B: Exploded Parts View of Beam Clamp Connection to Beam Bracket
Approach the crane with a fork truck from this side
and slide the forks under the I-beam.
Slowly raise the beam and slowly drive forward until the
crane stands on its feet.
DO NOT raise the beam unless all other
persons ha
ve moved to a location away from and
behind the fork truck.
33626
19211-A
19211-B
Beam
clamp
Fig. 2A: Beam clamp connection
Bekijk gratis de handleiding van Vestil FHS-4-10, stel vragen en lees de antwoorden op veelvoorkomende problemen, of gebruik onze assistent om sneller informatie in de handleiding te vinden of uitleg te krijgen over specifieke functies.
Productinformatie
| Merk | Vestil |
| Model | FHS-4-10 |
| Categorie | Niet gecategoriseerd |
| Taal | Nederlands |
| Grootte | 3660 MB |


