Tryton TJV20 handleiding
Handleiding
Je bekijkt pagina 7 van 56
7
PREPARATION FOR WORK:
The switch (10) has fluid rotation speed adjustment built-in.
Prior to each use of the tool one has to check whether moving parts of the
Press the switch to activate the power tool. The rotation speed will
device are in operating conditions, not seized, cracked or damaged that
increase the further the switch is pushed. To stop the power tool, release
may affect proper operation of the tool. Damaged tools must be handed
the switch.
over for repairs before they can be used again.
n Choosing rotation direction (see Fig. E)
The driver can work with clockwise (right) or counter-clockwise (left)
rotation.
- to select clockwise rotation, move the clockwise/counter-clockwise
slider (5) to the left (looking from the back of the driver),
- to select counter-clockwise rotation, move the clockwise/counter-
You can check the battery level with the battery level indicator button
clockwise slider (5) to the right (looking from the back of the driver),
(14). A single LED means the battery level is low, two LEDs mean medium
When the rotation direction switch is in the middle position, the
level, and three LEDs mean full battery.
is locked.
For drilling and driving screws in, clockwise operation should be
selected. For taking out the drill bit, removing a stuck drill bit, or
unscrewing screws, counter-clockwise operation should be selected.
Press the battery lock button (9) and take the battery (8) out of the drill
n Choosing torque (Fig. F)
driver
The driver is equipped with a ring (2), which can be used for setting the
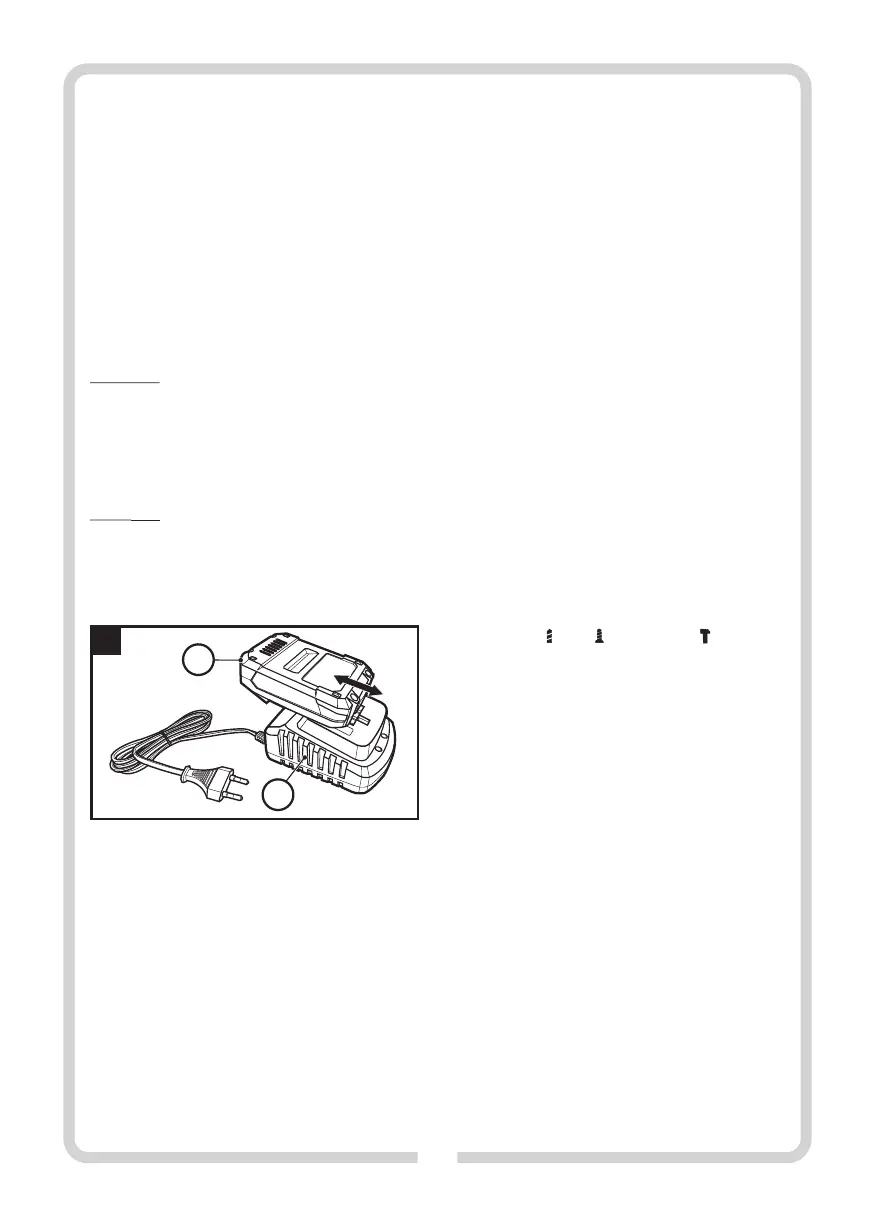
Connect the battery (8) to the charger (12) (see Fig. C).
toque when driving screws. The ring has 21 settings, from 1 to 21.
Connect the adapter plug (13) to the charger (12).
Using a given setting (from 1 to 21) means that the clutch is set to an
4. Connect the adapter to a mains socket (110–240 V, 50-60 Hz).
assigned toque. This makes it possible to prevent a screw from being
driven too far or being damaged. Different torques should be used for
different screws and materials.
Press the battery lock button (9) and take the battery (8) out of the drill
Always start with a low torque and increase gradually until the desired
driver
result is achieved.
Connect the battery (8) to the charger (12) (see Fig.
(Fig. F)
n Shifting gear (Fig. A)
The gear shifter (4) makes it possible to choose 2 rotation speed ranges.
Gear I: Used for driving and unscrewing screws.
Gear II: Used for drilling.
CAUTION: Do not change the position of the gear shifter (4) during tool
operation as this may damage the gear box. Always allow the tool to come
to a full stop before changing the setting of the gear shifter.
If the gear shifter does not move all the way, move the drive spindle
slightly.
n Changing the chuck (Fig. G)
n Battery charging indicator
1. Disconnect the battery (8) from the driver.
A green LED light indicates that the charger is connected to a power
source. After the battery is connected, the red LED is on to indicate
2. Open the chuck as much as possible (1)
charging. Blinking green battery LEDs also indicate that the battery is
3. Using a PH 2 (Philips No.2) screwdriver, rotate the fixing screw of the
charging and show the current battery level.
chuck clockwise (CAUTION! Left-thread). To free a seized bolt hit is
When the battery is fully charged, the red LED goes off and the green LED
gently on its head.
is on.
4. Unscrew the chuck of the drill/screwdriver counter-clockwise
After charging, disconnect the charger and remove the battery.
(looking from the point of view of the chuck).
NOTE! The battery may get slightly hot when charging. This is not a
CAUTION: A jammed keyless chuck (1) can be released by inserting the
malfunction.
short end of a hex key in the chuck and lightly tapping the longer arm of
the key (see Fig.D).
The lithium-ion battery can be charged at any moment, without
detriment to its life. Interrupting the charging process does not entail a
5. To attach the chuck, screw it onto the drive spindle clockwise and
risk of damaging the battery cells.
secure by screwing in the fixing screw counter-clockwise using a PH 2
screwdriver (No.2 Philips).
IN USE:
n Turning on/off
AUXILIARY COMPONENTS:
n Charging the battery
NOTE! Battery and charger are not part of the delivery. Depending on your
needs, you can purchase a 1.5 Ah battery TJ15AK, 2.0 Ah battery TJ2AK or
4.0Ah TJ4AK and a compatible charger TJ3LD (charging time 3–5 hours) or
TJ1LD (charging time 1 hour).
On/off
Charge the battery fully before
switch(10)
use.
TJ3LD
The first charging procedure using TJ3LD should last at least 5 hours.
1.
(see Fig. B).
2.
3.
TJ1LD
The first charging procedure using TJ1LD should last at least 1 hour.
1.
(see Fig. B).
2. H).
n Selecting mode
3. Connect the charger plug to a mains socket (220–240 V, 50 Hz).
With the knob (3) you can set the right mode. Depending on the work, set
the knob to drilling , driving , or hammer drilling .
Charger
Charger
8
12
H
Bekijk gratis de handleiding van Tryton TJV20, stel vragen en lees de antwoorden op veelvoorkomende problemen, of gebruik onze assistent om sneller informatie in de handleiding te vinden of uitleg te krijgen over specifieke functies.
Productinformatie
| Merk | Tryton |
| Model | TJV20 |
| Categorie | Niet gecategoriseerd |
| Taal | Nederlands |
| Grootte | 11694 MB |


