Handleiding
Je bekijkt pagina 38 van 76
TEC_TM_009 REV. L_EN
01/02/2025
Page 38 of 76
TRUE RESIDENTIAL
®
#212530
INSTALLATION
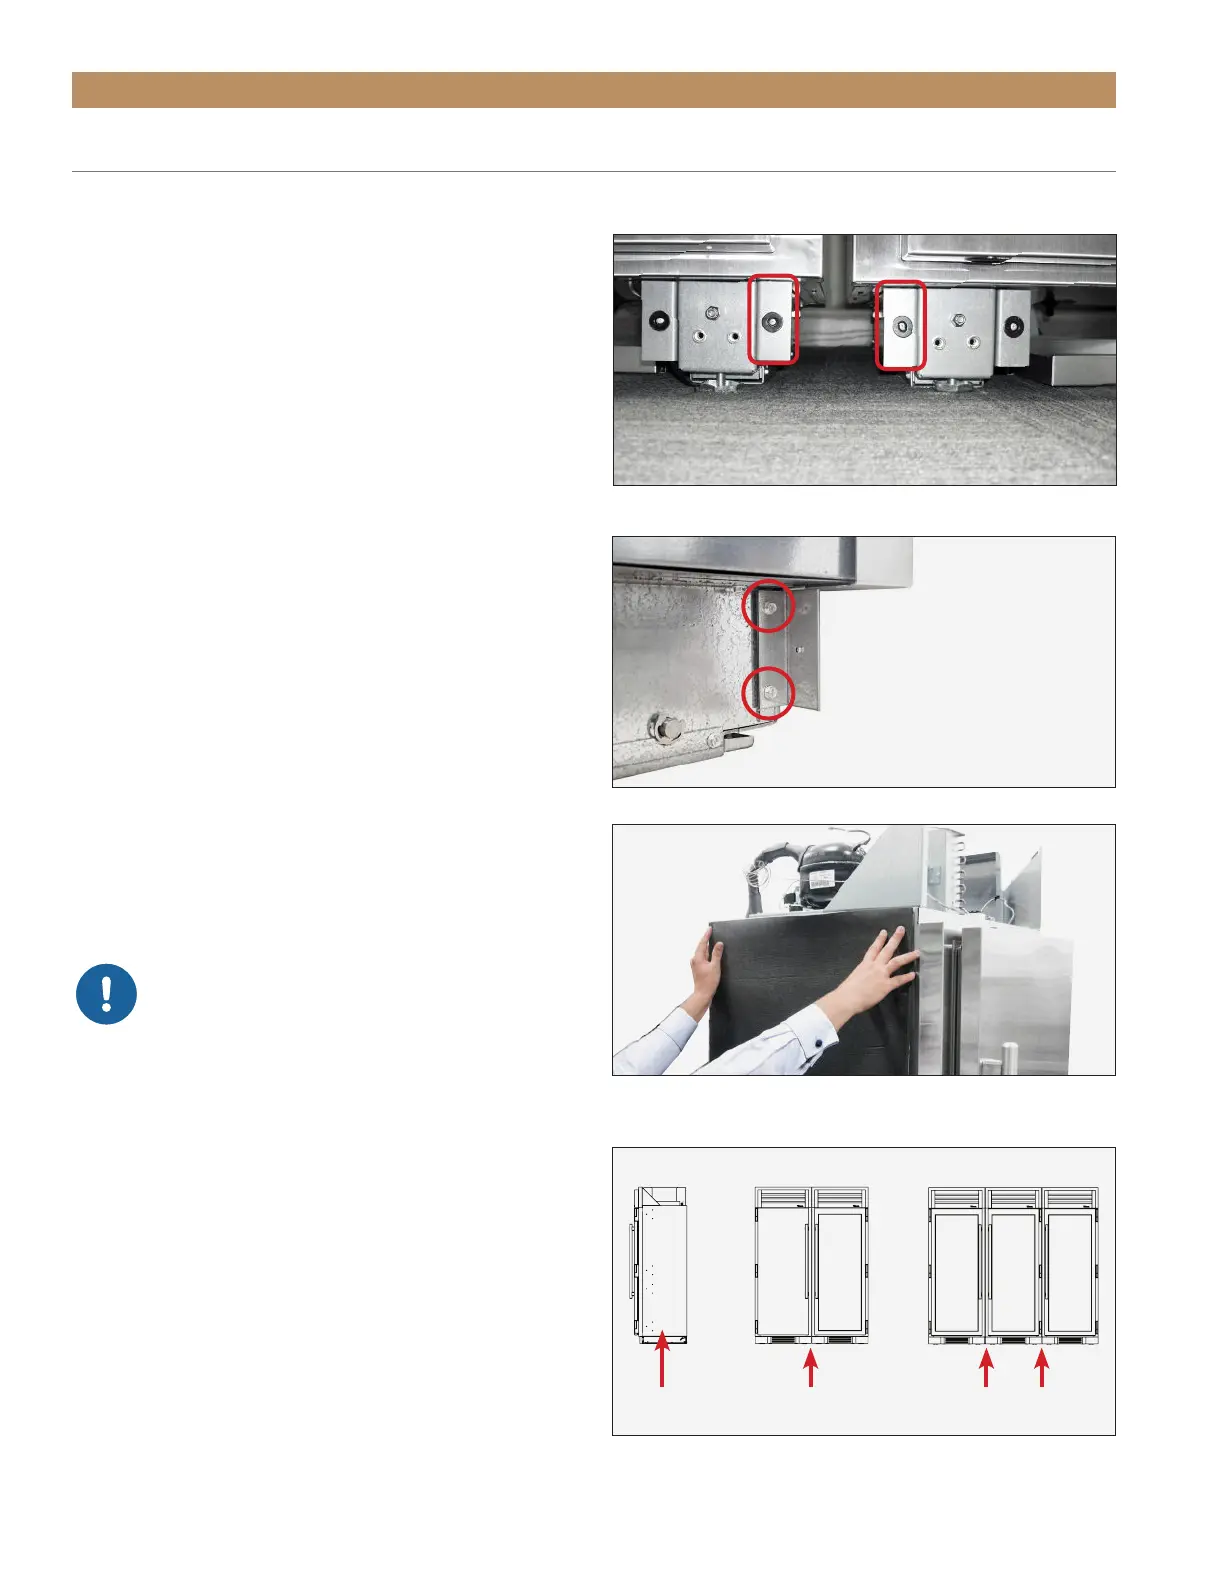
FIG. 11.
Remove and discard the interior magnet brackets.
FIG. 12.
Magnet bracket screw locations.
JOINING KIT INSTALLATION (CONT.)
7. Install anti-sweat foam end panels on the joined
units’ sides where the appliances will meet. See
figs. 13 and 14.
8. Position the units in front of the final installation
location. Then, level the units.
9. Verify the fronts of the units are flush at the seams
and the gap(s) between the units is (are) consistent
from top to bottom. See figs. 15 and 16.
10. With the provided hardware, install the joining
bracket across the interior legs. See figs. 17 and
18.
11. With the existing hardware, install the joining
rainshield assembly. See fig. 19.
NOTE: ASSISTANCE (AT LEAST TWO (2)
PEOPLE) RECOMMENDED.
12. Route the reed switch wires through the rainshield.
See figs. 6 and 7.
13. With the predrilled holes in the joining rainshield,
connect and install the reed switches near the
handle-side of the units.
NOTE: BE SURE TO CONNECT THE
WIRES TO THE REED SWITCH AS
ORIGINALLY CONFIGURED. WIRE
LOCATION IS CRITICAL TO THE
APPLIANCE’S OPERATION. SEE
FIGS. 5 OR 20.
FIG. 13.
Install the anti-sweat foam panel where the unit will be
positioned next to another unit.
FIG. 14.
Install foam pads between the joined units.
Application Area Two Pads Used Four Pads Used
Bekijk gratis de handleiding van True TR-24FRZ-R-SS-A, stel vragen en lees de antwoorden op veelvoorkomende problemen, of gebruik onze assistent om sneller informatie in de handleiding te vinden of uitleg te krijgen over specifieke functies.
Productinformatie
| Merk | True |
| Model | TR-24FRZ-R-SS-A |
| Categorie | Vriezer |
| Taal | Nederlands |
| Grootte | 23621 MB |


