Supermicro X14SBT-GAP handleiding
Handleiding
Je bekijkt pagina 40 van 142
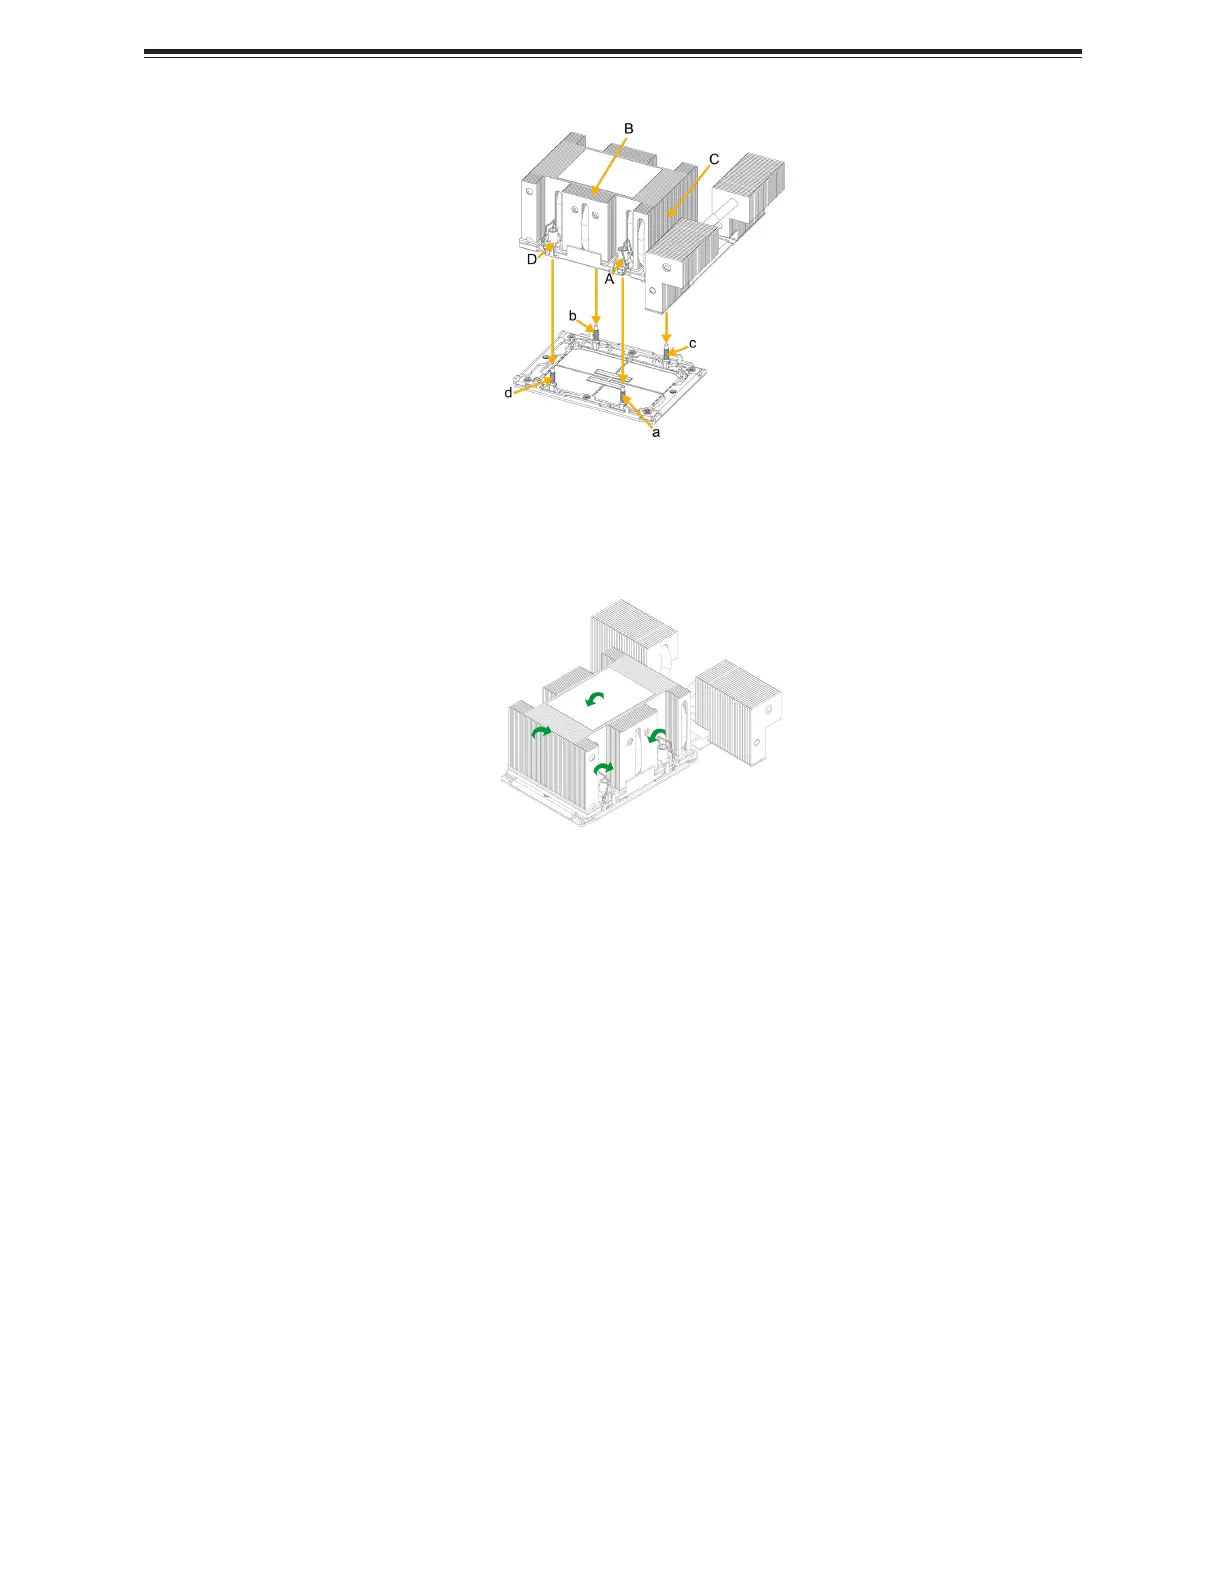
Figure 2-29. Align the Heatsink with the Socket (2U left, 4U right)
3. Press all four rotating wires inwards and make sure that the heatsink is securely latched
into the processor socket.
Figure 2-30. Latch the PHM (2U left, 4U right)
4. With a T30 bit torque driver set to a force of 8.0 in-lbf (0.904 N-m), gradually tighten the
four screws to ensure even pressure. You can start with any screw, but make sure to
tighten the screws in a diagonal pattern.
Important: Do not use a force greater than 8.0 in-lbf (0.904 N-m). Exceeding this
force may over-torque the screw, causing damage to the processor, heatsink, and
screw.
5. Examine all corners to ensure that the PHM is firmly attached to the socket.
40
X14SBT-GAP: Component Installation
Bekijk gratis de handleiding van Supermicro X14SBT-GAP, stel vragen en lees de antwoorden op veelvoorkomende problemen, of gebruik onze assistent om sneller informatie in de handleiding te vinden of uitleg te krijgen over specifieke functies.
Productinformatie
| Merk | Supermicro |
| Model | X14SBT-GAP |
| Categorie | Niet gecategoriseerd |
| Taal | Nederlands |
| Grootte | 15560 MB |


