Simrad Active Imaging HD (Thru-Hull) handleiding
Handleiding
Je bekijkt pagina 27 van 32
27
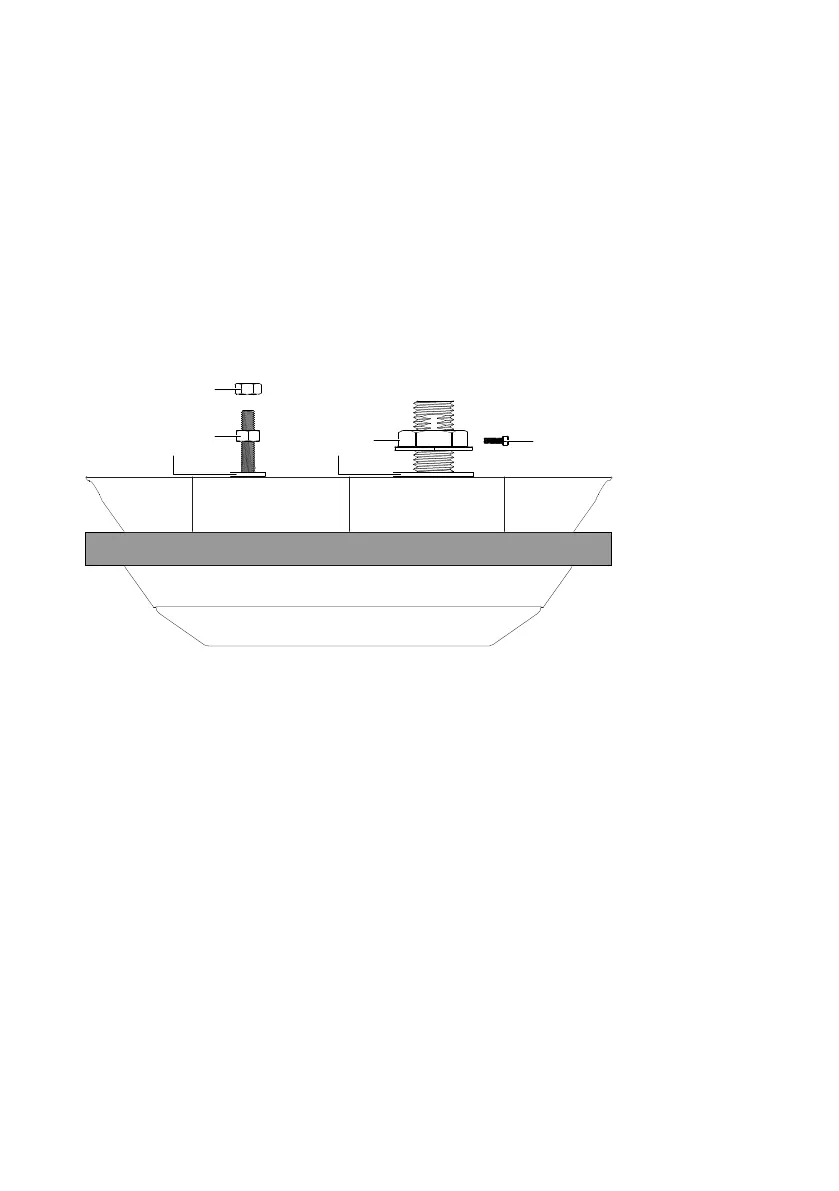
Fit washers and nuts
1 Pass the transducer cable through the large nylon washer. Move the nylon washer (A) down over the
transducer stem to contact the top surface of the fairing block.
2 Place the small nylon washer (B) on the anti-rotation stud and move the washer down to contact the top
surface of the fairing block.
3 Screw the stem nut (C) down the transducer stem. Tighten the stem nut against the washer using a 46
mm wrench or adjustable wrench.
4 Insert the set screw (D) into the stem nut and tighten it using a 3 mm Allen key.
5 Place the rst M10 nut (E) onto the anti-rotation stud and tighten it down against the washer using a 17
mm wrench.
6 Place the second M10 nut (F) onto the anti-rotation stud, and tighten it down onto the rst nut. Hold
the lower nut (E) in position with a second wrench, to prevent it turning with the top nut and over
tightening the stud.
A
C
B
E
D
F
7 To complete the installation, while the sealant is still wet, remove masking tape from inside and outside
the hull to create a crisp nished edge.
8 Wait the required amount of time for the sealant to cure (refer to the sealant manufacturer’s
instructions) before testing the boat in water.
Test for leaks
When the cure time for the sealant has been reached, place the boat in the water and check for leaks around
the transducer installation immediately. Even a small leak can allow a lot of water to accumulate, so monitor
the boat carefully for several hours and do not leave the boat unattendend.
Bekijk gratis de handleiding van Simrad Active Imaging HD (Thru-Hull), stel vragen en lees de antwoorden op veelvoorkomende problemen, of gebruik onze assistent om sneller informatie in de handleiding te vinden of uitleg te krijgen over specifieke functies.
Productinformatie
| Merk | Simrad |
| Model | Active Imaging HD (Thru-Hull) |
| Categorie | Niet gecategoriseerd |
| Taal | Nederlands |
| Grootte | 3264 MB |

