Handleiding
Je bekijkt pagina 13 van 72
2 screws
Security Bracket
2 screws
Security
Bracket
OR
OR
4. If desired, install the security bracket with 2 screws as shown.
NOTE: Cover the hole using the adaptor
cap when not in use.
Type 2: Wall Installation
1. Cut a 125mm (4.9inch) hole into the wall for the Wall Exhaust Adaptor B.
2. Secure the Wall Exhaust Adaptor B to the wall using the four Anchors and Screws
provided in the kit.
3. Connect the Exhaust Hose Assembly (with Wall Exhaust Adaptor A) to the Wall
Exhaust Adaptor B.
Expansion anchor
position
Wall Exhaust
Adaptor B
Adaptor
cap
Max 120cm or 47 inch
Min 30cm or 12 inch
NOTE: To ensure proper function, DO NOT overextend or bend the hose. Make sure
that there is no obstacle around the air outlet of the exhaust hose (in the range of
500mm) in order to the exhaust system works properly. All the illustrations in this
manual are for explanation purpose only. Your air conditioner may be slightly
dierent. The actual shape shall prevail.
Operating Instructions
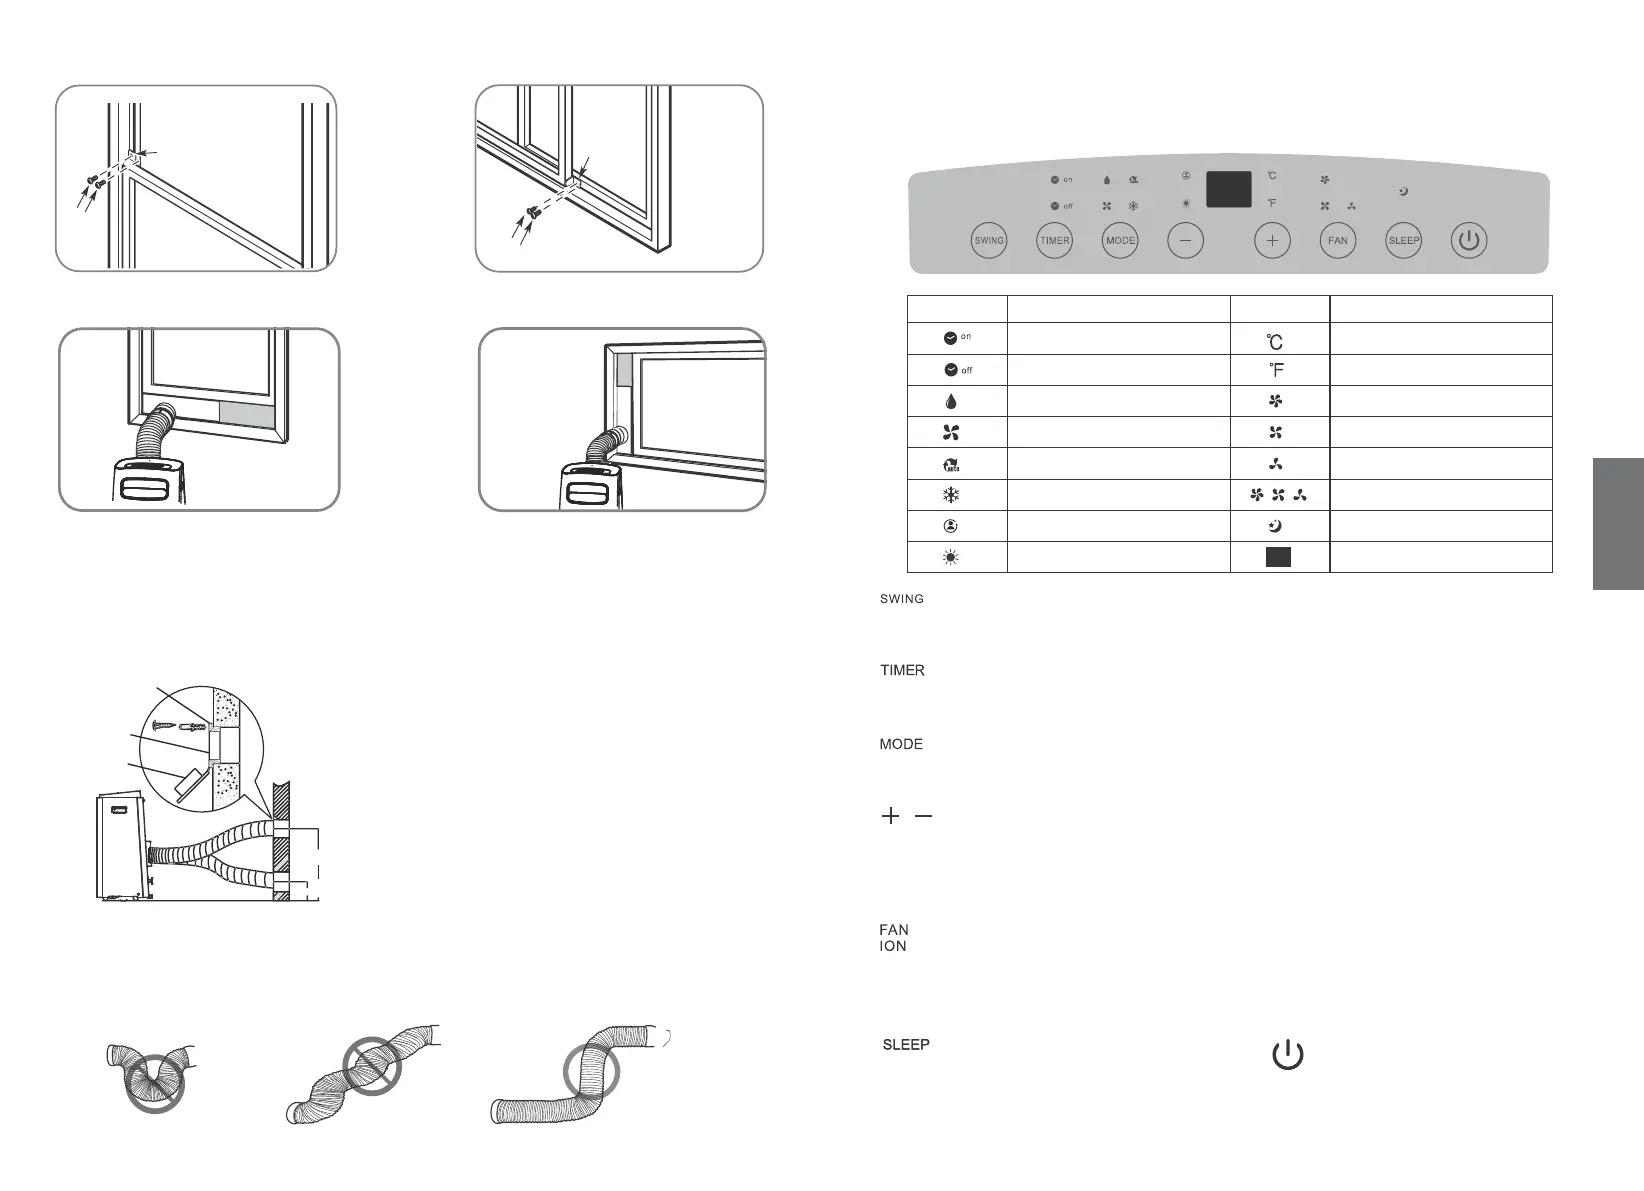
Control Panel Features
Indicator
Function
Timer on light;
Timer o light;
DRY mode light
FAN mode light
AUTO mode light
COOL mode light
FOLLOW ME light
Heat mode light;
Indicator
Function
Degrees Celsius
Degrees Fahrenheit
HIGH fan speed light
MED fan speed light
LOW fan speed light
AUTO fan speed light
(all illuminate/all dark)
SLEEP light
LED display
Used to initiate the Auto swing feature. When the operation is ON, press the SWING
button can stop the louver at the desired angle.
Timer button
Used to initiate the AUTO ON start time and AUTO OFF stop time program, in
conjunction with the + & - buttons. The timer on/o indicator light illuminates under
the timer on/ o settings.
Mode button Selects the appropriate operating mode. Each time you press the button, a
mode is selected in a sequence that goes from AUTO, COOL,DRY, FAN and HEAT. The
mode indicator light illuminates under the dierent mode settings.
Up (+) and Down (-) buttons Used to adjust (increasing/decreasing) temperature
settings in 1 °C/1 °F (or 2 °F) increments in a range of 17°C/ 62°F to 30°C/ 86°F (or 88°F)
or the TIMER setting in a range of 0~ 24hrs.
NOTE: The control is capable of displaying temperature in degrees Fahrenheit or degrees
Celsius. To convert from one to the other, press and hold the Up and Down buttons at
the same time for 3 seconds.
Fan button
Control the fan speed. Press to select the fan speed in four steps-LOW, MED, HIGH and
AUTO. The fan speed indicator light illuminates under dierent fan settings. When
select AUTO fan speed, all the fan indicator lights turn dark. On some models, when
select AUTO fan speed, all the fan indicator lights illuminate.
Sleep (Eco) button
Used to initiate the SLEEP/ECO
operation.
Power button
Power switch on/o.
2524
GB
Bekijk gratis de handleiding van Point POAC8212, stel vragen en lees de antwoorden op veelvoorkomende problemen, of gebruik onze assistent om sneller informatie in de handleiding te vinden of uitleg te krijgen over specifieke functies.
Productinformatie
| Merk | Point |
| Model | POAC8212 |
| Categorie | Airco |
| Taal | Nederlands |
| Grootte | 9076 MB |


