Phoenix Contact FL PN/PN SDIO-2TX/2TX handleiding
Handleiding
Je bekijkt pagina 41 van 94
Mounting, removal, electrical installation, and replacement
8220_en_06 PHOENIX CONTACT 41
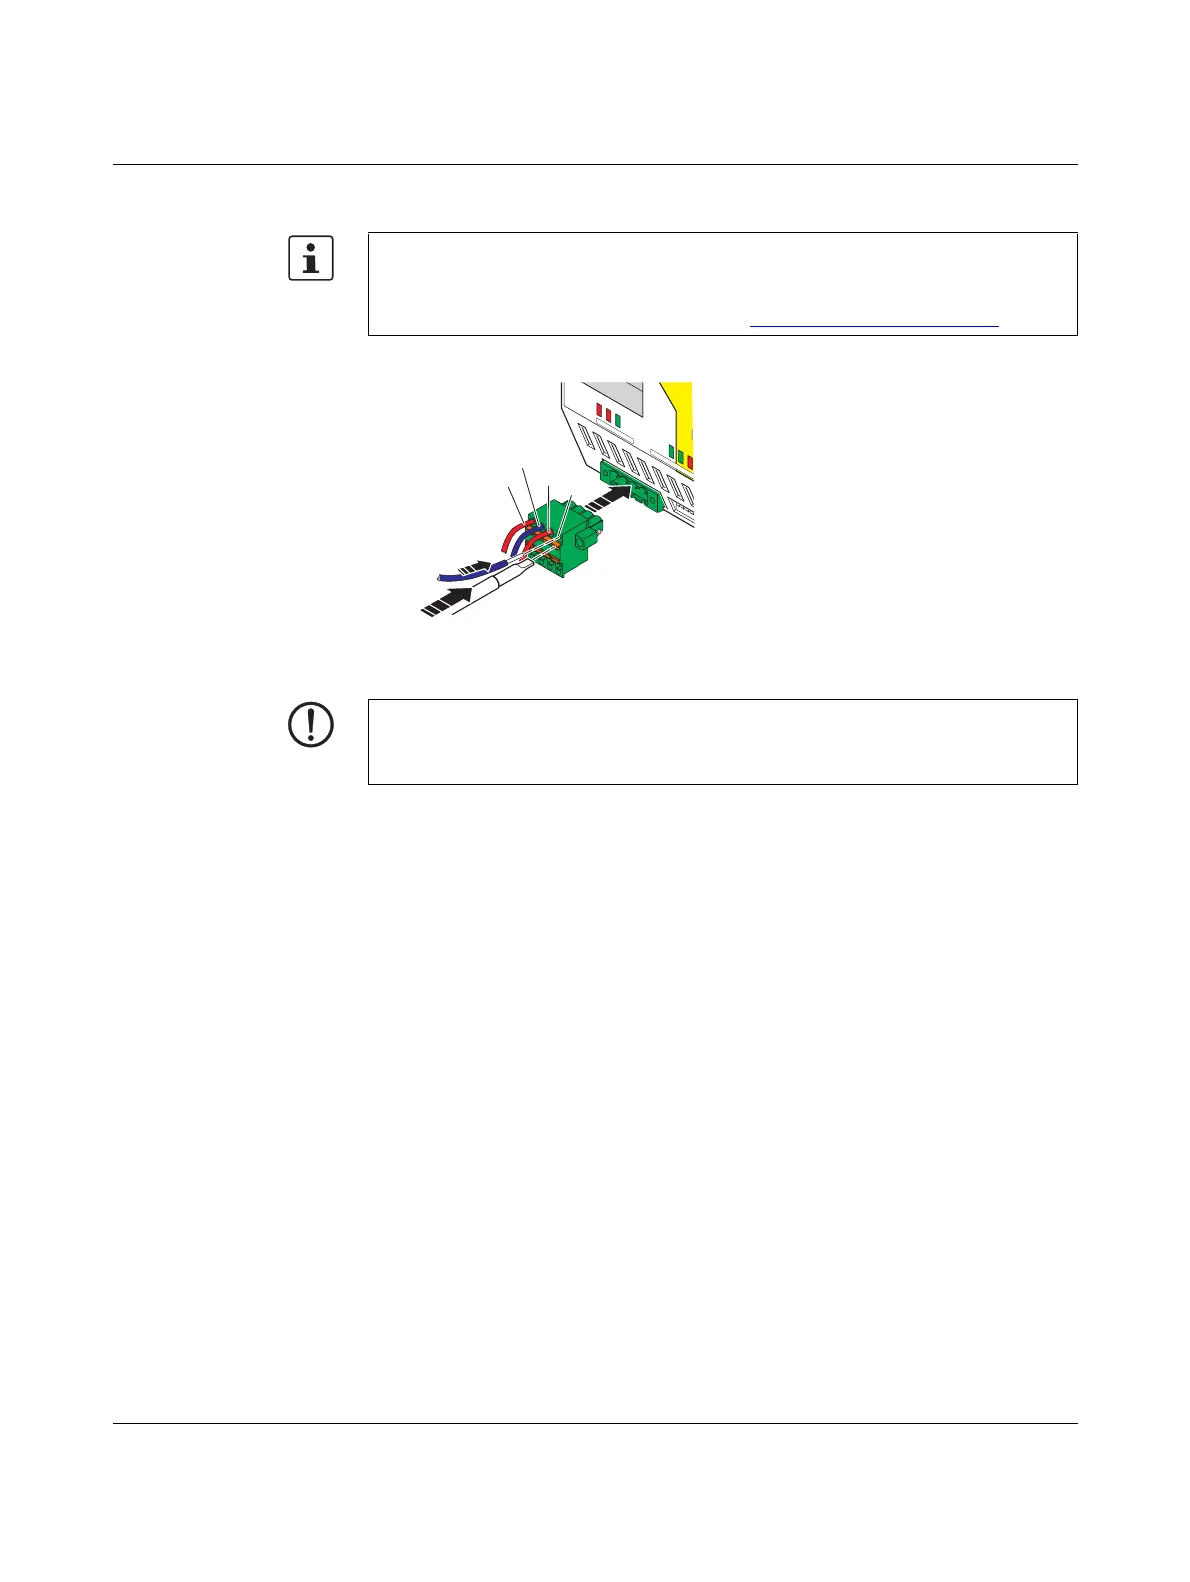
To connect the supply voltage, please proceed as described in Figure 3-3.
Figure 3-3 Connecting the supply voltage
1. Insulate the cables as specified in the plug-specific user documentation.
2. Release the fixing mechanism by pressing with the screwdriver (A in Figure 3-3).
3. Insert the cable into the terminal point of the COMBICON plug-in connector (B in
Figure 3-3).
4. Secure the cable by removing the screwdriver.
5. Insert the assembled COMBICON plug-in connector into the COMBICON socket (C in
Figure 3-3).
When assembling the plug (TFKC 2,5/4-STF-5,08, Order No. 1962710), please refer to
the information in the relevant user documentation, particularly regarding the stripping
length and maximum conductor cross section. We recommend using ferrules.
The user documentation can be downloaded at phoenixcontact.net/products
.
1
2
3
4
5
6
SF1BF1P1
US1
FS
US2
X
5
US1 GND1 US2
GND2
1
...
10
F
1
US1
GND1
US2
GND2
A
B
C
NOTE: Mixing up the input voltages can result in potential transfer
Take appropriate measures to prevent mix up and/or polarity reversal of the two input
voltages (U
S1
/U
S2
).
Bekijk gratis de handleiding van Phoenix Contact FL PN/PN SDIO-2TX/2TX, stel vragen en lees de antwoorden op veelvoorkomende problemen, of gebruik onze assistent om sneller informatie in de handleiding te vinden of uitleg te krijgen over specifieke functies.
Productinformatie
| Merk | Phoenix Contact |
| Model | FL PN/PN SDIO-2TX/2TX |
| Categorie | Niet gecategoriseerd |
| Taal | Nederlands |
| Grootte | 7175 MB |


