Phoenix Contact CHARX PS/3AC/920DC/87.5KW handleiding
Handleiding
Je bekijkt pagina 51 van 96
Installation
109484_en_01 PHOENIX CONTACT 51 / 94
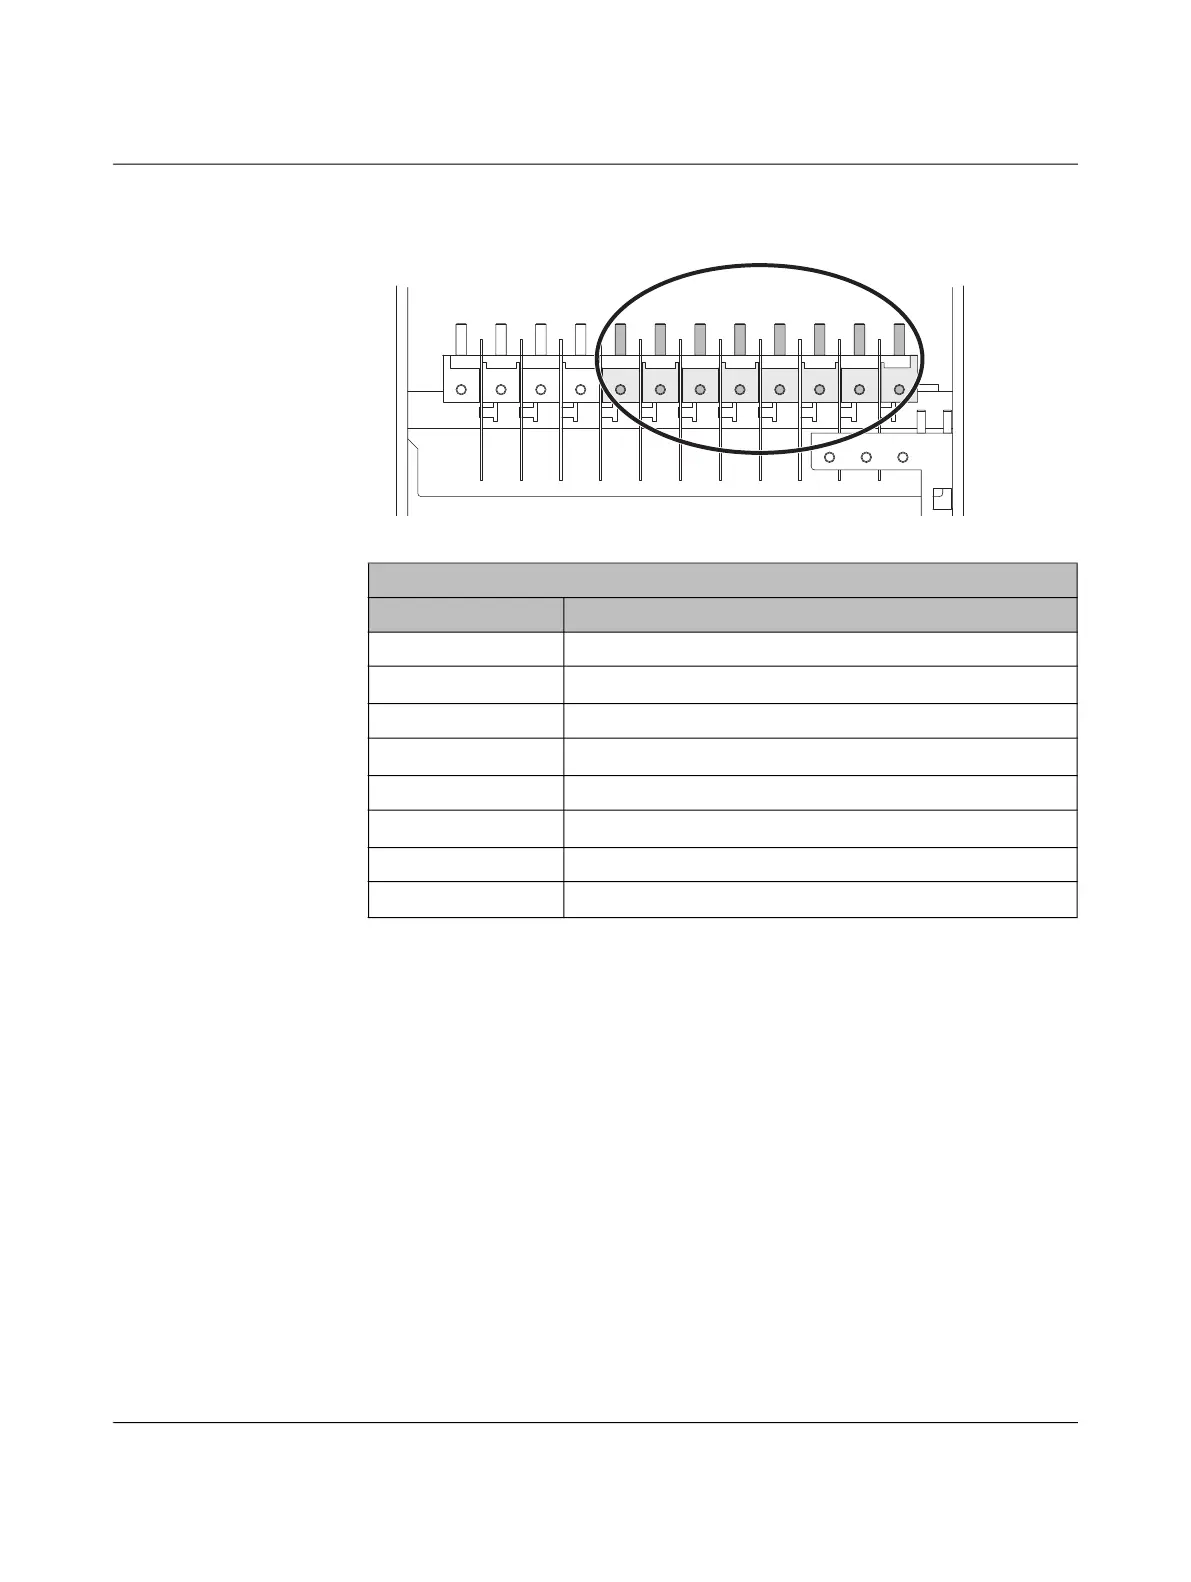
5.8.1 AC connection area
Figure 5-5 AC input area in the X1/X001 connection panel
5.8.2 Connecting the mains supply
Circuit diagram and equipment identification (EID)
Use the supplied circuit diagram and equipment identification do determine the position of
the individual terminal points. The first part of the circuit diagram provides an overview with
specifications of cable numbers and the respective terminal point.
Electrical connections
The following steps are required for electrical connection:
• Connect the grounding (PE) connections.
• Connect the AC supply lines.
• Connect the DC cables.
• Connect the signal lines (Remote OFF, collective fault).
• Connect the communication connection (CAN or adapted communication).
Table 5-4 Designation of AC bars in the X1/X001 connection panel
AC input X1/X001
Designation Designation
L1.1 Mains input 1 L1
L1.2 Mains input 2 L1
L2.1 Mains input 1 L2
L2.2 Mains input 2 L2
L3.1 Mains input 1 L3
L3.2 Mains input 2 L3
MP1 Mains input 1 neutral
MP2 Mains input 2 neutral
DC1- DC2- DC1+ DC2+ L1.1 L1.2 L2.1 L2.2 L3.1 L3.2 MP1 MP2
Bekijk gratis de handleiding van Phoenix Contact CHARX PS/3AC/920DC/87.5KW, stel vragen en lees de antwoorden op veelvoorkomende problemen, of gebruik onze assistent om sneller informatie in de handleiding te vinden of uitleg te krijgen over specifieke functies.
Productinformatie
| Merk | Phoenix Contact |
| Model | CHARX PS/3AC/920DC/87.5KW |
| Categorie | Niet gecategoriseerd |
| Taal | Nederlands |
| Grootte | 6956 MB |


