Perfect Aire 1PNC18000 handleiding
Handleiding
Je bekijkt pagina 9 van 24
6
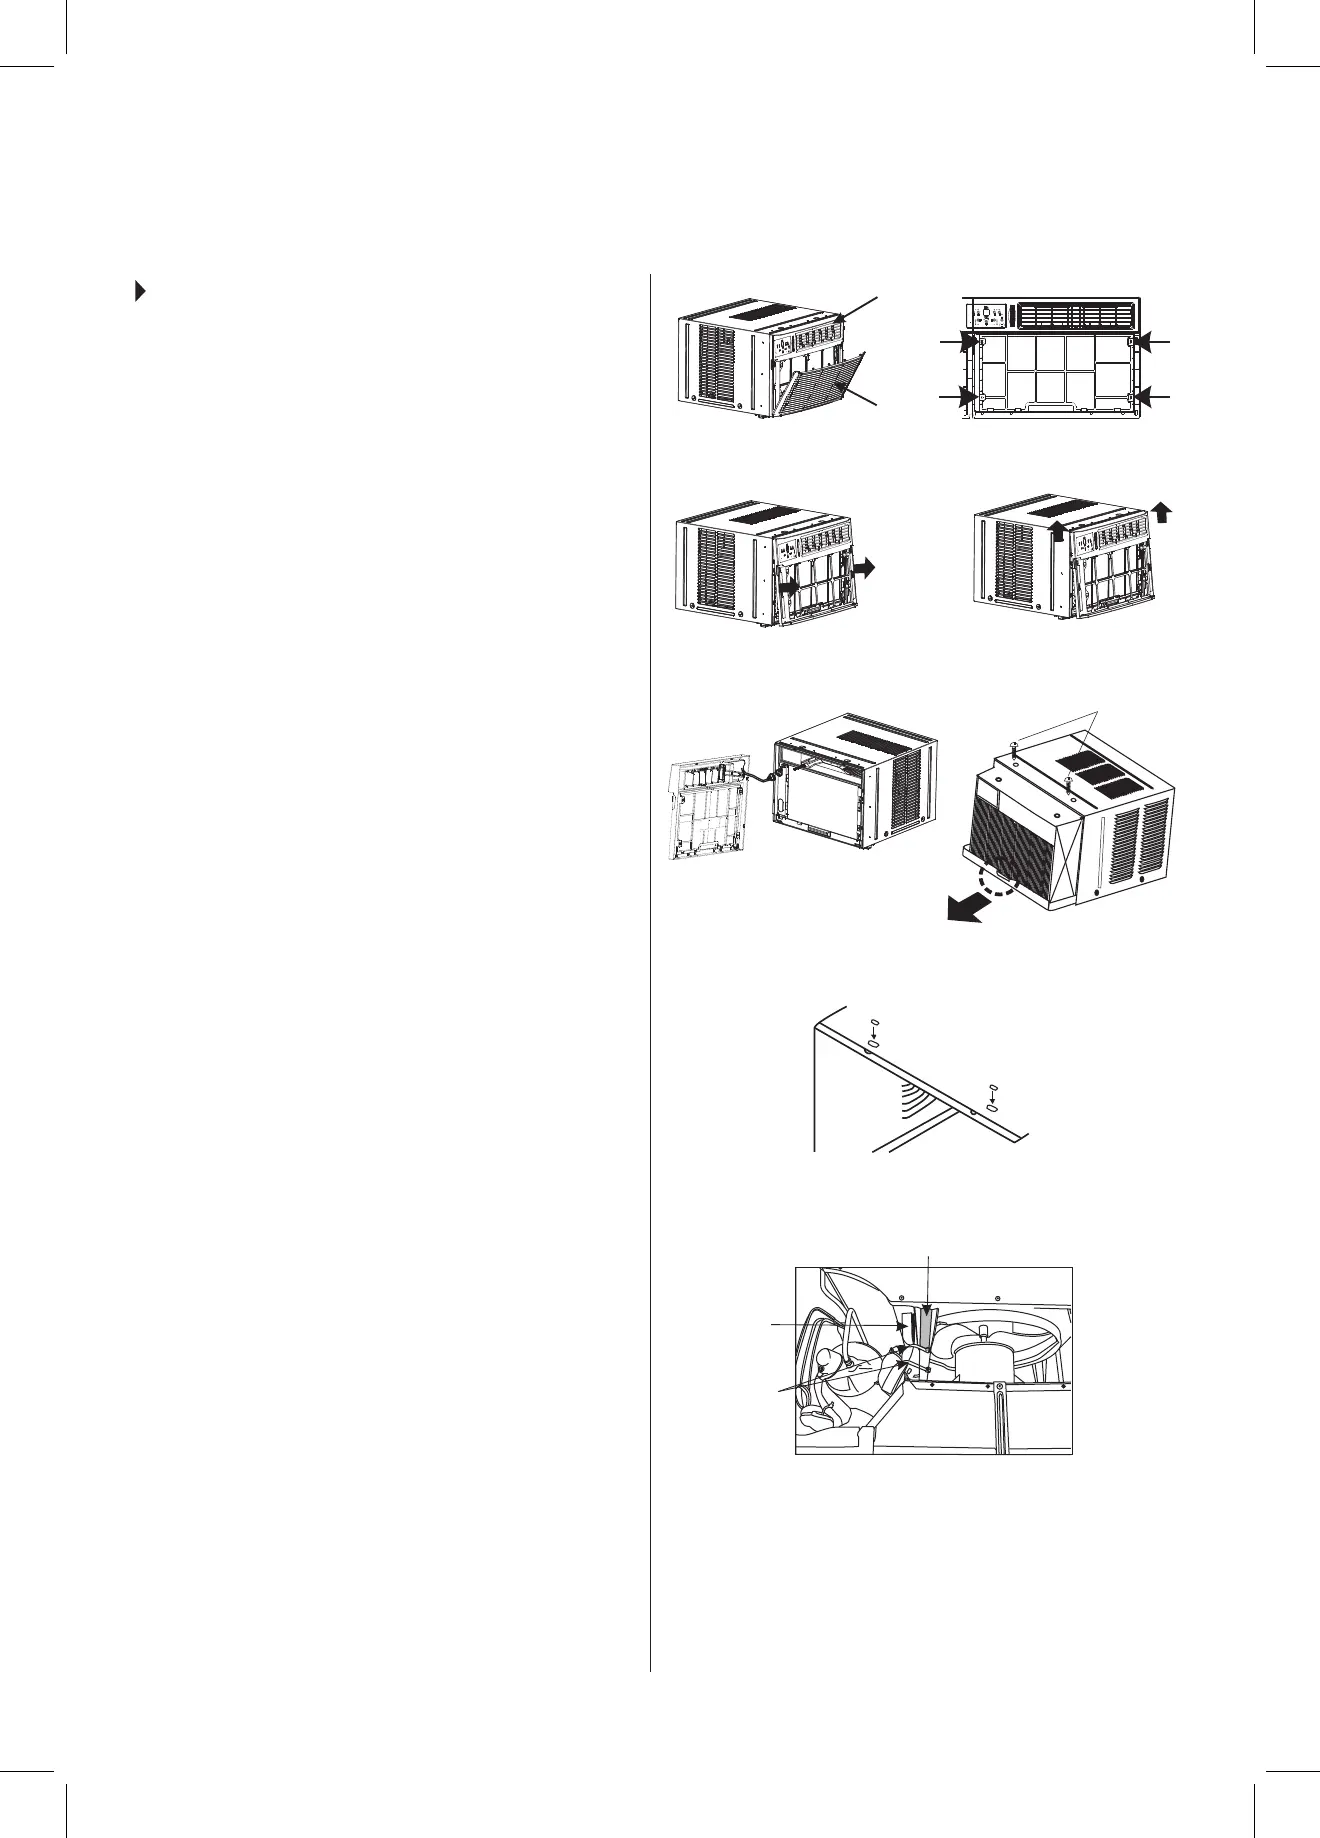
STEP 1:
REMOVE CHASSIS
7\SSKV^UMYVU[NYPSSLHUKYLTV]LÄS[LY
(See Fig. 1.)
2. Lift front grille upwards and place to one side.
3. Locate and remove the four front screws. These
screws will be needed to re-install the front panel
later. (See Fig. 2.)
4. Push metal cabinet side and pull on plastic frame
to release plastic tabs on each side of front panel.
(See Fig. 3.)
.LU[S`SPM[MYVU[WHULSVɈ\UP[
(See Fig. 3A.)
6. Disconnect the connector plug of the display
panel from the unit and place front panel to one
side. (See Fig. 4.)
7. Remove shipping screws from top of unit. (See
Fig. 5.)
8. Hold the cabinet while pulling on the base handle,
and carefully remove the unit.
9. Add two foam inserts to holes in top of cabinet
where shipping screws were removed from.
(See Fig. 6.)
@V\Y\UP[TH`JVTL^P[OPU[LYUHSWHJRHNPUN
ZOPWWPUNWHJRHNPUNWSHZ[PJ[PLZNYH`MVHT
WHKKPUNHZZOV^UPU-PN;OPZWHJRHNPUN
MUST be removed prior to installing the air
JVUKP[PVULYIHJRPU[V[OLJHIPUL[
DO NOT LIFT, PULL, OR REMOVE ANY EXPANDED
POLYSTYRENE (FOAM) FROM INSIDE OF THE AIR
CONDITIONER. IT IS NOT PACKING MATERIAL.
WINDOW MOUNTING INSTALLATION INSTRUCTIONS
FIG. 1
FIG. 4
FIG. 3
FIG. 2
FIG. 5
FIG. 6
FIG. 7
FIG. 3A
Shipping
Packaging
Shipping
Screws
Plastic Ties
Front Grille
Front Panel
Gray Foam
Padding
Bekijk gratis de handleiding van Perfect Aire 1PNC18000, stel vragen en lees de antwoorden op veelvoorkomende problemen, of gebruik onze assistent om sneller informatie in de handleiding te vinden of uitleg te krijgen over specifieke functies.
Productinformatie
| Merk | Perfect Aire |
| Model | 1PNC18000 |
| Categorie | Airco |
| Taal | Nederlands |
| Grootte | 4311 MB |


