PAC SRK-RAM13HX handleiding
Handleiding
Je bekijkt pagina 5 van 18
SRK-RAM13HX
Radio Replacement Kit
for 2013-2018 RAM Trucks
and 2019-2024 RAM Classic
Stinger HEIGH10
© 2025 Stinger. All rights reserved. PAC is a Power Brand of Stinger Solutions.
PAC-Audio.com / StingerSolutions.com
Pacific Accessory Corporation
Page 5
Rev: V1
Date: 020725
®
Section 1: Disassembly (continued)
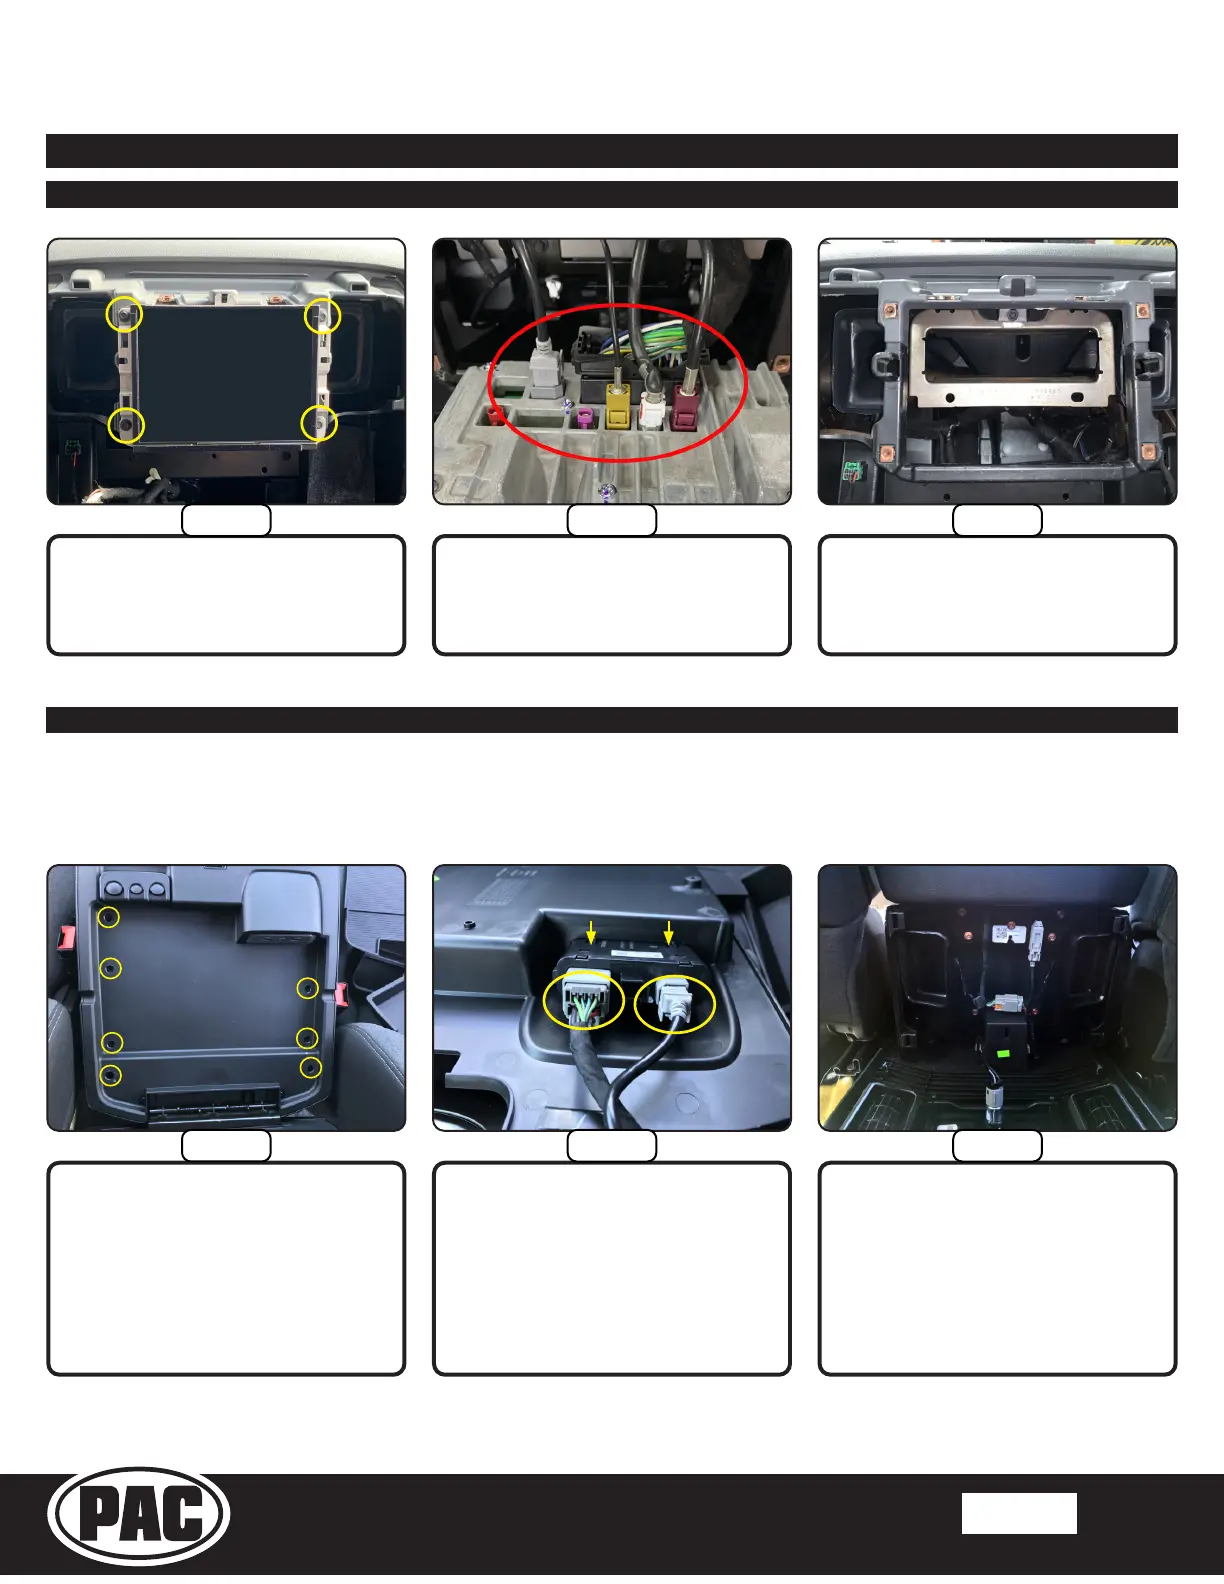
Part Three: Radio Display Removal
Part Four: Floor Mounted Center Console Disassembly
Remove the four 7mm screws
securing the radio display in place.
Open the upper console storage and
remove the rubber mat. Remove the
seven inner tray T20 TORX screws.
Remove the inner tray enough to
access the wire harness connectors
for the factory USB hub.
Disconnect all the connectors from
the back of the radio (the number of
connections will vary based on the
vehicle’s available features).
Disconnect the two connectors from
the factory USB hub. Compress the
four retaining tabs (only 2 shown) on
the USB hub to release and remove
the hub assembly from the inner tray.
Remove the display from the
dash (dash appearance may vary
according to model year).
Using a plastic trim tool, remove
the center console rear panel by
releasing the four retaining clips.
Note: The rear power outlet can
remain connected and the rear panel
laidontheoor.
Ifequippedwithaoormountedcenterconsole,proceedwiththeconsoledisassemblystepslistedbelow.
If equipped with a center seat mounted storage console, skip ahead to Part Five on page 7.
Step 1
Step 2 Step 3
Step 1
Step 2 Step 3
Bekijk gratis de handleiding van PAC SRK-RAM13HX, stel vragen en lees de antwoorden op veelvoorkomende problemen, of gebruik onze assistent om sneller informatie in de handleiding te vinden of uitleg te krijgen over specifieke functies.
Productinformatie
| Merk | PAC |
| Model | SRK-RAM13HX |
| Categorie | Niet gecategoriseerd |
| Taal | Nederlands |
| Grootte | 18646 MB |

