PAC SRK-RAM13HX handleiding
Handleiding
Je bekijkt pagina 14 van 18
SRK-RAM13HX
Radio Replacement Kit
for 2013-2018 RAM Trucks
and 2019-2024 RAM Classic
Stinger HEIGH10
© 2025 Stinger. All rights reserved. PAC is a Power Brand of Stinger Solutions.
PAC-Audio.com / StingerSolutions.com
Pacific Accessory Corporation
Page 14
Rev: V1
Date: 020725
®
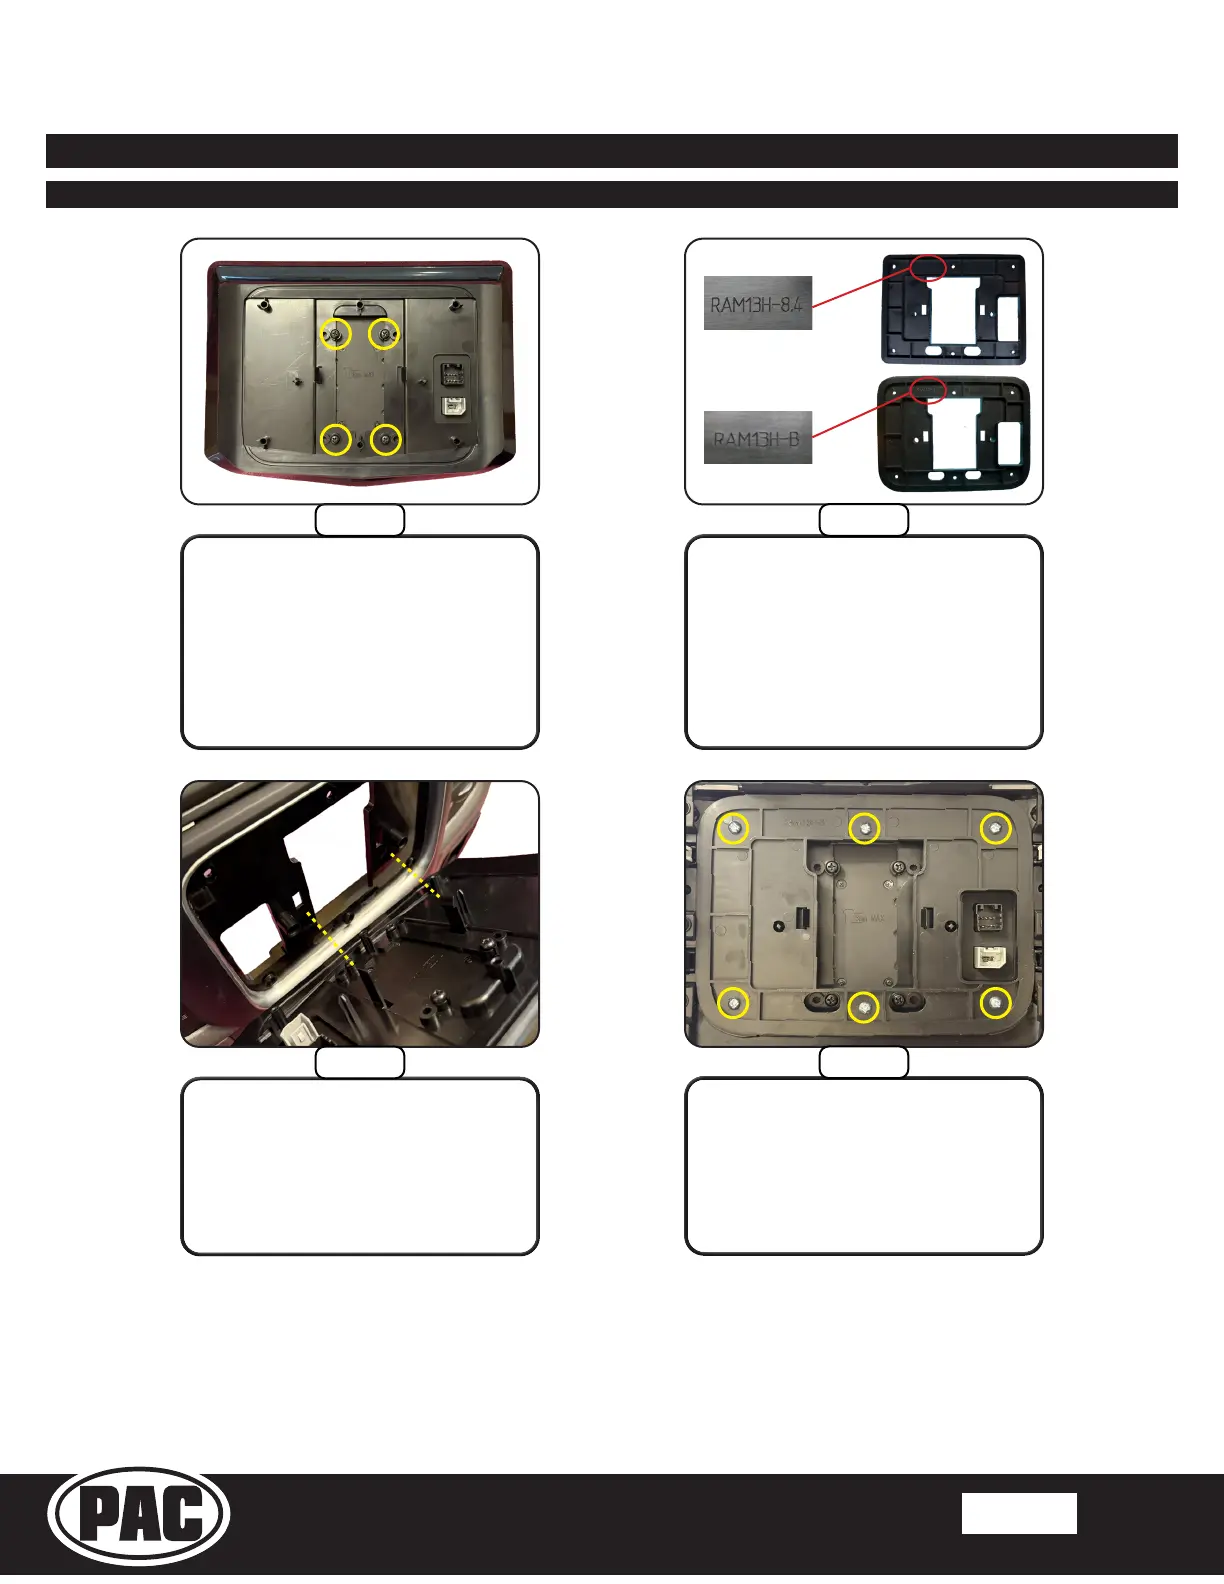
Section 4: Display & Radio Unit Mounting Preparation
Part One: Display Mounting Panel
From the SRK-RAM13HX kit,
choose the appropriate Mounting
Plate. RAM13H-8.4 is used when
replacing an 8.4” factory display and
RAM13H-B is used for all others.
Install six M4x12 Philips screws
from the SRK-RAM13HX kit to
secure the Mounting Plate and
Display Mounting Panel to the
OEM dash panel.
Position the Mounting Plate on the
backside of the OEM dash panel
opening with the cut-out on the left
side. Align the two locator pins on
the Display Mounting Panel to the
Mounting Plate and push to snap
together.
Step 2
Step 3
Step 4
Place the HEIGH10 Touch
Panel Display face down on a
soft surface. Place the Display
Mounting Panel over the back
of the HEIGH10 Touch Panel
Display and secure it with the four
M4x10 screws from the HEIGH10
hardware pack.
Step 1
Bekijk gratis de handleiding van PAC SRK-RAM13HX, stel vragen en lees de antwoorden op veelvoorkomende problemen, of gebruik onze assistent om sneller informatie in de handleiding te vinden of uitleg te krijgen over specifieke functies.
Productinformatie
| Merk | PAC |
| Model | SRK-RAM13HX |
| Categorie | Niet gecategoriseerd |
| Taal | Nederlands |
| Grootte | 18646 MB |

