Mitsubishi MFXZ-KW25-50VG handleiding
Handleiding
Je bekijkt pagina 5 van 12
EN-4
Wall
Outdoor
side
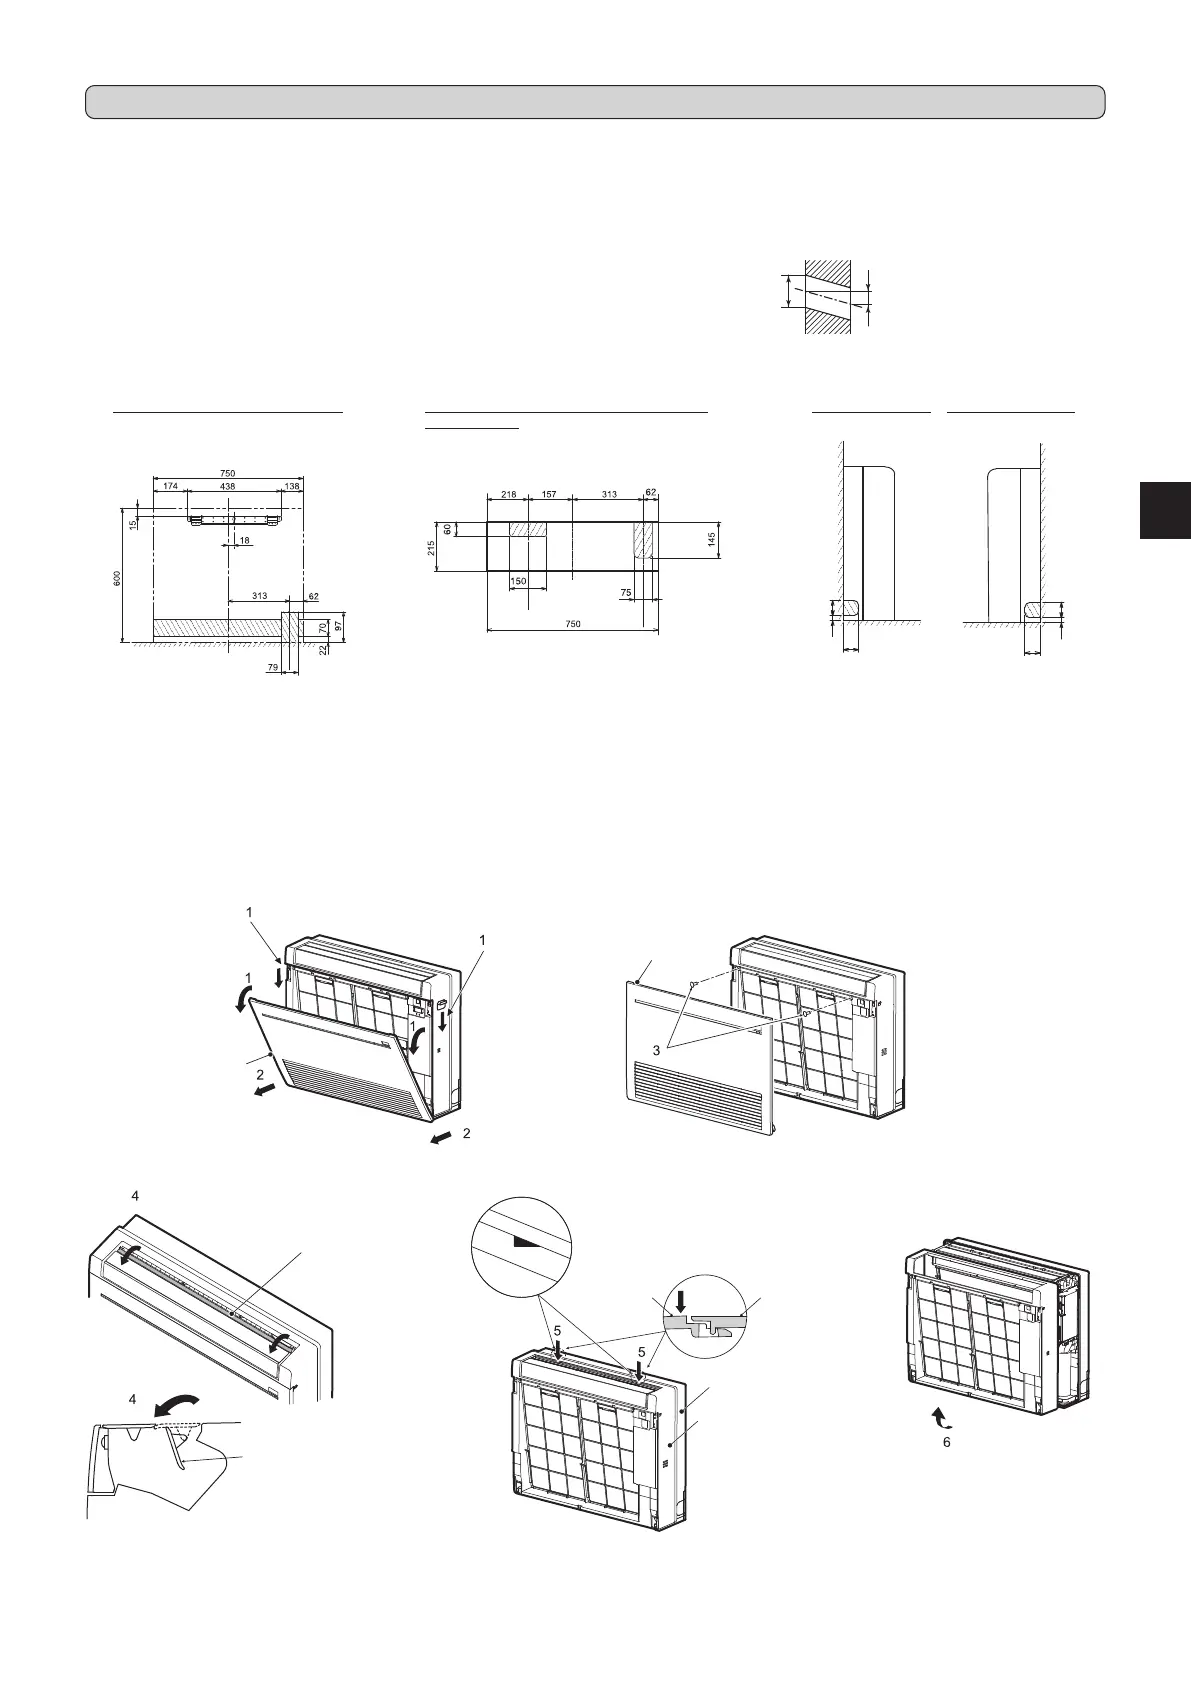
2-2. HOLE DRILLING
1) Determine the wall hole position.
2) Drill a dia. 65 mm hole (dia. 75 ~ 80 mm for KW50). The outdoor side should
be 5 to 7 mm lower than the indoor side.
3) Insert wall hole sleeve (C).
2-1. FIXING OF INDOOR UNIT MOUNTING BRACKET
• Do not install the indoor unit at a place higher than 150 mm.
• Find a structural material (such as a stud) in the wall and x bracket (7) horizontally with xing screws (8).
• To prevent bracket (7) from vibrating, be sure to install the xing screws in the holes indicated in the illustration. For added support, xing screws may also be installed
in other holes.
FOR RIGHT DOWNWARD OR LEFT DOWN-
WARD PIPING
(The following gure is a view of the bottom of
the indoor unit from above.)
FOR REAR OR LEFT-REAR PIPING
(The following gure is a front view
of the indoor unit installation location.)
FOR LEFT PIPING FOR RIGHT PIPING
HOLE POSITIONS
ø65 mm (KW25/35)
ø75 ~ ø80 mm (KW50)
5 - 7 mm
2-3. INDOOR UNIT PREPARATION
Remove the front panel of the indoor unit.
1) Push down the tab on the both sides of the unit to open the front panel.
2) Pull the front panel toward you to remove it.
3) Remove the 2 screws.
4) Open the rear horizontal vane.
5) Push the 2 locations on the top of the panel, and then pull the upper part of the panel toward you.
6) Remove the panel while lifting it up (slightly).
Rear horizontal
vane
Panel
Panel
Push
Indoor unit
60
60
6030
6030
Front panel
Front panel
Indoor unit
Indoor
side
Rear horizontal
vane
2. INDOOR UNIT INSTALLATION
Bekijk gratis de handleiding van Mitsubishi MFXZ-KW25-50VG, stel vragen en lees de antwoorden op veelvoorkomende problemen, of gebruik onze assistent om sneller informatie in de handleiding te vinden of uitleg te krijgen over specifieke functies.
Productinformatie
| Merk | Mitsubishi |
| Model | MFXZ-KW25-50VG |
| Categorie | Airco |
| Taal | Nederlands |
| Grootte | 1832 MB |


