Martin Exterior Projection Pro Compact handleiding
Handleiding
Je bekijkt pagina 32 van 71
32 Martin
®
Exterior Projection Pro Compact User Manual, Rev. A
Installing an animation wheel in the animation wheel module
The animation wheel module is supplied with the Radial Breakup animation wheel packed separately
to avoid transport damage, so you must fasten the wheel into its position in the module before you
install the module in the fixture.
Using standoffs
The animation wheel is supplied with three screws and three standoffs. If a gobo module is not going
to be installed in the fixture, fastening the standoffs to the hub and then fastening the animation wheel
to the standoffs will move the animation wheel forwards in the fixture and closer to the focal plane.
This will allow sharper projections when using the animation wheel together with the framing module.
Fastening the animation wheel
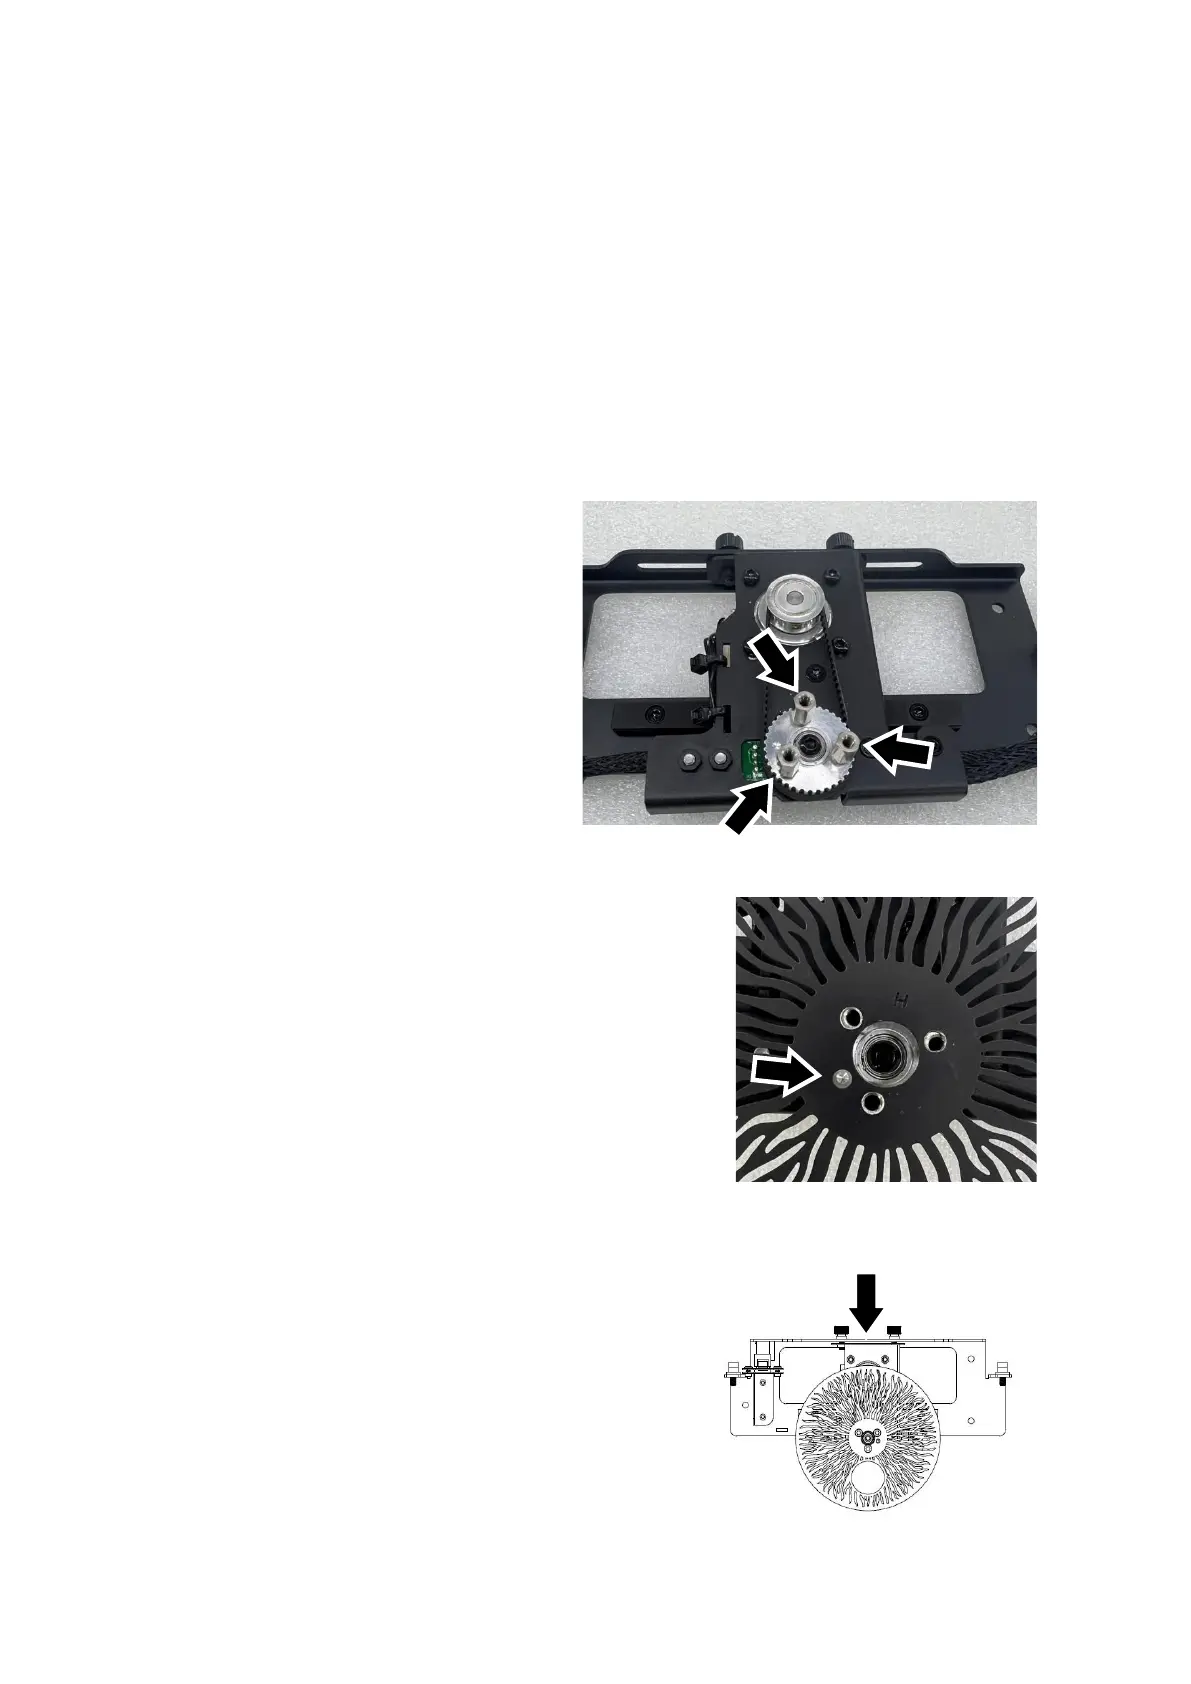
To fasten the animation wheel to the module:
1. For convenience, tighten the two
thumbscrews on the top of the animation
wheel car to prevent it from sliding while
you work. Place the animation wheel
module on a clean, flat work surface with
the hub side facing upwards,
2. See photo on right. If a gobo module will
not be installed and you are going to use
the supplied standoffs, apply a small
amount of Loctite 222 or similar thread
lock compound to the threads of the
standoffs and fasten them to the hub as
shown. We recommend that you use a
torque driver and tighten to 0.5 Nm.
3. See photo on right. Position the animation wheel so that the
extra hole in the wheel lines up with the reference mark in
the hub (arrowed). Apply a small amount of Loctite 222 or
similar thread lock compound to the threads of the three
supplied screws, then use them to fasten the wheel to the
hub in the center of the module. We recommend that you
use a torque driver and tighten to 0.5 Nm.
Centering the animation wheel with aperture
If you install the animation wheel with aperture available from
Martin as an accessory, loosen the adjustment thumbscrews
in the module, slide the animation wheel to the center of the
traverse (the center point is marked with an arrow on the
module) and then tighten the thumbscrews. This will ensure
that the aperture is aligned so that you can select the open
position via DMX.
Bekijk gratis de handleiding van Martin Exterior Projection Pro Compact, stel vragen en lees de antwoorden op veelvoorkomende problemen, of gebruik onze assistent om sneller informatie in de handleiding te vinden of uitleg te krijgen over specifieke functies.
Productinformatie
| Merk | Martin |
| Model | Exterior Projection Pro Compact |
| Categorie | Niet gecategoriseerd |
| Taal | Nederlands |
| Grootte | 14946 MB |


