Martin Exterior PixLine 20 handleiding
Handleiding
Je bekijkt pagina 15 van 44
Physical installation 15
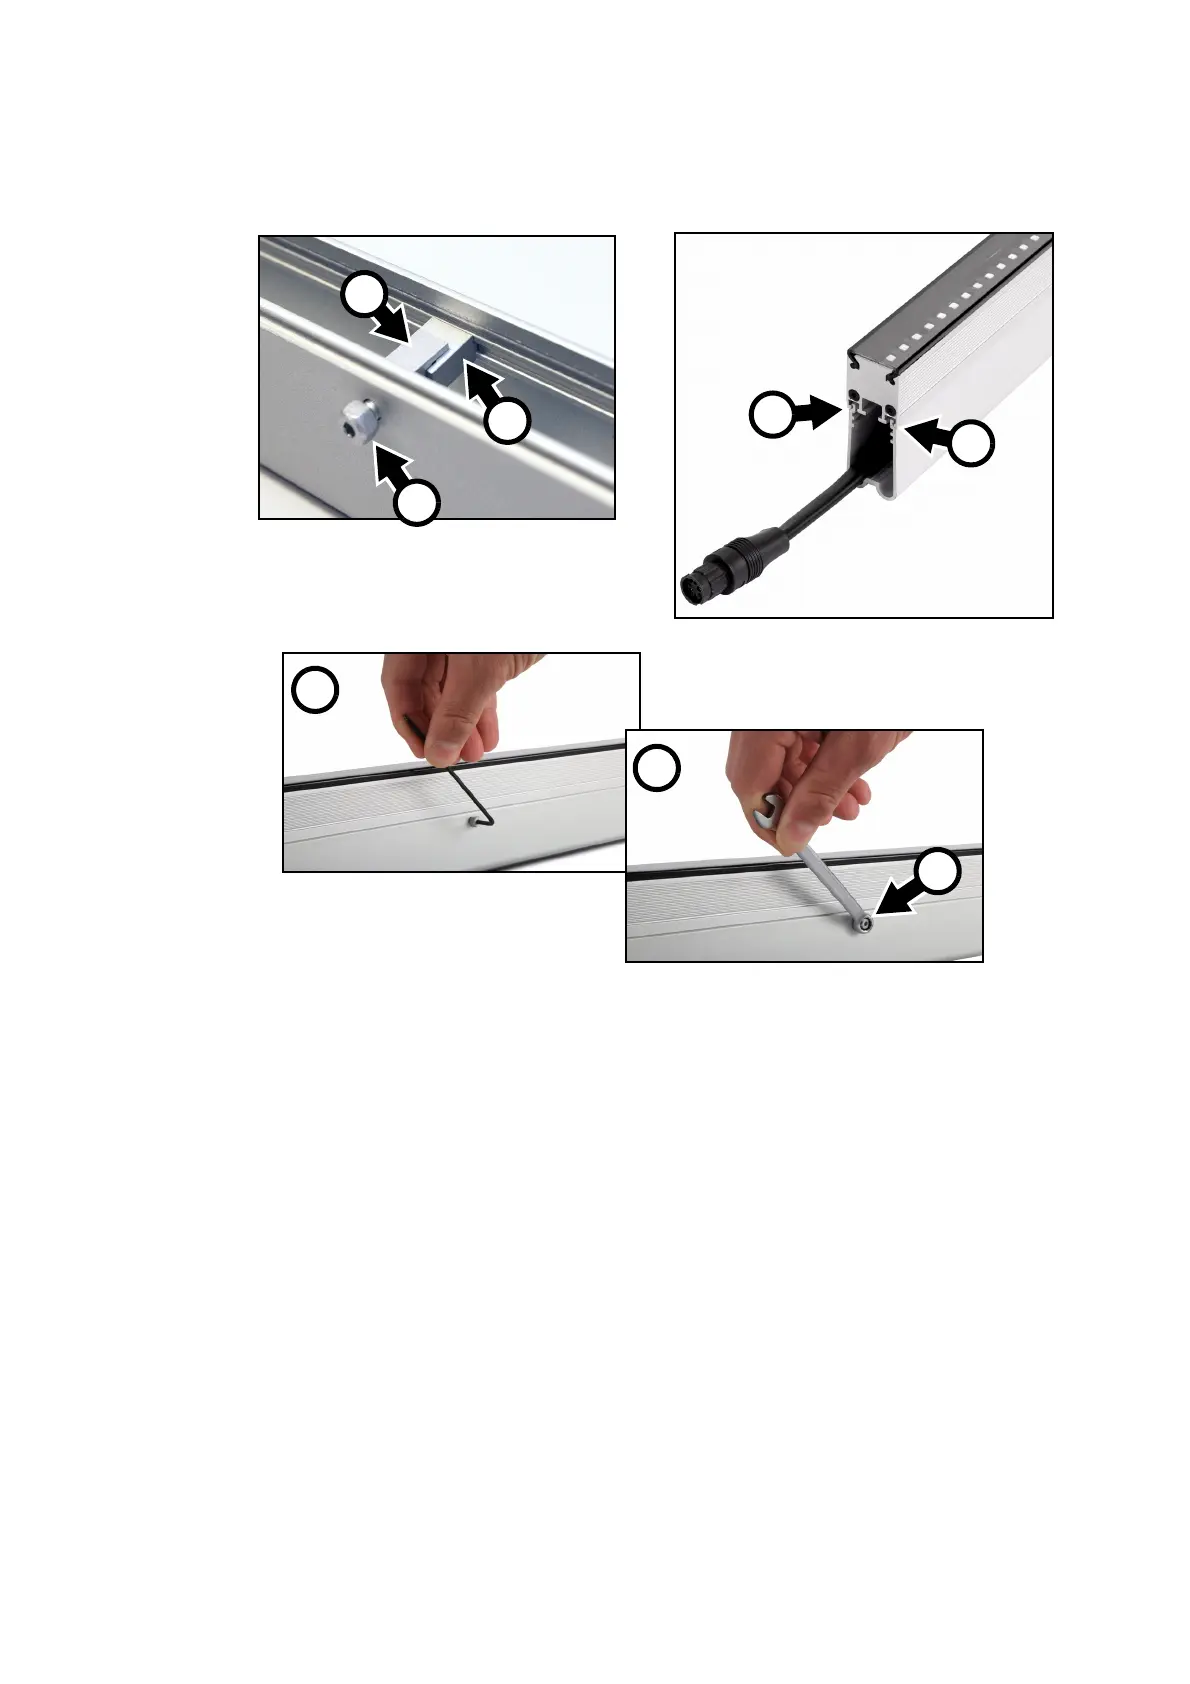
6. See Figure 5. Prepare one mounting profile lock C per 310/320 mm fixture or minimum three mounting
profile locks per 1270/1280 mm fixture. Apply a small quantity of Loctite 243 to the threads of the lock
bolts D. Place each lock C in position so that it engages with the grooves in the profile as shown at E and
tighten the bolt D finger-tight only.
7. Connect the fixture to the input cable or the previous fixture on the link, ensuring that connections are
correctly fastened together, then position the fixture on the profile so that the lips on the fixture engage in
the channels in the profile as shown at F.
8. Tighten the lock bolt on each mounting profile lock to secure the fixture in the profile. The bolt accepts a
2.5 mm Allen key G or a 7 mm wrench H. Tighten the bolt to a torque of 1 Nm (0.75 ft.-lbs.) using a
torque driver or torque wrench. When you have tightened the bolt, check that the head of the bolt D sits
flat against the mounting profile.
9. Check that the fixture is held securely. If necessary, leave a gap (see “Thermal expansion, end-to-end
gaps and pixel pitch” on page 13) before you install the next fixture.
Figure 5: Mounting Profile Lock
E
D
F
F
G
H
C
D
Bekijk gratis de handleiding van Martin Exterior PixLine 20, stel vragen en lees de antwoorden op veelvoorkomende problemen, of gebruik onze assistent om sneller informatie in de handleiding te vinden of uitleg te krijgen over specifieke functies.
Productinformatie
| Merk | Martin |
| Model | Exterior PixLine 20 |
| Categorie | Niet gecategoriseerd |
| Taal | Nederlands |
| Grootte | 5166 MB |


