Martin Exterior PixLine 20 handleiding
Handleiding
Je bekijkt pagina 12 van 44
12 Exterior PixLine™ User Manual
Physical installation
Warning! Read “Safety information” on page 5 before installing the Exterior PixLine and read all of
this ‘Physical installation’ chapter before starting work.
Warning! Thermal expansion can create a safety hazard and cause damage if fixtures are installed
end-to-end without a gap between them and exposed to temperature variations of +/- 5° C (+/- 9° F)
or more. In outdoor locations and all locations where significant temperature variations are present,
all Exterior PixLine mounting profiles and fixtures must be installed with a gap between the ends of
fixtures as described in this chapter to allow for thermal expansion.
You can install the Exterior PixLine on a surface or structure using two methods:
• You can fasten Exterior PixLine mounting profile into position first and then secure fixtures on the profile.
This option lets you conceal up to three cable runs inside the profile and gives a clean appearance.
• You can bolt Exterior PixLine fixtures directly to a structure or surface, using the channels in the base of
fixtures as tracks to hold M6 bolt heads.
The Exterior PixLine can be installed in any orientation.
Allow free airflow and 10 mm (0.4 in.) minimum clearance around the fixture. You must also allow clearance
around mounting locks for access with a wrench or Allen key (see Figure 5 on page 15).
Water and condensation
The Exterior PixLine is designed to withstand water projections such as rainfall and low-pressure water jets
and can be installed outdoors, but do not submerge it and do not install it in a location where water can build
up around the fixture. If necessary, provide drainage at the installation location.
Changing atmospheric conditions can cause condensation in lighting fixtures. Vents are provided at the end
of Exterior PixLine fixtures to allow moisture to leave the fixture, especially when the fixture heats up during
use, but condensation can still be visible under diffusers. Condensation is normal, the Exterior PixLine is
designed to withstand it, and it does not affect operation or product lifetime. Do not allow the vents to
become submerged or blocked.
Optimizing optical characteristics
If you install multiple fixtures that run parallel at the same angle,
install the fixtures with their male connectors at the same end,
running extension cables between female and male connectors if
necessary (see “Cables” on page 38). This will give the most even
optical characteristics.
Installing Exterior PixLine fixtures vertically in columns will give the
most even light output when viewing the installation from the side.
There is only a minor difference compared to fixtures installed
horizontally in rows, however, and any unevenness in horizontal
fixtures will only be visible when they are viewed from the side.
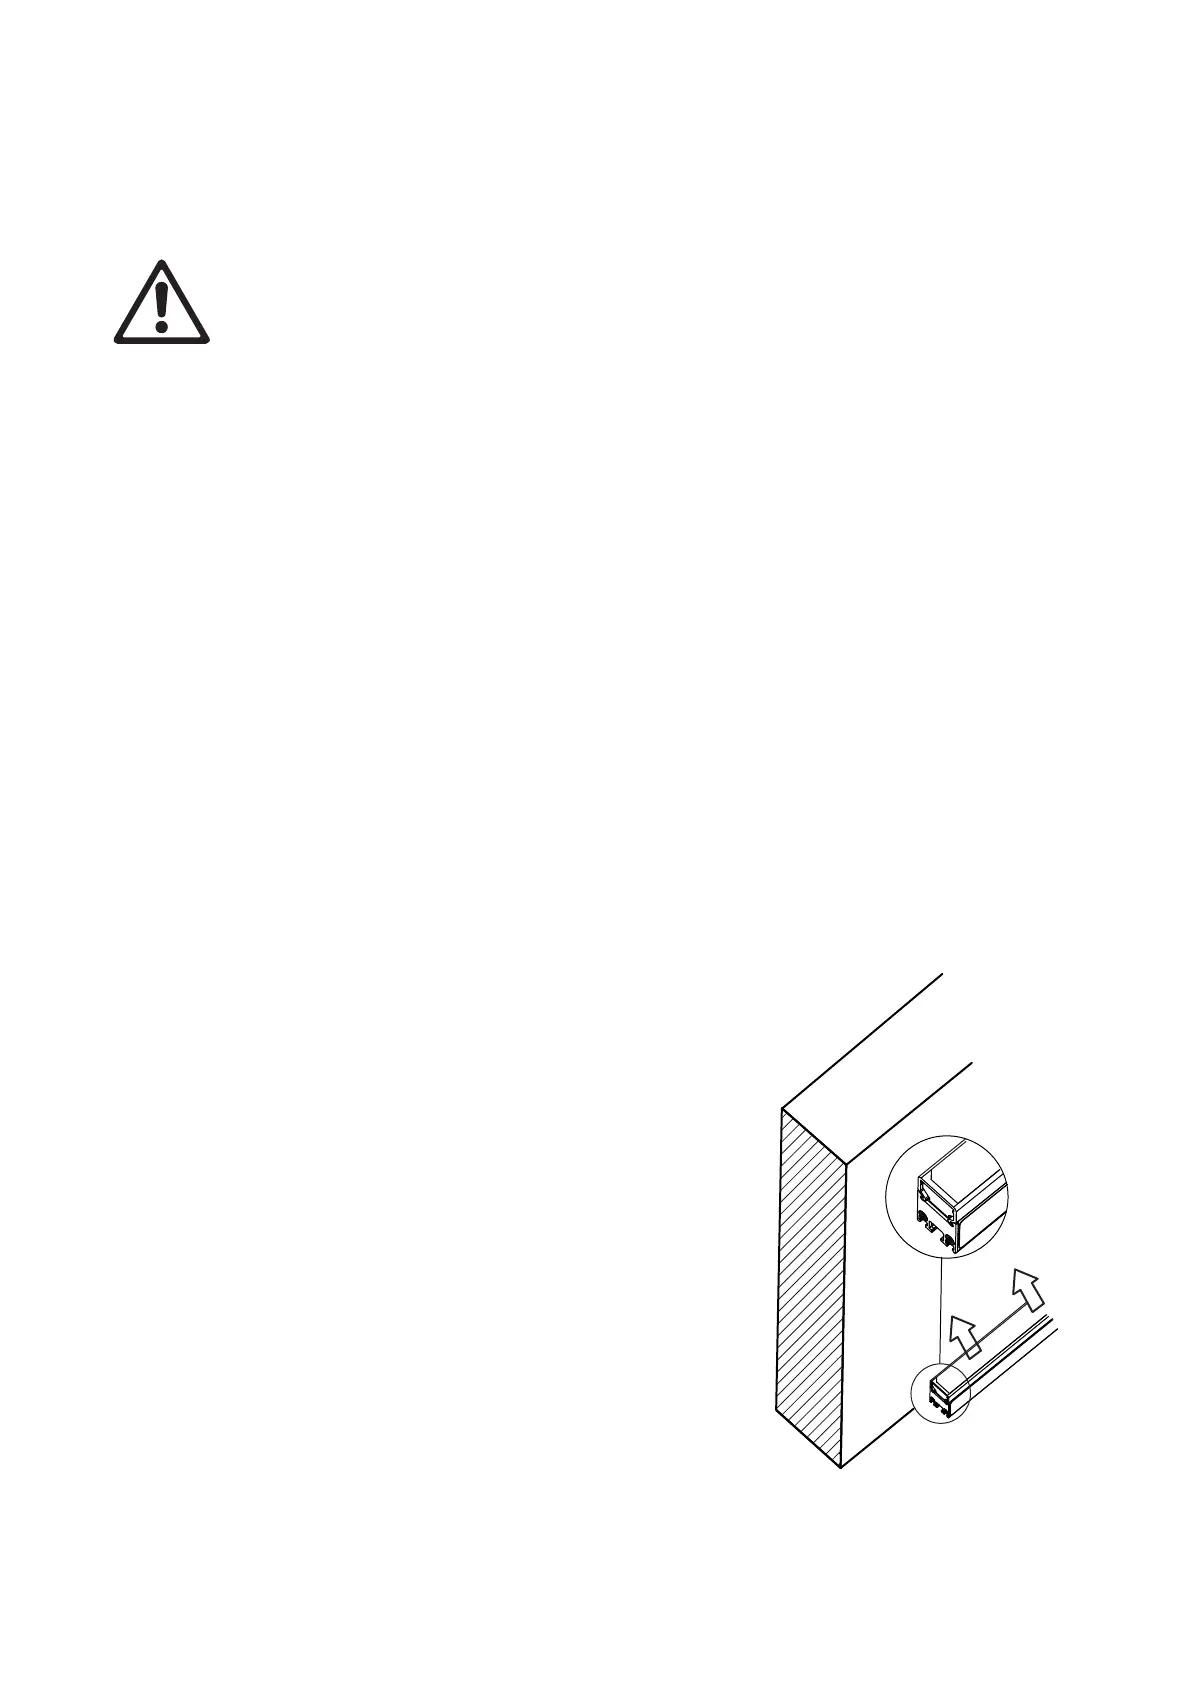
Identifying wallwasher optics
Wallwasher fixtures have an asymmetric beam, so they need to be
oriented correctly. See Figure 2. A small 45° cutout on one side of
the asymmetric lens sheet indicates the direction of the light
output. Install wallwasher fixtures with this cutout facing towards
the surface to be illuminated.
Figure 2: Wallwasher orientation
Bekijk gratis de handleiding van Martin Exterior PixLine 20, stel vragen en lees de antwoorden op veelvoorkomende problemen, of gebruik onze assistent om sneller informatie in de handleiding te vinden of uitleg te krijgen over specifieke functies.
Productinformatie
| Merk | Martin |
| Model | Exterior PixLine 20 |
| Categorie | Niet gecategoriseerd |
| Taal | Nederlands |
| Grootte | 5166 MB |


