Handleiding
Je bekijkt pagina 19 van 24
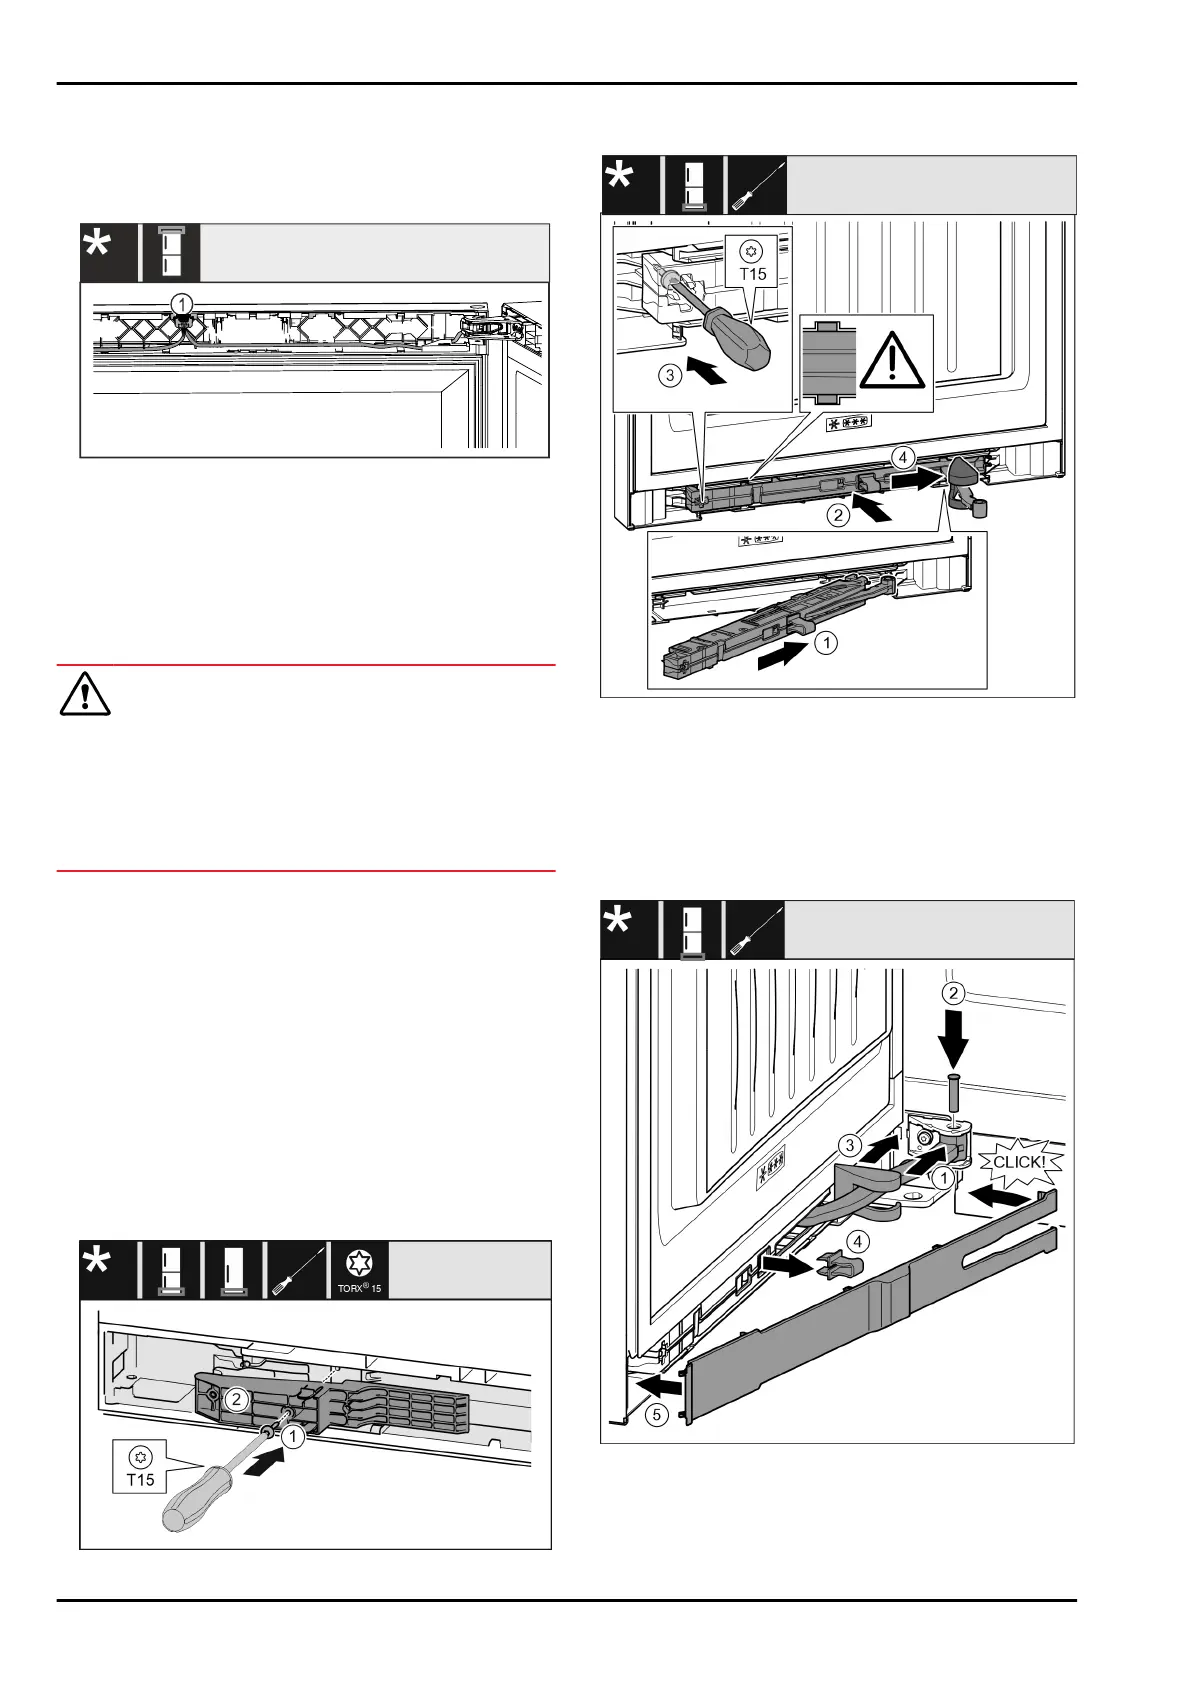
Fig. 45 Fridge/freezer combinations / freezers / refrigera‐
tors*
u
Insert the cable Fig.45(1) into the guide in the top door.*
u
Push the latching tab Fig.45(2) backwards.*
u
Engage the plug Fig.45(3).*
*
Fig. 46 For wine-freezer combinations*
u
Insert both cables into the top door.*
u
Snap the plug Fig.46(1) into the guide.*
u
Position the remaining cable length as a loop in the
guide, if required.
14.14 Aligning the doors
For all appliances:
WARNING
Danger of injury due to door falling out!
If the bearing parts are not screwed on tightly enough, the
door may fall out. This can result in serious injuries. In
addition, the door may not close with the result that the
appliance does not cool properly.
u
Screw the bearing brackets on firmly with 4Nm.
u
Check all screws and retighten them if necessary.
u
Align the doors flush with the appliance housing using
the two slots in the lower bearing bracket and centre
bearing bracket if needed. To do this undo the middle
screw in the bottom bearing bracket with the T20 tool
supplied. Undo the remaining screws a little with the T20
tool or with a T20 screwdriver and align using the slotted
holes. Undo the screws in the middle bearing bracket
with the T20 tool and align the middle bearing bracket
using the slotted holes.
u
Prop up the door: Take off the adjustable foot on the
bearing bracket using the open-ended wrench SW10 until
it comes into contact with the floor, then turn an addi‐
tional 90°.
14.15 Fitting the bottom soft stop mech‐
anism
Fig. 47*
u
Insert adapter Fig. 47(1) in the recess on the handle side.*
u
Tighten screw Fig. 47(2) with screwdriver.*
Fig.48
u
On the swap bearing block side, slide the closing damper
unit Fig.48(1) into the recess at an angle up to the stop.
u
Push the closing damper unit Fig. 48 (2) into the recess
completely.
w
The closing damper unit is positioned correctly if the
closing damper unit’s rib is in the guide.
u
Use a screwdriver to tighten the screw Fig.48(3).
u
Push the cover Fig.48(4) over the joint.
Fig. 49
The door is open 90°
u
Turn the joint Fig. 49(1) in the attachment.
u
Use a screwdriver to insert the bolt Fig. 49 (2) into the
attachment and the joint. Ensure that the latching cam is
in the groove properly.
Door hinge change
* Depending on model and options 19
Bekijk gratis de handleiding van Liebherr SWNsdh 5264 Prime, stel vragen en lees de antwoorden op veelvoorkomende problemen, of gebruik onze assistent om sneller informatie in de handleiding te vinden of uitleg te krijgen over specifieke functies.
Productinformatie
| Merk | Liebherr |
| Model | SWNsdh 5264 Prime |
| Categorie | Koelkast |
| Taal | Nederlands |
| Grootte | 6456 MB |


