Handleiding
Je bekijkt pagina 24 van 32
8.3.1 Removing / inserting the glass shelf
Make sure that the following requirements are fulfilled:
q
Glass shelf under the drawer: The drawer has been
removed. (see8.1 Drawers)
q
Pull-out board under IceTower: IceTower has been
removed. (see8.2 Pull-out board with IceTower)
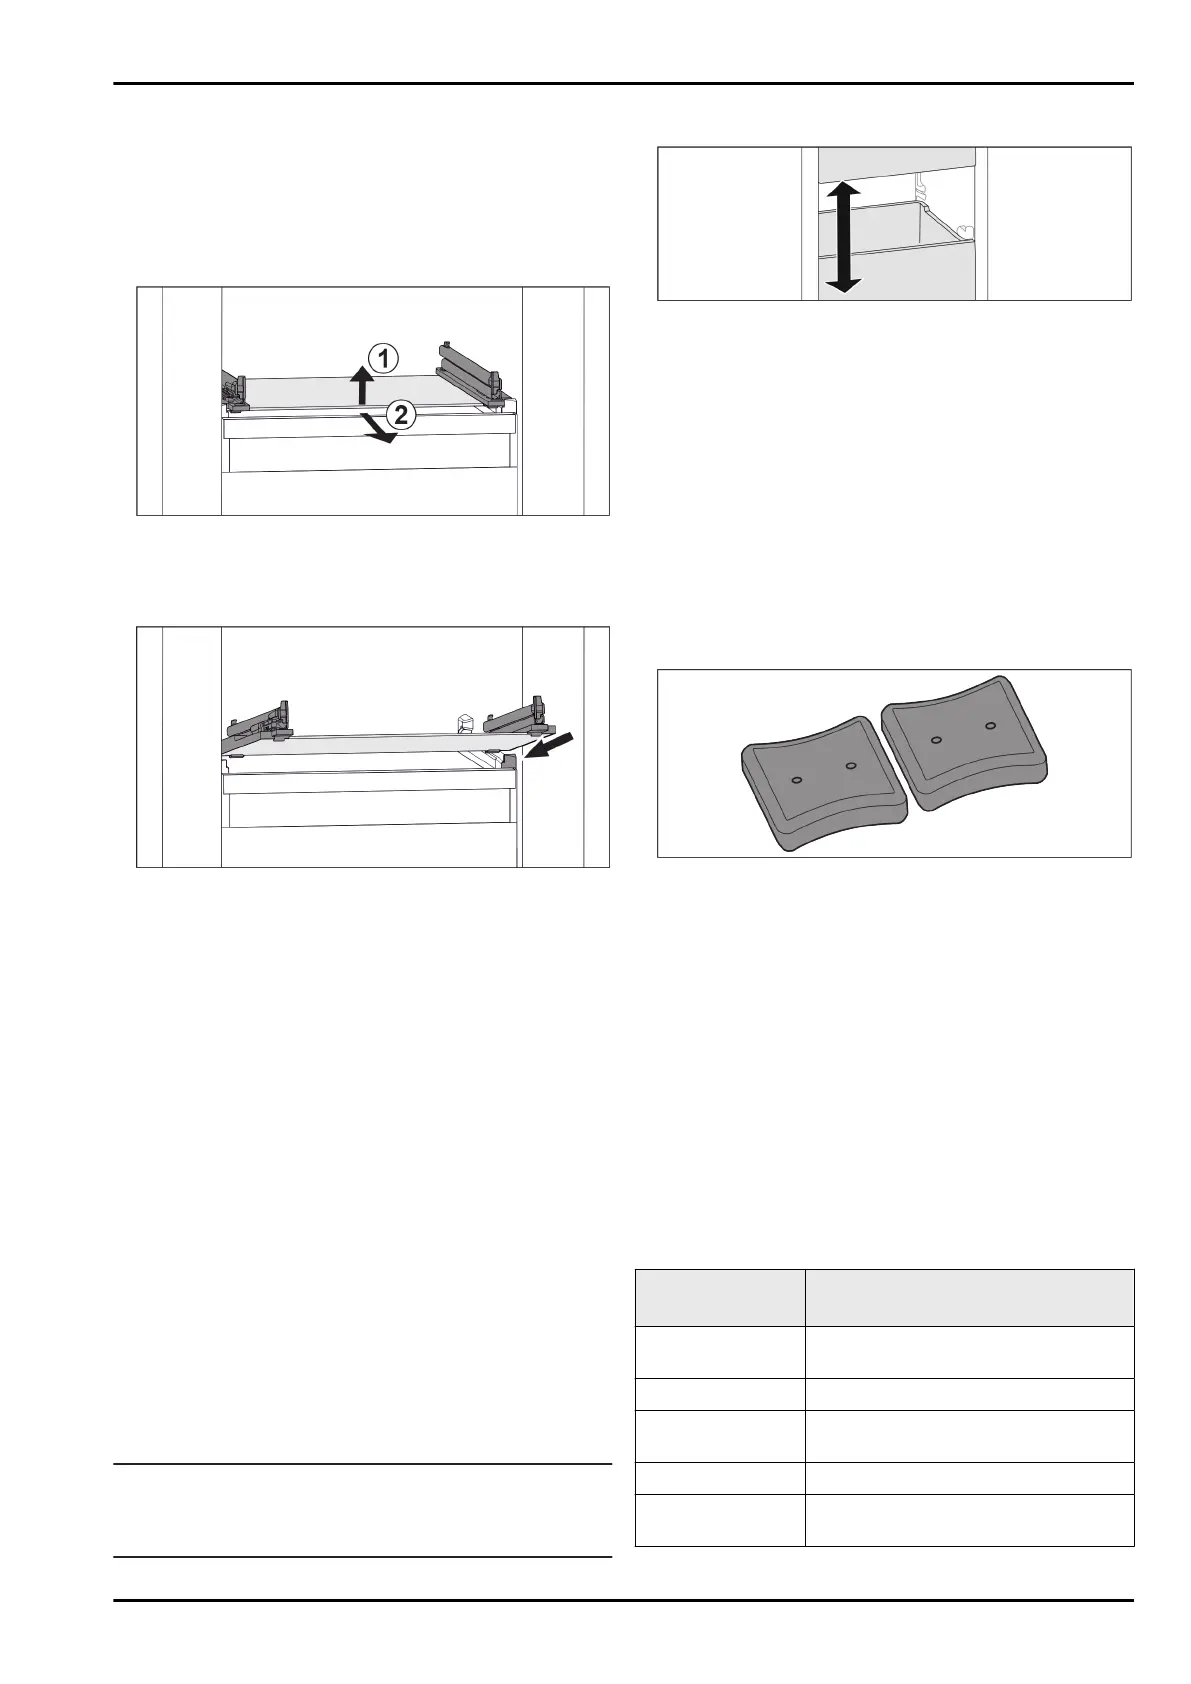
Removing glass shelf
Fig. 108 Example illustration of glass shelf
u
Lift glass shelf at the front. Fig. 108(1)
u
Take out glass shelf to the front. Fig. 108(2)
Inserting glass shelf
Fig. 109 Example illustration of glass shelf
u
Position glass shelf at an angle behind the stoppers. (see
Fig. 109)
u
Lower glass shelf.
u
Slide in glass shelf to the back.
8.4 IceMaker
The IceMaker will produce ice cubes for household use only.
Ensure that the following conditions are met:
-
The IceMaker is clean. (see9 Maintenance)
-
IceMaker drawer is cleaned.
-
IceMaker drawer is fully inserted.
8.4.1 Producing ice cubes
The volume depends on the freezing temperature. The
colder the temperature, the more ice cubes the system can
produce in a certain time period.
After the IceMaker is turned on for the first time, it can take
up to 24 hours for the first ice cubes to be made.
u
Activate the IceMaker function.
u
Producing many ice cubes: Activate the MaxIce function.
u
Distribute the ice cubes evenly in the drawer to increase
the capacity.
u
Closing the drawer: IceMaker starts making ice cubes
again automatically.
Note
When a certain level is reached in the IceMaker drawer, it
stops producing ice cubes. The IceMaker does not fill the
drawer all the way to the top.
8.5 VarioSpace
Fig. 110
You can remove drawers and glass panels from your appli‐
ance. This provides more room for large food items such as
poultry, joints of meat, large game, and tall baked products.
You can then freeze these items whole for later preparation.
u
Note the weight limits on the drawers and glass panels
(see 10.1 Technical specifications) .
8.6 Freezer pack
Freezer packs prevent the temperature rising too quickly
should there be a power cut.
The freezer packs are in the drawer.
You can store the freezer packs in the freezer tray.
8.6.1 Using the freezer pack
Fig.111
When the freezer packs are fully frozen:
u
Place on the frozen goods in the top, front part of the
freezer.
9 Maintenance
9.1 Disassembling / assembling pull-
out systems
9.1.1 Notes on disassembly
You can disassemble some of the pull-out systems for
cleaning. Your appliance can contain a variety of pull-out
systems.
The following pull-out systems can be disassembled or
cannot be disassembled:
Pull-out system
can be disassembled/
cannot be disassembled
Drawer guided on
glass shelf
can be disassembled (see Drawer on
glass shelf)
Top tiltable drawer cannot be disassembled
Drawer guided on
container rib*
can be disassembled
(see 9.1.3 Drawer on moulded rib*) *
Bottom drawer cannot be disassembled
IceTower can be disassembled
(see 9.1.4 IceTower)
Maintenance
24 * Depending on model and options
Bekijk gratis de handleiding van Liebherr SFNstd 529i Peak NoFrost, stel vragen en lees de antwoorden op veelvoorkomende problemen, of gebruik onze assistent om sneller informatie in de handleiding te vinden of uitleg te krijgen over specifieke functies.
Productinformatie
| Merk | Liebherr |
| Model | SFNstd 529i Peak NoFrost |
| Categorie | Vriezer |
| Taal | Nederlands |
| Grootte | 5194 MB |
Caratteristiche Prodotto
| Apparaatplaatsing | Vrijstaand |
| Soort bediening | Touch |
| Kleur van het product | Roestvrijstaal |
| Deurscharnieren | Links |
| Ingebouwd display | Ja |


