Handleiding
Je bekijkt pagina 31 van 38
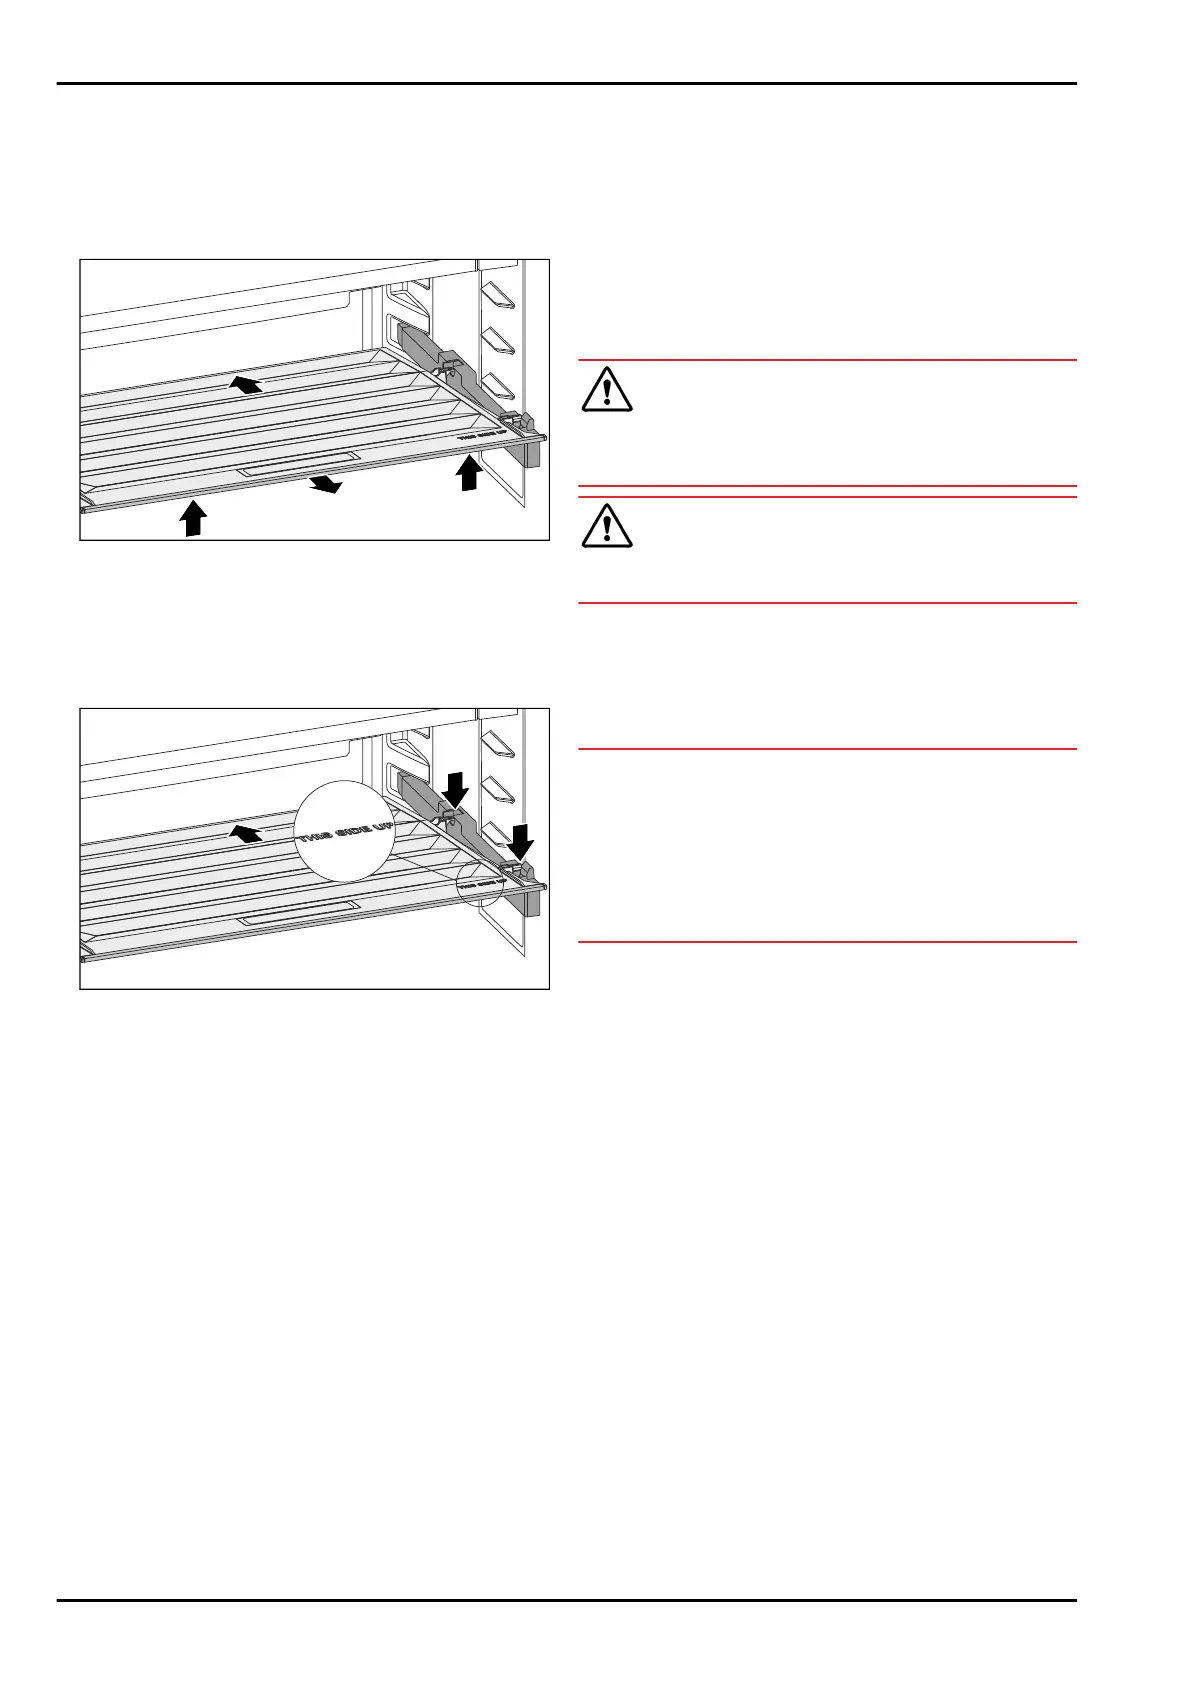
9.3.1 Removing the compartment lid
Ensure that the following requirements are met:
❑
The shelf directly above the drawer has been removed.
(see8.2 Shelves)
❑
The drawer directly below the compartment lid has been
removed. (see8.6 Drawers)
Fig. 153
► Push the compartment lid backwards.
► Lift the compartment lid forwards.
► Remove the compartment lid forwards and upwards at an
angle.
9.3.2 Inserting the compartment lid
Fig. 154
If the THIS SIDE UP lettering is at the top:
► Insert the rear retaining parts into the relevant rear open‐
ings.
► Push the compartment lid backwards.
► Lower the compartment lid forwards and engage the
front retaining parts into the openings.
► Move the compartment lid into the required position.
9.4 Defrosting the appliance
9.4.1 Defrosting the fridge compartment
Defrosting is performed automatically. The water from the
thawing process drains through the outlet and evaporates.
Water drops or a thin layer of frost or ice can form on the
back wall; this is a completely normal part of the applian‐
ce’s function. This must not be removed.*
A layer of frost or ice can from briefly due to the energy-
optimised control of the device.*
► Clean the drain opening at regular intervals.
(see 9.5Cleaning the appliance)
9.4.2 Defrosting the freezer compartment with
NoFrost
Defrosting is performed automatically with the NoFrost
system. The moisture is deposited on the evaporator, is peri‐
odically defrosted and evaporates.
The appliance does not have to be defrosted.
9.5 Cleaning the appliance
9.5.1 Ready
WARNING
Danger of electric shock!
► Remove the refrigerator connector or interrupt the power
supply.
WARNING
Risk of fire
► Do not damage the refrigeration circuit.
► Empty the appliance.
► Remove mains connector.
-or-
► Activate CleaningMode. (seeCleaningMode)
9.5.2 Cleaning the interior
NOTICE
Improper cleaning!
Damage to the appliance.
► Only use soft cleaning cloths and ph-neutral all-purpose
cleaners.
► Do not uses abrasive sponges or steel wool which may
cause scratches.
► Do not use any sharp or abrasive cleaning agents, nor
any that contain sand, chloride or acid.
► Plastic surfaces: clean by hand with a soft clean cloth,
lukewarm water and a little detergent.
► Metal surfaces: clean by hand with a soft clean cloth,
lukewarm water and a little detergent.
► Drain hole: remove deposits using a thin item (for
example a cotton bud).
9.5.3 Cleaning the dry rear panel*
You can remove the dry rear panel for cleaning.
Removing the rear panel
► Remove all equipment parts.
Maintenance
* Depending on model and options 31
Bekijk gratis de handleiding van Liebherr ICN 5103 Pure, stel vragen en lees de antwoorden op veelvoorkomende problemen, of gebruik onze assistent om sneller informatie in de handleiding te vinden of uitleg te krijgen over specifieke functies.
Productinformatie
| Merk | Liebherr |
| Model | ICN 5103 Pure |
| Categorie | Koelkast |
| Taal | Nederlands |
| Grootte | 5643 MB |


