Kichler Spyn Lite handleiding
Handleiding
Je bekijkt pagina 13 van 57
1352" Spyn Lite
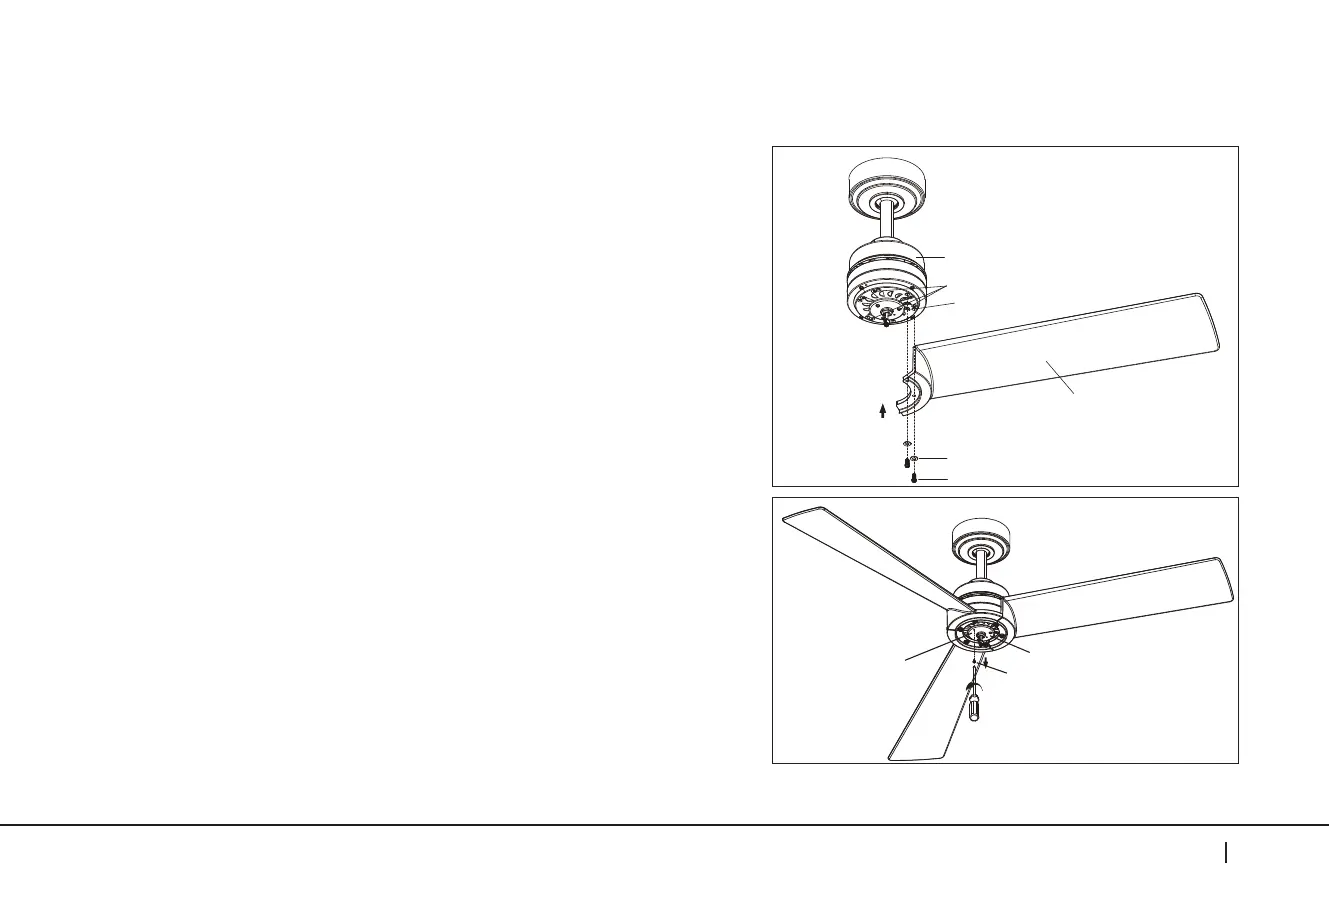
ATTACHING THE FAN BLADES
INSTALLING THE SWITCH COVER
Motor Body
Motor Flywheel
Label (A/B/C)
Fan Blades
Washers
Fan Blade Mounting Screws
Fig. 17
Fig. 18
Mounting Plate Screw
Mounting Plate
CAUTION: Before continuing installation, confirm that the power is
still turned o at the main circuit breaker or by removing the circuit
fuse. Turning the power o using a wall switch is not sucient to
prevent electrical shock.
CAUTION: Before continuing installation, confirm that the power is still
turned o at the main circuit breaker or by removing the circuit fuse.
Turning the power o using a wall switch is not sucient to prevent
electrical shock.
Step 1. NOTE: The holes in the fan blades and the holes in the motor
flywheel are marked "A", “B", or "C".
Line up the holes in the fan blades with the holes in the motor flywheel
(Line up A to A, B to B, and C to C). Attach fan blades to the flywheel
with the washers and fan blade mounting screws provided. Tighten
to secure. (Fig. 17)
Step 1. Remove the mounting plate screw that is marked with a brown
dot label from the mounting plate. Retain mounting plate screw.
Loosen the other two mounting plate screws (do not remove). (Fig. 18)
Brown Dot Label
Bekijk gratis de handleiding van Kichler Spyn Lite, stel vragen en lees de antwoorden op veelvoorkomende problemen, of gebruik onze assistent om sneller informatie in de handleiding te vinden of uitleg te krijgen over specifieke functies.
Productinformatie
| Merk | Kichler |
| Model | Spyn Lite |
| Categorie | Ventilator |
| Taal | Nederlands |
| Grootte | 4203 MB |


