Handleiding
Je bekijkt pagina 15 van 90
Installation Instructions
(for 18000 and 25000Btu/h)
Installation
Instructions
Page 14
BEFORE YOU BEGIN
Read these instructions completely and
carefully.
IMPORTANT-Save these instructions for
local inspector
’
s
use.
IMPORTANT-Observe all governing codes
and ordianaces.
Note to Installer- Be sure to leave these
instructions with the Consumer.
Note to Consumer- Keep these
instructions for futrue reference.
Skill level- Installation of this appliance
requires basic mechanical skills.
Completion time- Approximately 1 hour.
We recommend that two people install
this product.
Proper installation is the responsibility of
the installer.
P
roduct failure due to improper installation
is not covered under the Warranty.
You MUST use all supplied parts and use
proper installation procedures as described
in these instructions when installing this
air conditioner.
NOTE:
Save Carton and these Installation Instr-
uctions for future reference. The carton
is the best way to store unit during
winter, or when not in use.
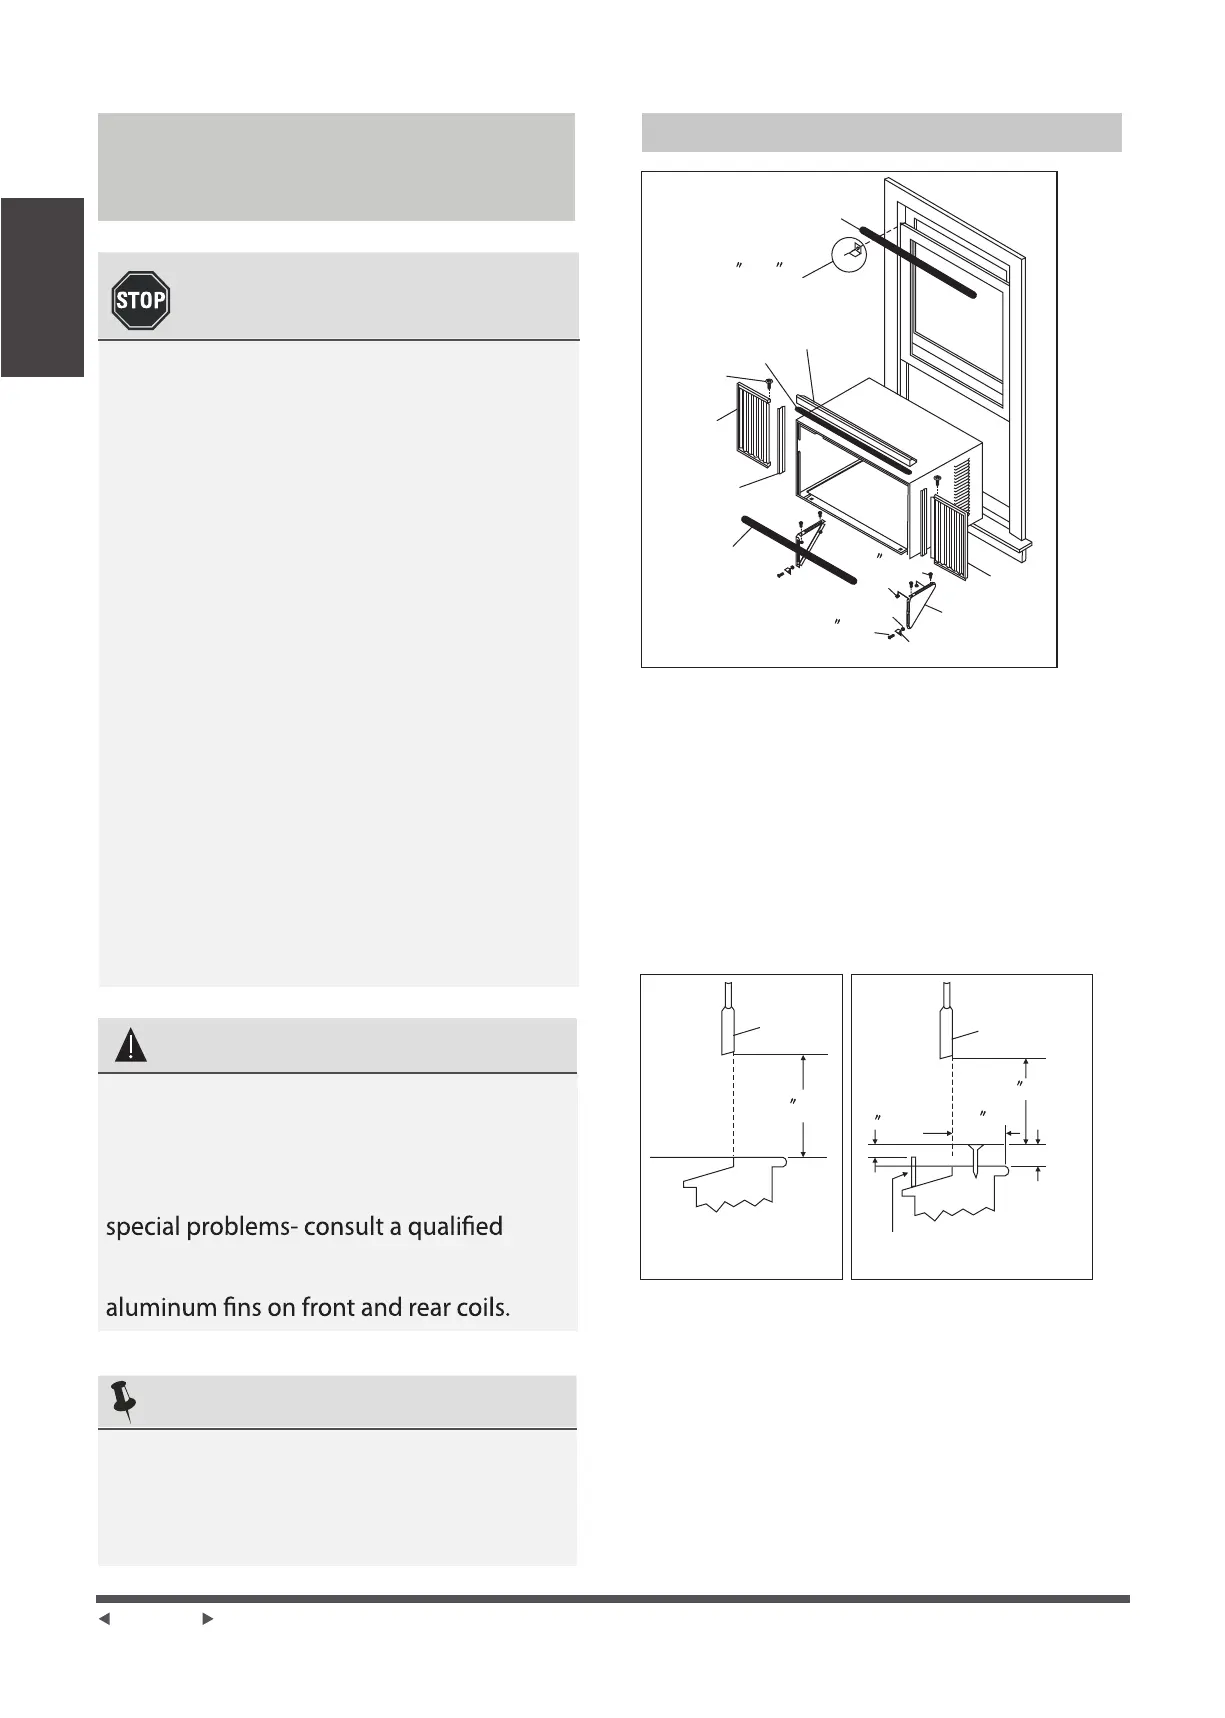
1 .Check window opening size-- the moun-
ting parts furnished with this air conditioner
are made to install in a wooden sill double-hung
window. The standard parts are for window
dimensions listed above. Open sash to a mini-
mum of 19 inches(483mm). See Fig.D.
2.Check condition of window-- all wood
parts of window must be in good shape and
able to firmly hold the needed screws. If not,
make repairs before installing unit.
Do the following before starting to install unit.
See illustrations below.
Check dimensions of your unit to determine
model type:
Unit Height: 18 " 17 "
Unit Width: 26 " 23 "
Min. Window Opening: 19 " 18 "
Min. Window Width: 31" 28"
Max. Window Width: 42" 40 "
1
2
/
1
2
/
1
2
/
1
2
/
5
8
/
5
8
/
5
8
/
SASH
.
19 MIN.
indow Frame or
bstruction
Storm Window
Frame or Other
Obstruction
Board
Thickness
As Required,
Along Entire
Sill. Fasten
With Two Nails
Or Screws.
/2 MIN.
1
/2 MIN.
1
19 MIN.
SASH
Window Sash Seal
Safety Lock and
3 /4 (or1/2 ) Long
Hex Head Screw
Top Angle
Foam Gasket
Washer Head
Locking screw
Frame
Assembly
(Left)
Side Retainer
Bottom rail
seal to Unit
1 /2 Long
Screw and
Locknuts
Locknut
3 /4 Long
Flat Head
Bolt
Sill Angle
Bracket
Window Support
Bracket
Frame
Assembly
(Right)
Preliminary Instructions
Fig.D Fig.E
to
avoid cuts from sharp metal edges and
electircian. When handling unit, be careful
Aluminum house wiring may present
the
power
cord of the air
conditioner.
power
cord. Do not change the plug on
remove the third (ground) prong from the
Do not, under any circumstances, cut or
CAUTION
Bekijk gratis de handleiding van Keystone KSTAW08CE, stel vragen en lees de antwoorden op veelvoorkomende problemen, of gebruik onze assistent om sneller informatie in de handleiding te vinden of uitleg te krijgen over specifieke functies.
Productinformatie
| Merk | Keystone |
| Model | KSTAW08CE |
| Categorie | Airco |
| Taal | Nederlands |
| Grootte | 15608 MB |


