Juki MF-3580 handleiding
Handleiding
Je bekijkt pagina 102 van 440
− 30 −
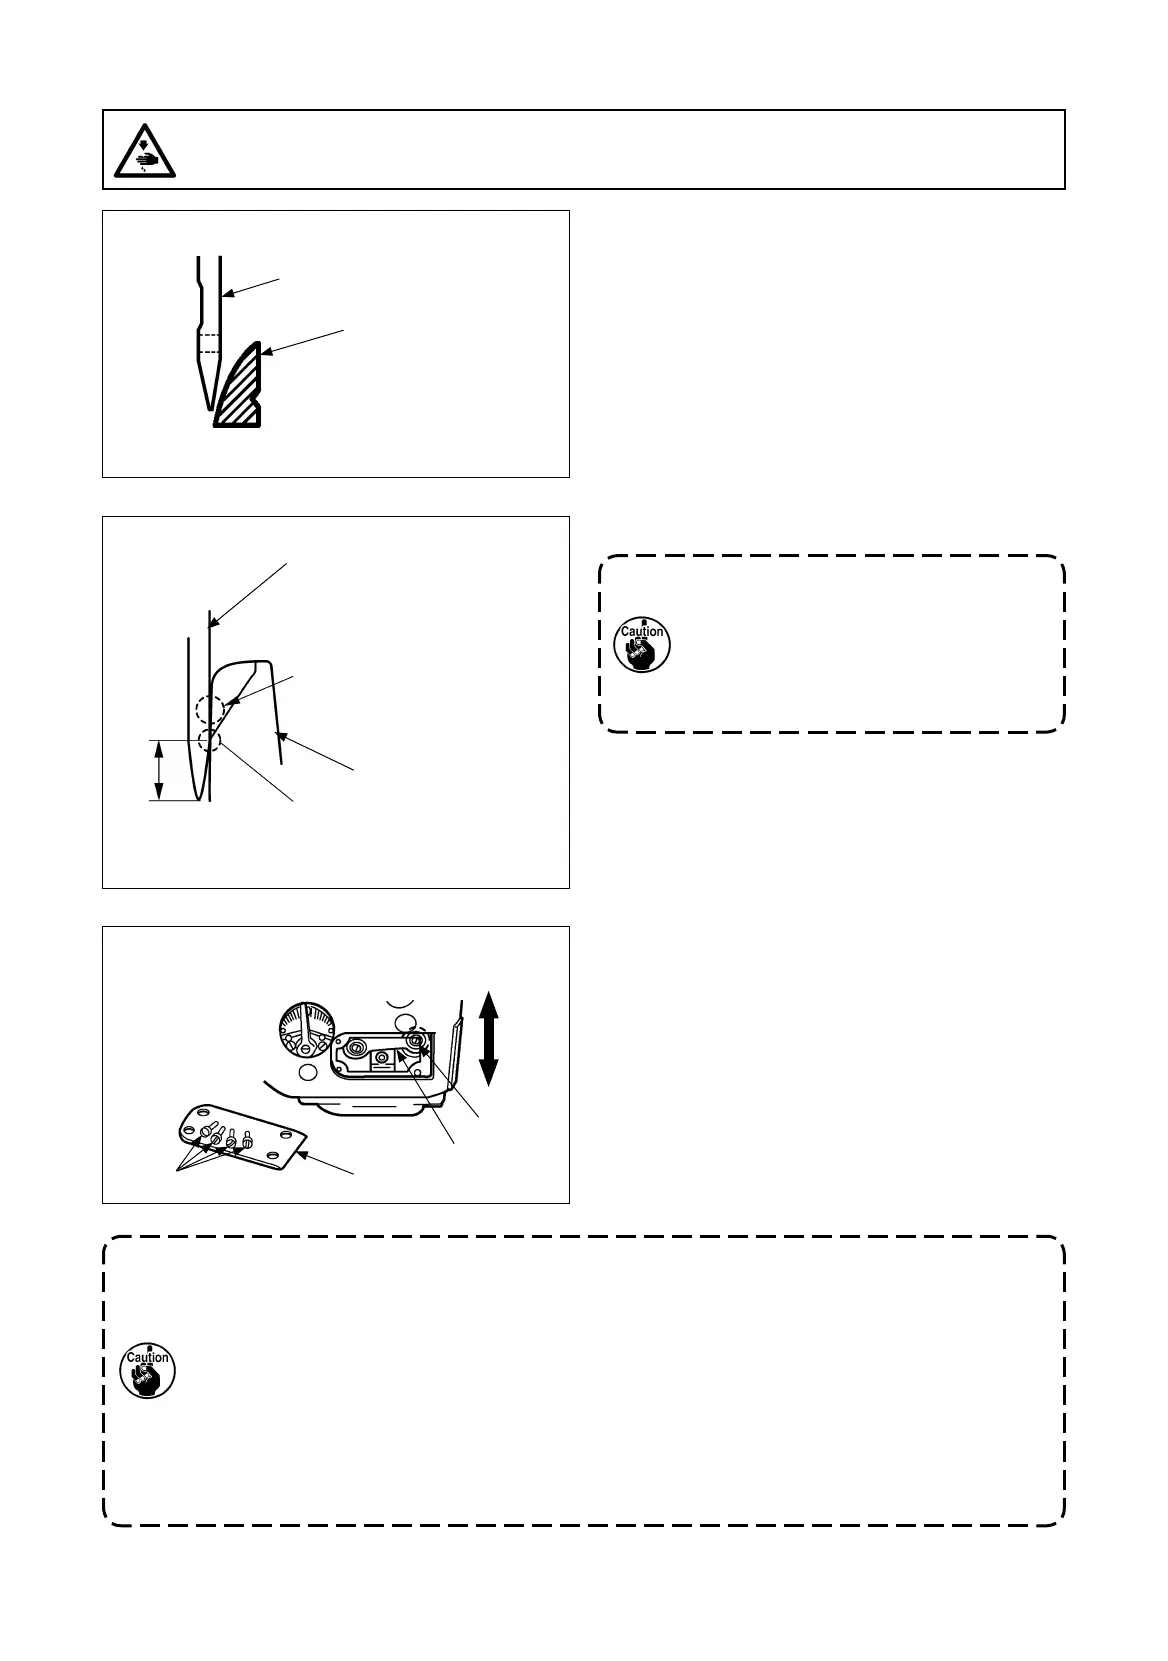
6. Adjustment of the looper motion paths
(1)
Looper momentum in the front-rear direction
1)
The standard position of the front looper
1
is decided
under the condition that the tip of the needle
4
touches
the rear of the front looper
1
at 1/3 from the bottom
surface when the pulley is rotated counterclockwise
and the front looper
1
is moved from right to left after
mounting the front looper
1
in a standard manner.
2)
While the looper is moving backward, the side face of
the needle should comes in contact with the back side
of the looper when the needle tip is 1 mm or more away
from the middle of the back ridge of the looper.
(Front, middle and rear loopers)
When the material has a section which has
a large difference in height, the depth of
back-to-back contact between the needle
tips and loopers (
2
and
3
) has to be de-
creased. (In order to prevent the needle tip
from being crushed.)
WARNING :
Perform the work after turning OFF the power to prevent accidents caused by the abrupt start of the
sewing machine.
(2) Adjustment of longitudinal movement of
the looper with differential feed
1) Loosen the setscrews
7
(4 pcs.) and remove the
cylinder side cover
8
.
2) Loosen the setscrew
!0
of the ball joint
9
with a
spanner wrench, and adjust the forward/reverse
movement by moving the setscrew
!0
forward or
backward.
3) After adjustments, mount the cylinder side cover
8
,
and tighten the setscrews
7
.
™
When reducing the front and rear momentum
amount of the looper, move the ball joints
9
upwards.
™
When increasing the front and rear momentum
amount of the looper, move the ball joints
9
downwards.
Model with differential feed
Up-down
direction
7
8
9
!0
4
・
5
・
6
1
・
2
・
3
Back ridge
4
・
5
・
6
1
・
2
・
3
The ridge of the needle tip
should come in contact with
the looper at a point that is 1
mm or more from the bottom.
1 mm or more
1. When the front and rear momentum of the looper has been adjusted, move the respective looper
bases
!1
,
!2
and
!3
, and readjust the front/rear positions of the needles (
4
,
5
and
6
) and the
loopers (
1
,
2
and
3
).
2. When the above-mentioned adjustments are carried out, the throat plate
!4
should be removed.
3. When the front and rear momentum amount of the looper is small :
The amount of contact becomes large between tips of the needles (
4
,
5
and
6
) and rear parts
of the loopers (
1
,
2
and
3
) and this can be a cause of needle tip being blunt.
4. When the front and rear momentum amount of the looper is large :
The clearance becomes large between tips of the needles (
4
,
5
and
6
) and rear parts of the
loopers (
1
,
2
and
3
) and this can be a cause of stitch skipping.
Bekijk gratis de handleiding van Juki MF-3580, stel vragen en lees de antwoorden op veelvoorkomende problemen, of gebruik onze assistent om sneller informatie in de handleiding te vinden of uitleg te krijgen over specifieke functies.
Productinformatie
| Merk | Juki |
| Model | MF-3580 |
| Categorie | Naaimachine |
| Taal | Nederlands |
| Grootte | 79694 MB |


