Juki MF-3580 handleiding
Handleiding
Je bekijkt pagina 101 van 440
− 29 −
5. Adjusting the height of the needle bar
(1) Height of the needle bar
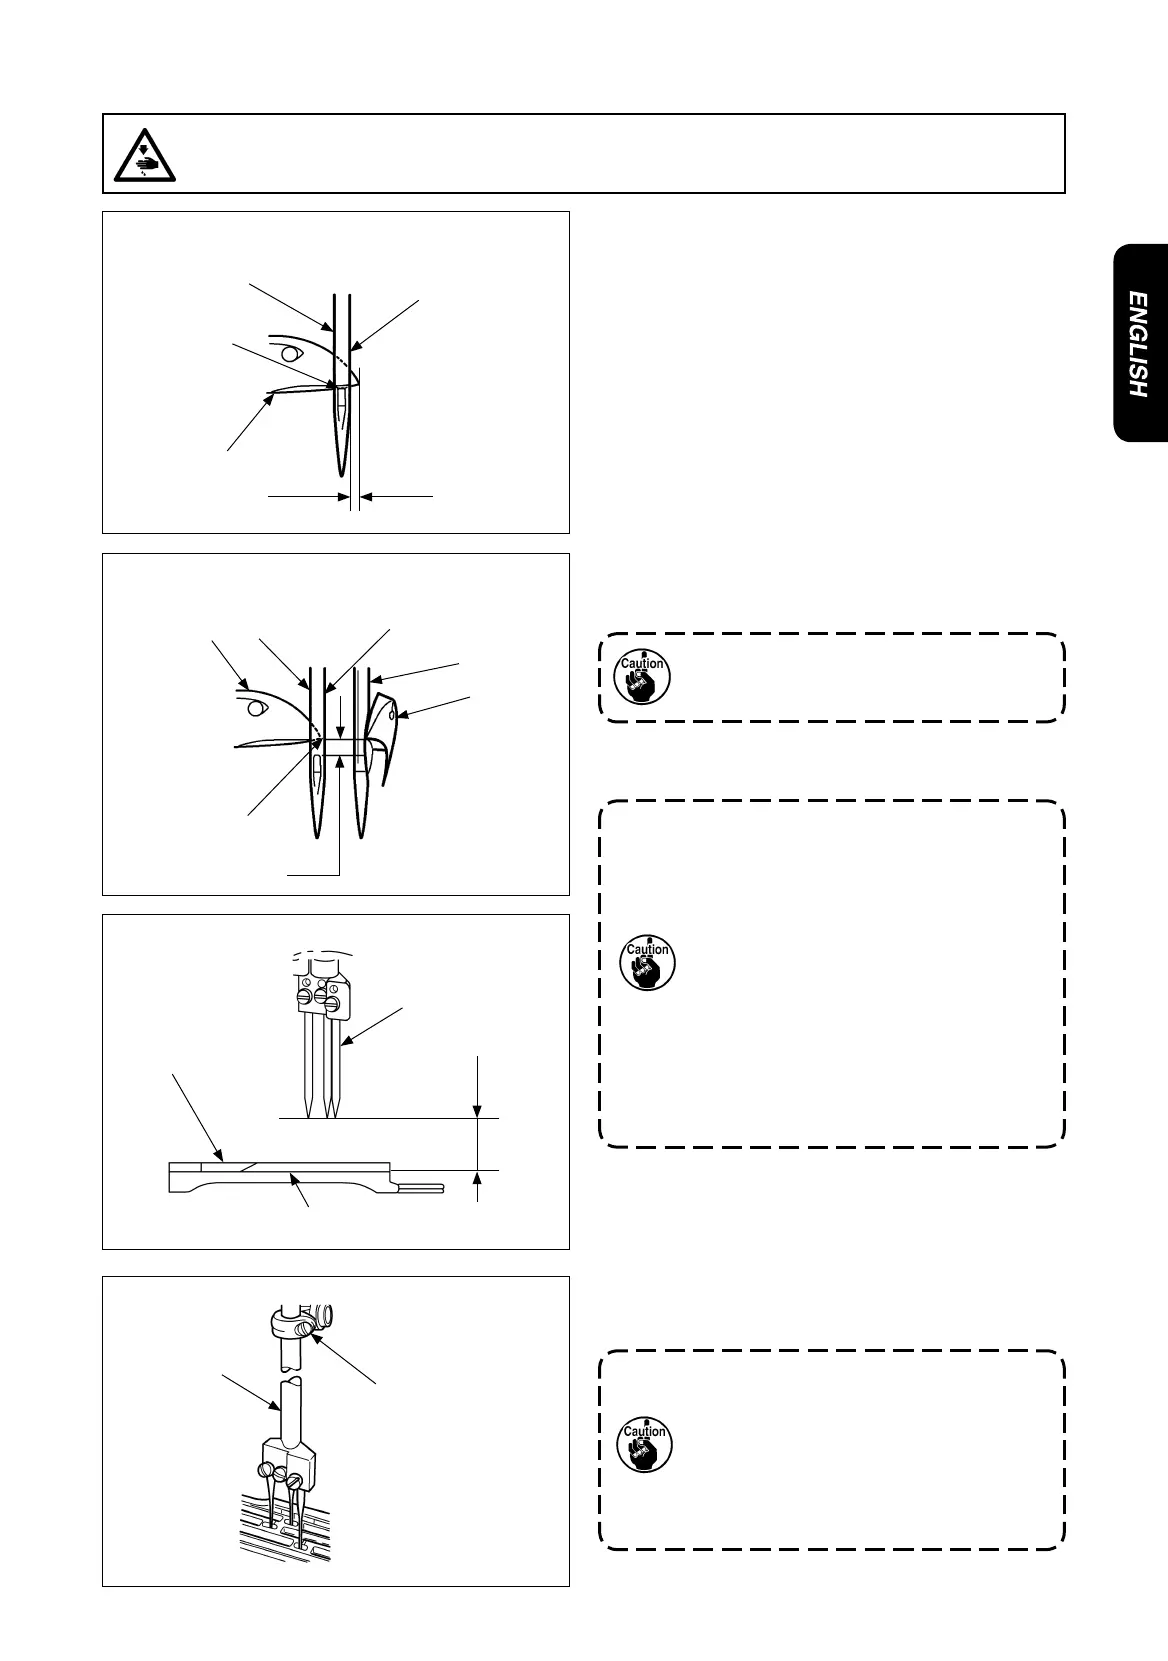
1) Alignment between the bottom surface of the front
looper and the top hole end of the left needle
When the pulley is rotated counterclockwise and the
bottom surface of the front looper
1
is aligned with
the top hole end of the left needle
2
, the standard
needle bar height is achieved by adjusting the
distance from the tip of the front looper
1
the right
surface of the left needle
2
to 0.8 mm.
2) Alignment between the tip of the front looper and the
left surface of the left needle
When the pulley is rotated counterclockwise and
the tip of the front looper
1
is aligned with the right
surface of the left needle
2
, the standard needle bar
height is achieved by adjusting the distance from the
bottom surface of the front looper
1
to the top hole
end of the left needle
2
to 1.6mm .
1. Needle entry adjustment is performed in
accordance with the temporary needle
bar height.
When the needle bar is at the upper
dead point, the temporary clearance be-
tween the top surface of the throat plate
3
and the tips of the needles
2
is 12.5
mm.
2. The needle bar height is temporarily
adjusted for needle entry adjustment. If
there is no problem with the needle bar
height, readjustment of the needle bar
height is not required.
Advance to the next step.
3) Checking of the middle and rear looper heights shall
be also checking of each looper return.
For adjusting the needle bar height, select
an easier-to-adjust one from either 1) or 2)
mentioned above.
(2) Adjustment of the needle bar height
1) Remove the needle bar, roller cover, surface cover,
and packing.
2) Loosen the setscrew
4
and adjust the needle bar
5
position vertically.
3) After adjustment, tighten the setscrew
4
.
1. Use caution not to rotate the needle bar
5
at adjustment of needle bar height.
Failure to observe this changes needle
entry positions.
2. Remarkably improper needle bar height
adjustment may cause stitch skipping,
needle breakage, or thread breakage.
Alignment between the bottom surface of the looper
and the top hole end of the needle
Alignment between the tip of the looper and the right
surface of the needle
2
1
Right surface of
the left needle
Alignment
0.8mm
2
1
2
1
1.6mm
Right surface of
the left needle
Alignment
Temporary needle bar height
12.5mm
2
3
Top surface of the throat plate
5
4
Torque
2.1 to 2.4N•m
WARNING :
Perform the work after turning OFF the power to prevent accidents caused by the abrupt start of the
sewing machine.
Bekijk gratis de handleiding van Juki MF-3580, stel vragen en lees de antwoorden op veelvoorkomende problemen, of gebruik onze assistent om sneller informatie in de handleiding te vinden of uitleg te krijgen over specifieke functies.
Productinformatie
| Merk | Juki |
| Model | MF-3580 |
| Categorie | Naaimachine |
| Taal | Nederlands |
| Grootte | 79694 MB |


