Janitza 800-CT8-LP handleiding
Handleiding
Je bekijkt pagina 27 van 56
27
www.janitza.com 800-CT8-LP module
ESC
Duration
Confirm Ok
30
Module position
1
Identify single module
Item Description
1
Blink "orange" during operation and signaling cyclic
data exchange (Tx ... Transmit data, Rx... Receive
data).
2
Lights "green" if the supply of power via the JanBus
interface of the basic device is correct, the device is
ready for operation (P ... Power).
3
Lights "red" during initialization/startup and in the
event of a fault (error). Note in this regard Sect.
“15.2 Modules - Error cases” on p. 53.
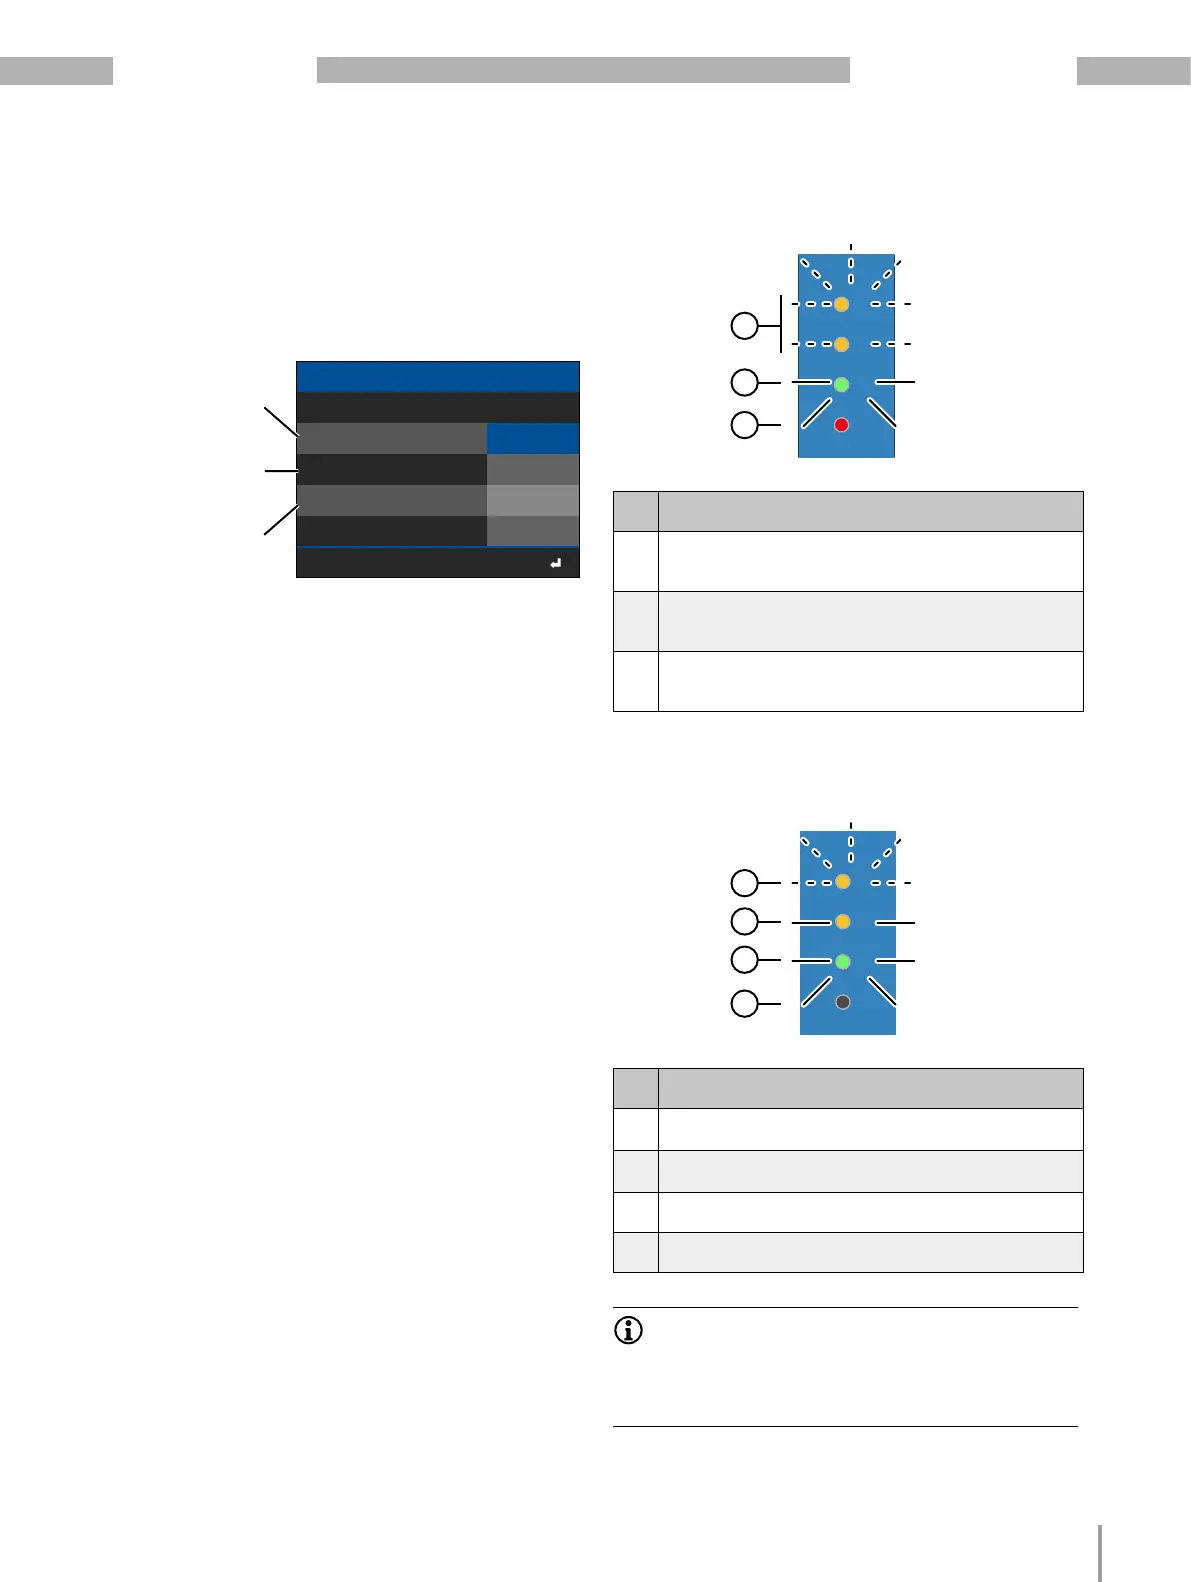
LED status of the module in operation:
Tx
Rx
P
E
1
2
3
LED status of the module during module
identification:
Tx
Rx
P
E
1
2
4
3
Item Description
1
Blinks "orange" for the Duration of the module
identification.
2
Lights "orange" for the Duration of the module
identification.
3 Lights "green".
4 “Off”
INFORMATION
During the Duration of individual module iden-
tification , the blink intervals of all other modules
connected to the basic device are paused!
7.3.2 Entry Identify one module
· In the Diagnostics window, use buttons 2 “5” and
5 “6” to select the menu item Identify one module
and confirm with button 3 Enter.
· The Identify one module window appears.
· In the Identify one module window, use keys 2 “5”
and 5 “6” to select the menu item Module position
and confirm with key 3 Enter.
· The entry Module position blinks.
· Use the keys 2 "5" and 5 "6" to enter the position
number of the module to be identified (the position
number depends on the number of modules con-
nected in series to the basic device).
· Confirm the entry with key 3 Enter.
· Use keys 1 ESC and key 5 "6" to access the entry
Duration.
· Press button 3 Enter.
· The first digit of the entry Duration blinks.
· Use buttons 4 () and 6 () to change the position
of the digit to be set and buttons 2 (5) and 5 (6) to
change the digit (-1/+1).
· Confirm your entries with key 3 Enter.
· Use keys 1 ESC and key 5 "6" to access the entry
Confirm.
· Press button 3 Enter.
· In the entry Confirm, OK blinks.
· Pressing button 3 Enter starts the module iden-
tification with a blink interval of the LEDs on the
corresponding module (see Sect. “7.3.3 Module
identification - LED blink interval” on p. 27).
Fig. Window: Identify one module
Position of the module
in the order of the basic
device’s module topology.
Time in s that the module
identification takes
(setting range 0-600s)
Starts the module
identification
(LEDs blink)
7.3.3 Module identification - LED blink interval
The module identification (diagnostics) procedure
started on the basic device triggers a blink interval
of the LEDs on the current measuring modules. The
blink interval of the functions Identify one module
and Identify all modules works the same way for a
single module or for all modules!
Bekijk gratis de handleiding van Janitza 800-CT8-LP, stel vragen en lees de antwoorden op veelvoorkomende problemen, of gebruik onze assistent om sneller informatie in de handleiding te vinden of uitleg te krijgen over specifieke functies.
Productinformatie
| Merk | Janitza |
| Model | 800-CT8-LP |
| Categorie | Niet gecategoriseerd |
| Taal | Nederlands |
| Grootte | 7251 MB |


