Hoshizaki HS-5234 handleiding
Handleiding
Je bekijkt pagina 3 van 6
3
2A8351-010
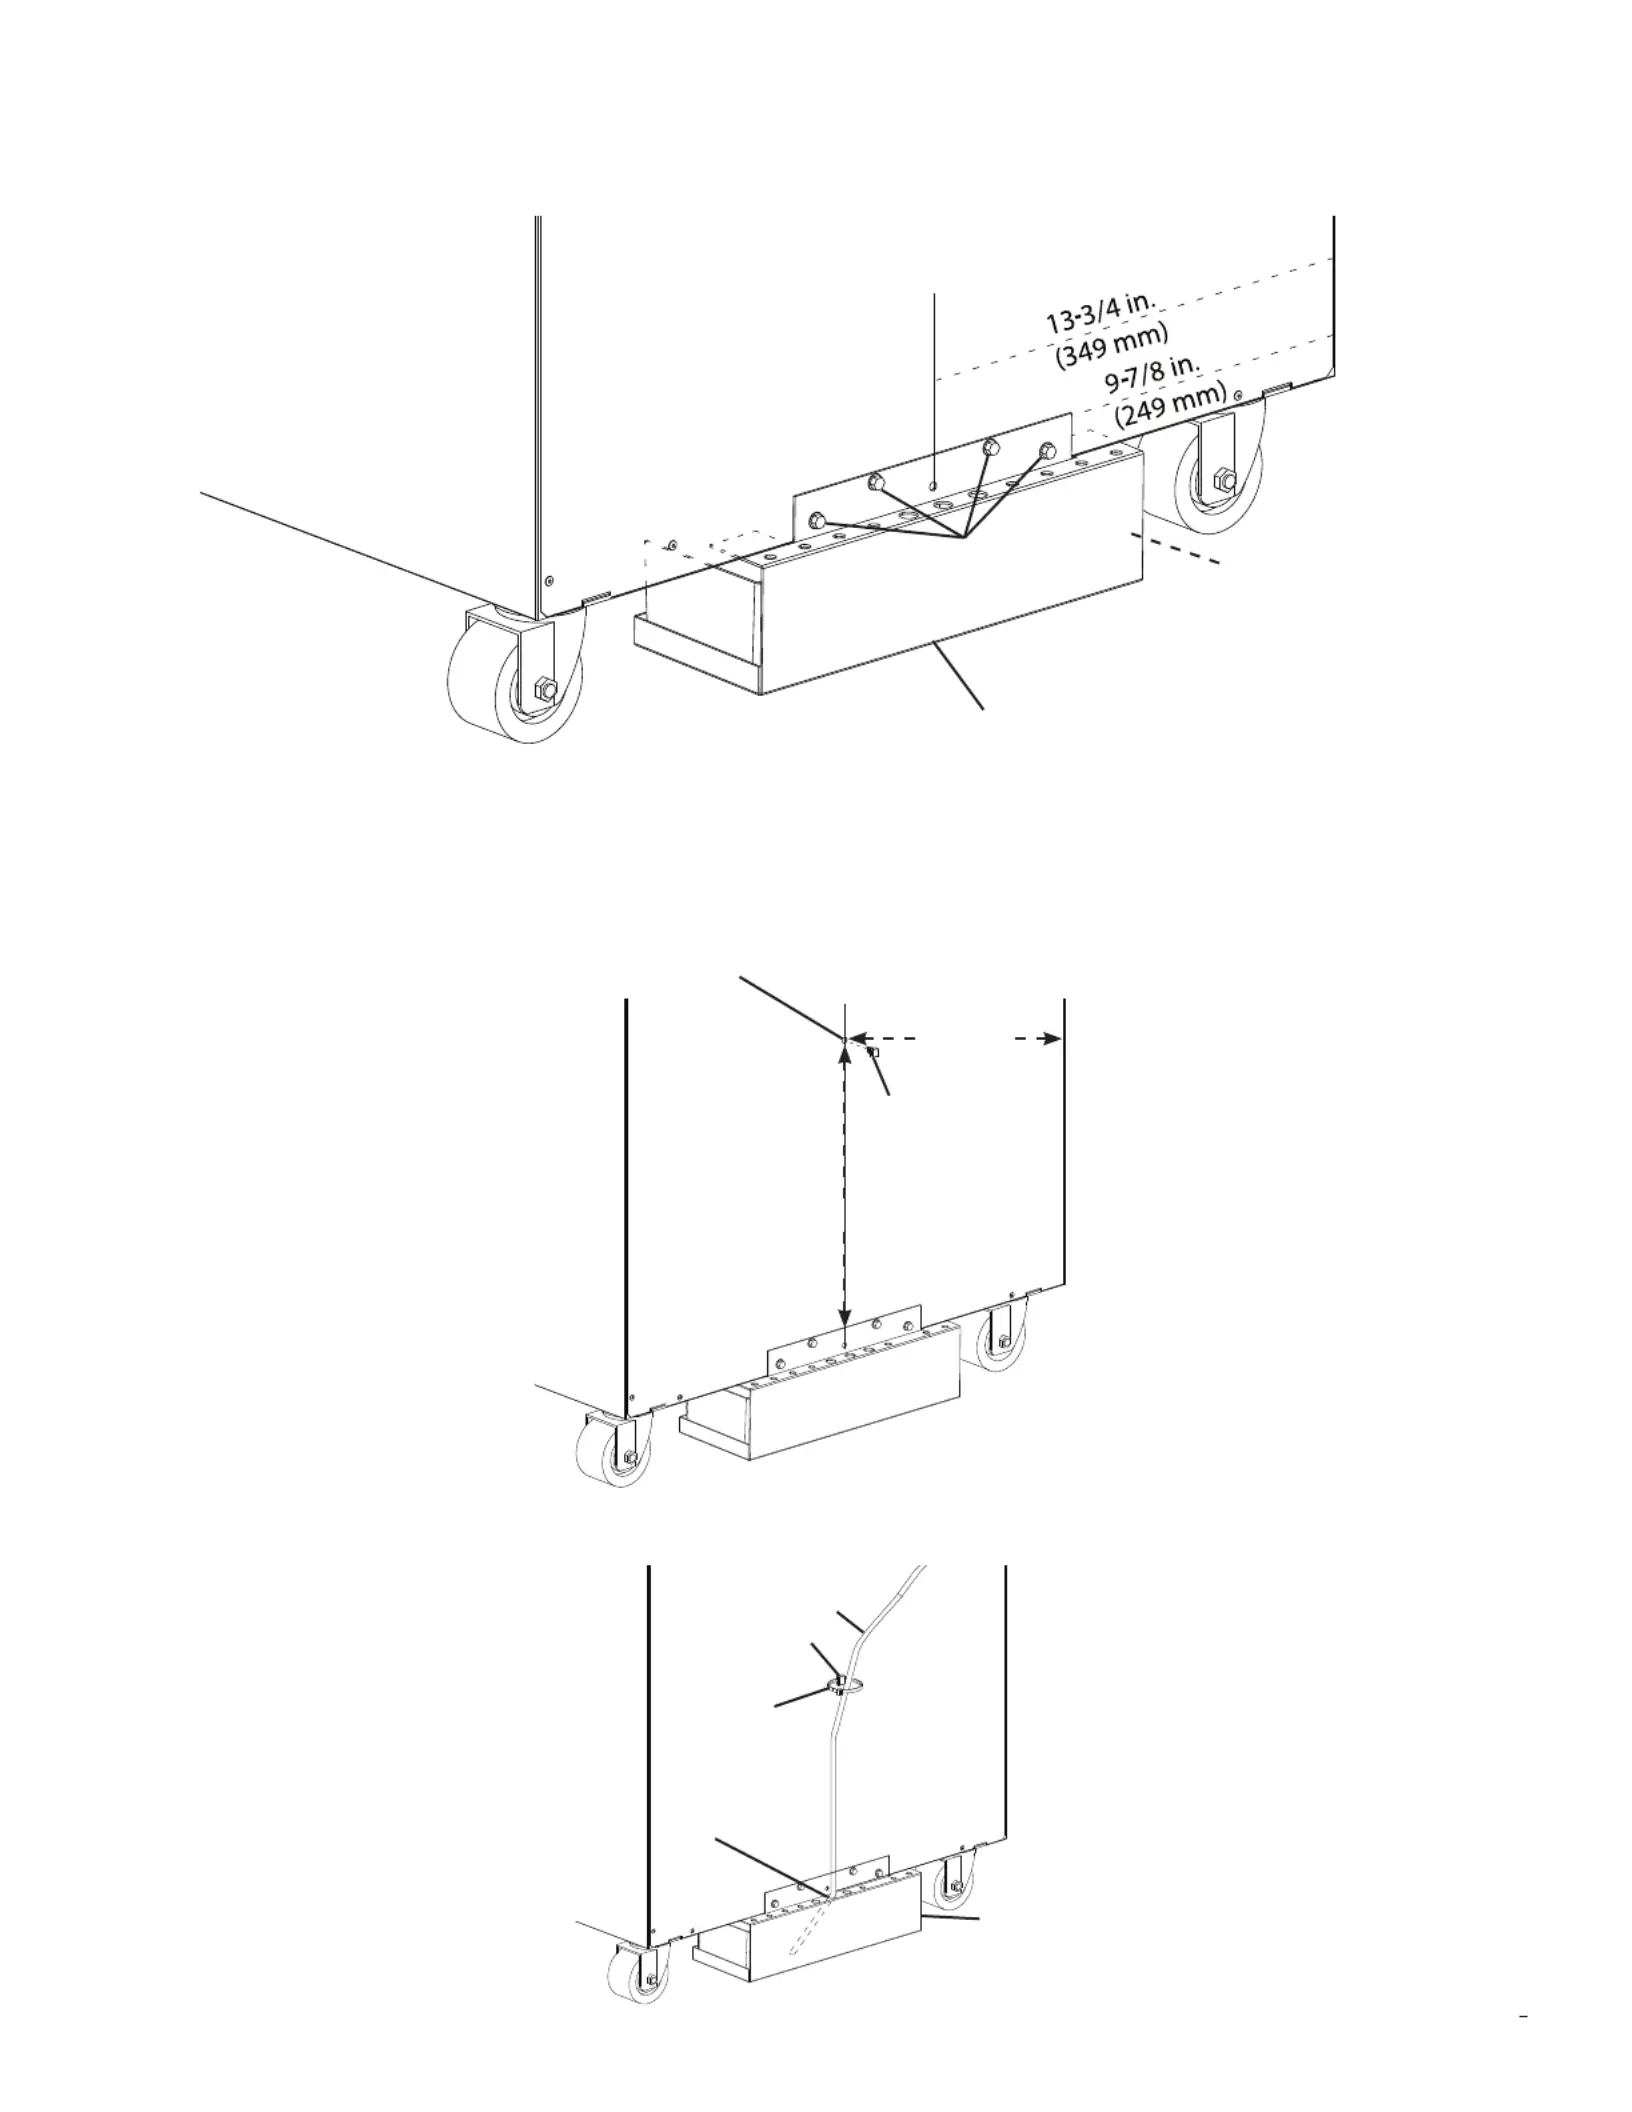
9) Measure 13-3/4 in. (349 mm) from the right side of the appliance. Next, measure up 12 in. (305 mm) from the top of the heated
overow drain pan mounting bracket and place a mark. Next, drill a 1/4 in. (6mm) hole at the mark.
See Fig. 6. NOTICE! Do not drill deeper than 1 in. (25 mm). Drilling deeper could penetrate the interior cabinet wall.
Fig. 7
Fig. 6
Nylon Tie Mount
1/4 in. (6 mm)
Nylon Tie Mount Hole
NOTICE!
Do not drill
deeper than
1 in. (25 mm)
12 in. (305 mm)
10) Place a nylon tie through the nylon tie mount and close (do not tighten). Route the silicone hose through the nylon tie then down into
the large center hole at the top of the heated overow drain pan mounting bracket. See Fig. 7. Do not cut the silicone hose at this
time.
13-3/4 in.
(349 mm)
Silicone Hose
Heated Overow Drain
Pan Assembly
Larger Center
Hole
Center
Nylon Tie
Nylon Tie Mount
8) Place the heated overow drain pan assembly at the rear of the appliance as shown in Fig. 5. Measure from the right side of the
appliance as shown for proper location. Lift it ush against the rear panel of the appliance and secure using 4 of the self-drilling hex
screws provided in this kit. See Fig. 5. The heated overow drain pan power cord connector should be facing the right side from rear
view.
Fig. 5
Self-Drilling
Screws
Heated Overow Drain Pan
Power Cord Connector
Heated Overow Drain Pan Assembly
Model Shown: CF1S-FS
Model Shown: CF1S-FS
Model Shown: CF1S-FS
Center of Appliance (1 section)
(Right Side on 2 Section Appliance)
Bekijk gratis de handleiding van Hoshizaki HS-5234, stel vragen en lees de antwoorden op veelvoorkomende problemen, of gebruik onze assistent om sneller informatie in de handleiding te vinden of uitleg te krijgen over specifieke functies.
Productinformatie
| Merk | Hoshizaki |
| Model | HS-5234 |
| Categorie | Niet gecategoriseerd |
| Taal | Nederlands |
| Grootte | 790 MB |


