Homematic IP HmIP-WTH-B-A handleiding
Handleiding
Je bekijkt pagina 30 van 121
30
Start-up
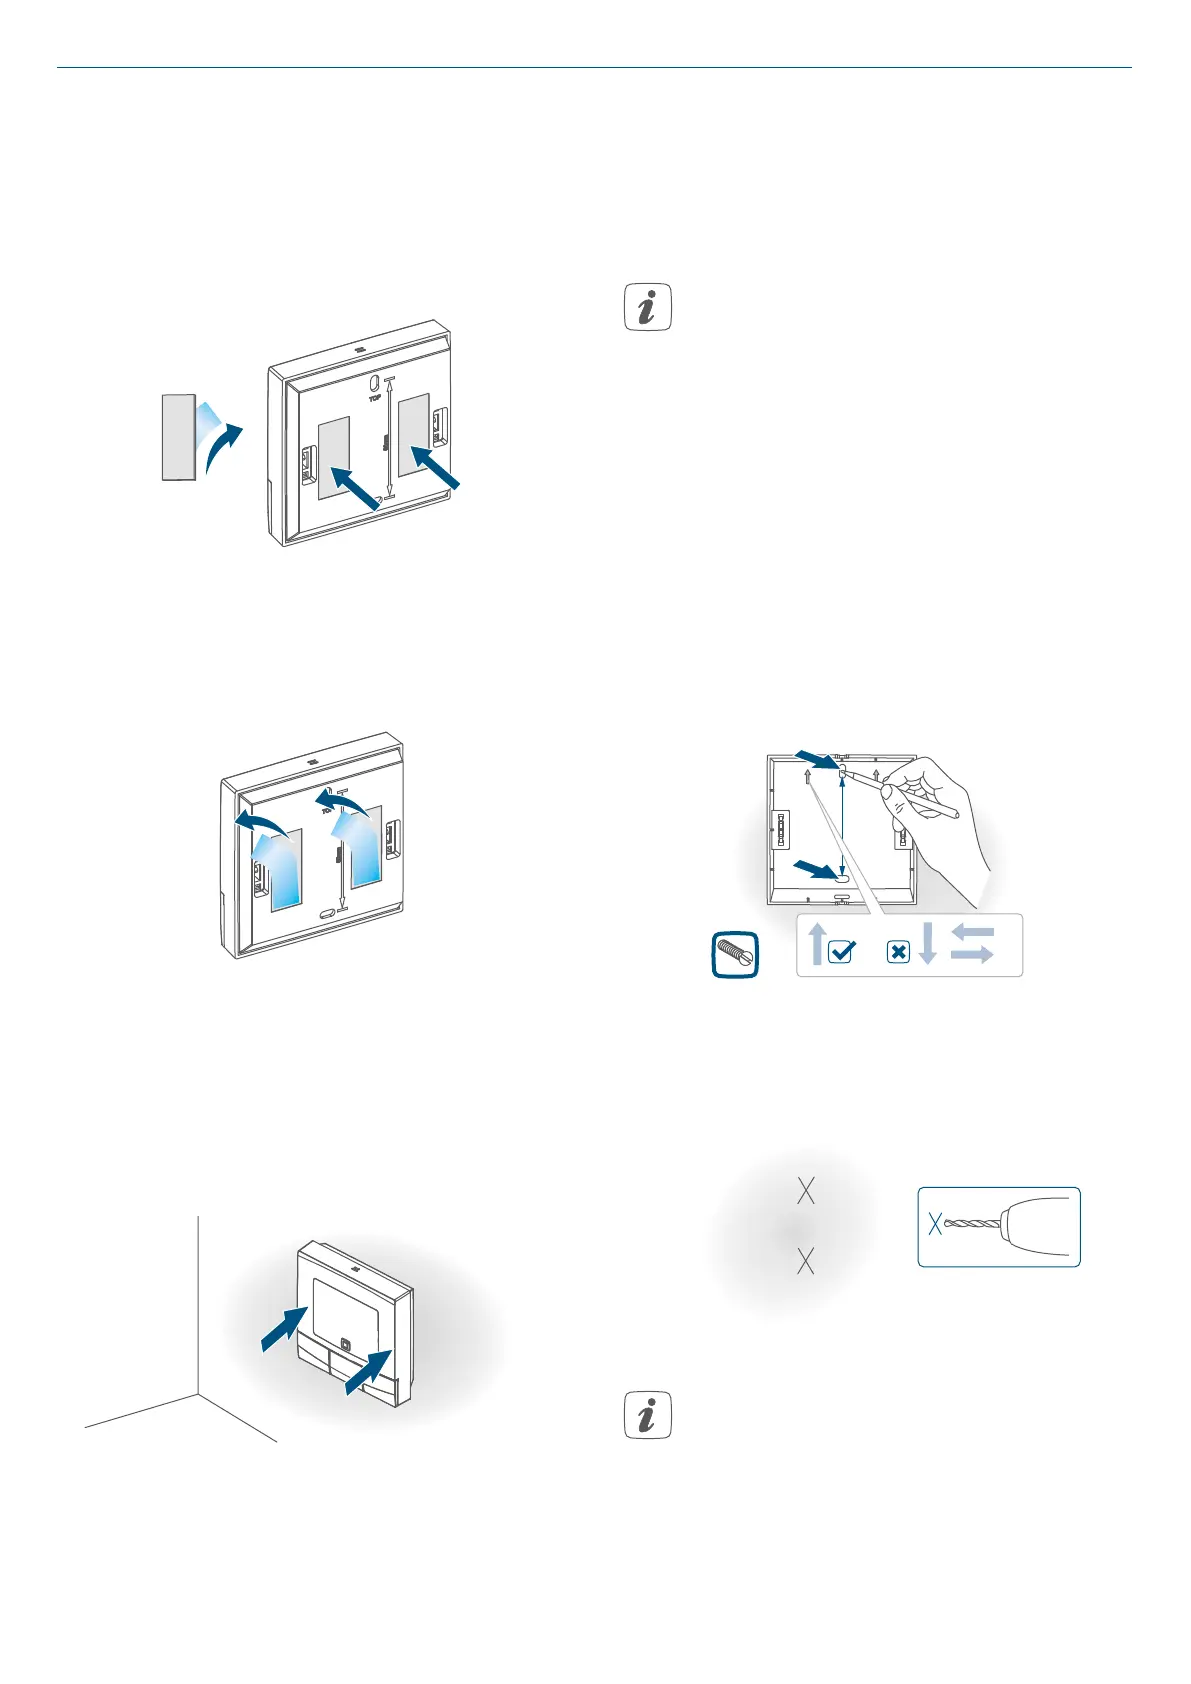
• Fix the adhesive strips on the back
side of the mounting plate in the
provided area. You should be able
to read the letters (“TOP”) on the
back side.
Figure 8
2x
• Remove the protective film from
the adhesive strips.
Figure 9
• Press the assembled wall thermos-
tat with the back side to the wall in
the position where it should subse-
quently be attached.
Figure 10
6.3.2 Screw mounting
For mounting the wall thermostat by
screws, please proceed as follows:
• Choose a site for installation.
Make sure that no electricity or
similar lines run in the wall at this
location!
• Position the mounting plate on the
desired site on the wall. Make sure
that the arrows on the back side of
the mounting plate point upwards.
Use a pen to mark the positions of
the two bore holes according to
the mounting plate with a distance
of 60 mm on the wall.
Figure 11
60 mm
• Drill the marked holes.
Figure 12
2x
If you are working with a stone
wall, drill the marked two 5 mm
holes and insert the plugs sup-
plied. If you are working with a
wooden wall, you can pre-drill
1.5mm holes to make screws
easier to insert.
Bekijk gratis de handleiding van Homematic IP HmIP-WTH-B-A, stel vragen en lees de antwoorden op veelvoorkomende problemen, of gebruik onze assistent om sneller informatie in de handleiding te vinden of uitleg te krijgen over specifieke functies.
Productinformatie
| Merk | Homematic IP |
| Model | HmIP-WTH-B-A |
| Categorie | Thermostaat |
| Taal | Nederlands |
| Grootte | 13184 MB |