Homematic IP HmIP-WTH-B-A handleiding
Handleiding
Je bekijkt pagina 31 van 121
31
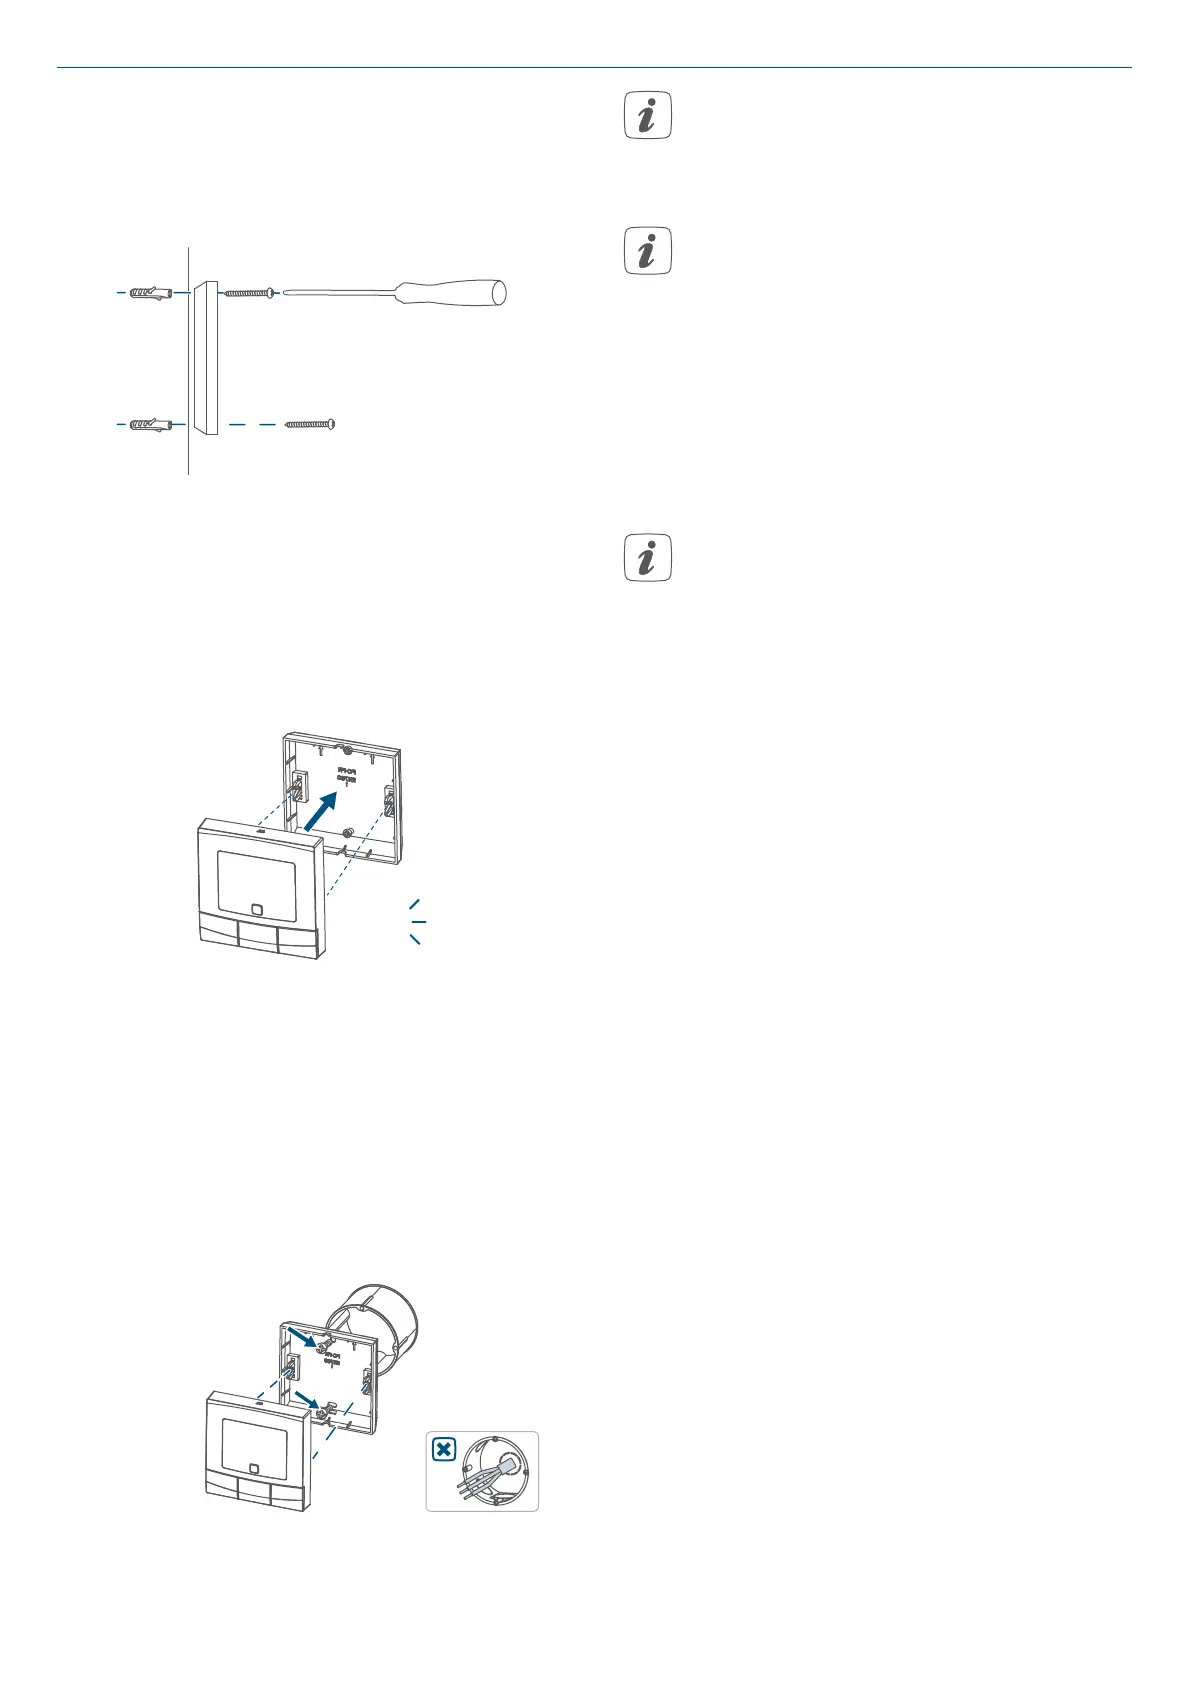
Start-up
• Use the supplied screws and plugs
to fasten the mounting plate to the
wall.
Figure 13
• Insert the electronic unit (A) into
the mounting plate. Make sure that
the electronic unit properly enga-
ges into the mounting plate.
Figure 14
click
6.3.3 Installation on flush-mounted
boxes
You can mount the wall thermostat
on flush-mounting/installation boxes
using the screw holes. Abb 13
Figure 15
If the device is mounted to a
flush-mounting box, there may be
no open conductor ends.
If changes or works have to be
made on the house installation
(e.g. extension, bypass of switch-
or socket inserts) or the low-vol-
tage distribution for mounting or
installing the device, the following
safety instruction must be consi-
dered:
Please note! Only to be installed
by persons with the relevant elec-
tro-technical knowledge and
experience!*
Incorrect installation can put
• your own life at risk;
• and the lives of other users of the
electrical system.
Incorrect installation also means that
you are running the risk of serious
damage to property, e.g. because of a
fire. You may be personally liable in the
event of injuries or damage to proper-
ty.
Contact an electrician!
*Specialist knowledge required for ins-
tallation:
The following specialist knowledge is
particularly important during installati-
on:
• The “5 safety rules” to be used:
Disconnect from mains; Safeguard
from switching on again; Check
that system is de-energised; Earth
and short circuit; Cover or cordon
o neighbouring live parts;
• Select suitable tool, measuring
Bekijk gratis de handleiding van Homematic IP HmIP-WTH-B-A, stel vragen en lees de antwoorden op veelvoorkomende problemen, of gebruik onze assistent om sneller informatie in de handleiding te vinden of uitleg te krijgen over specifieke functies.
Productinformatie
| Merk | Homematic IP |
| Model | HmIP-WTH-B-A |
| Categorie | Thermostaat |
| Taal | Nederlands |
| Grootte | 13184 MB |