Gys WF 51 handleiding
Handleiding
Je bekijkt pagina 28 van 116
28
User manual
WF 51
Translation of the original
instructions
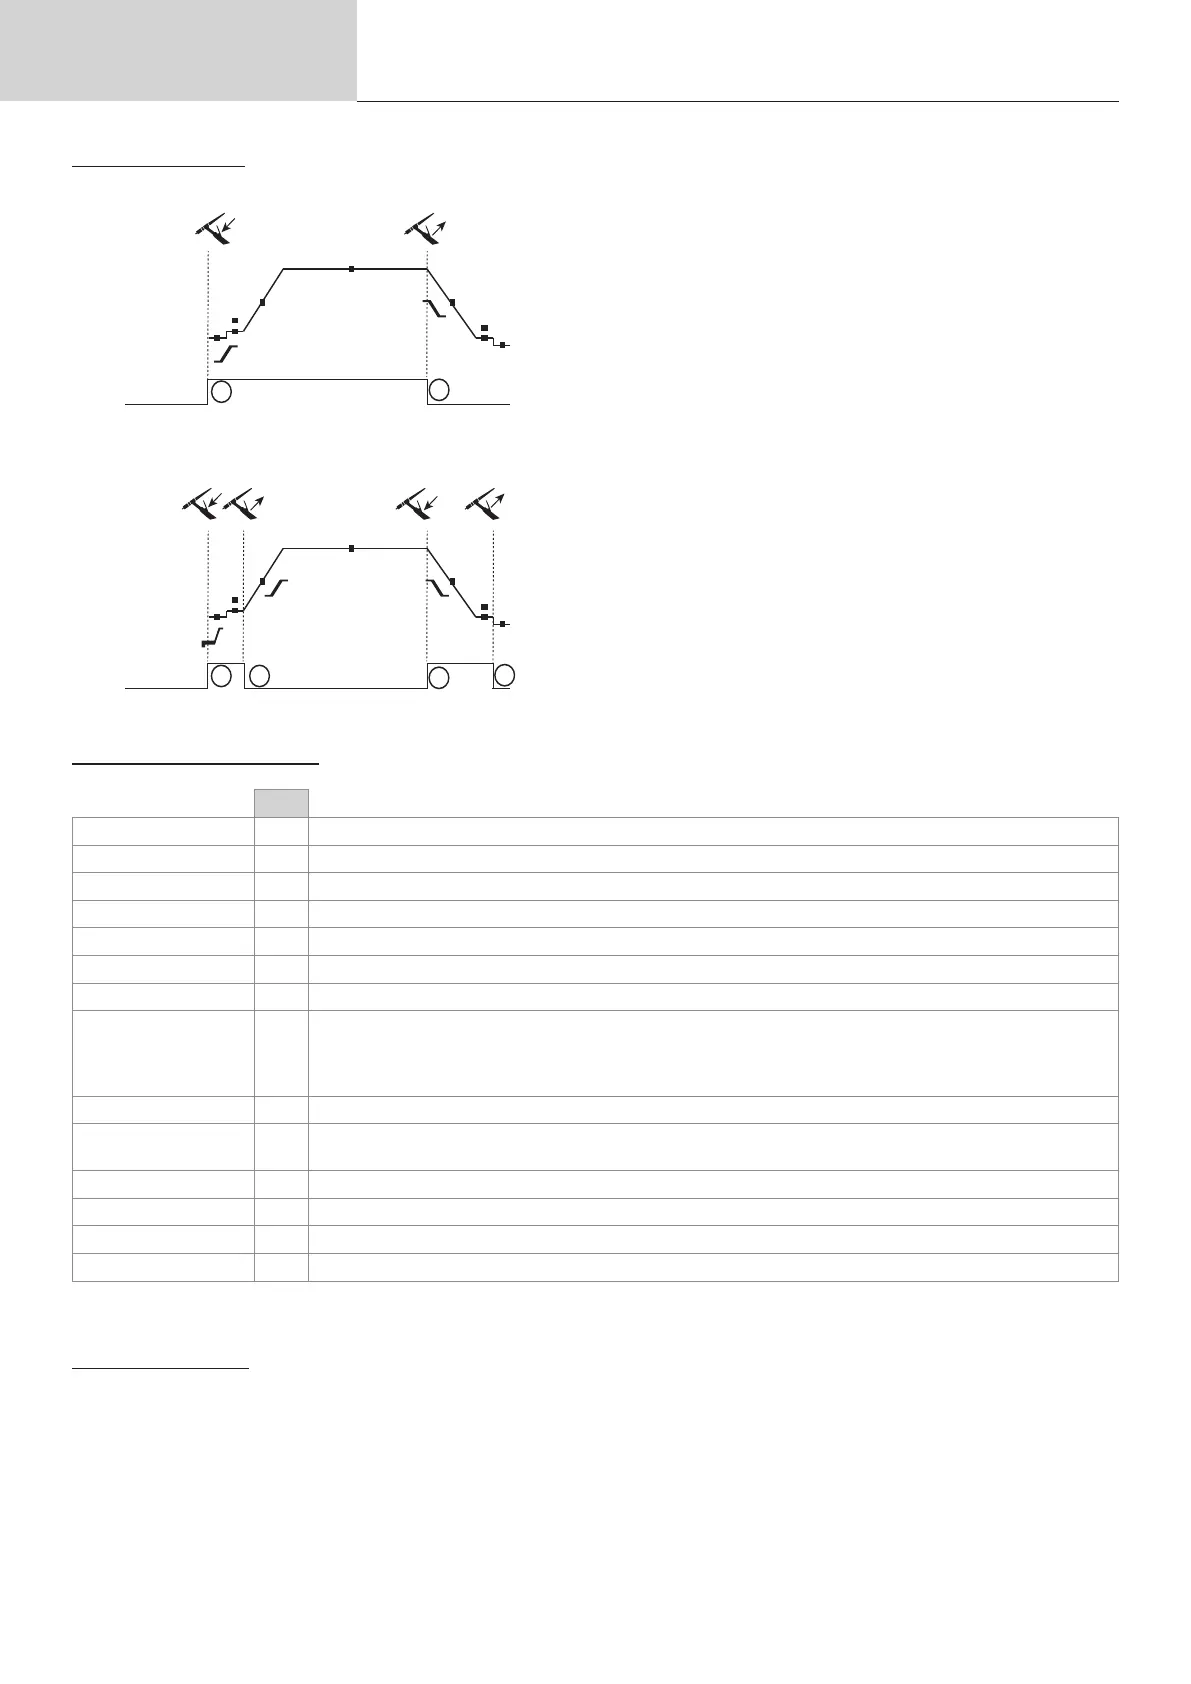
USING THE TRIGGER
• 2T
t t
t t
t
t
T2
T1
Main button
T3
T1
Main button
T2
T4
T3
T1
Main button
T2
T4
>0.5s<0.5s<0.5s
T1 - The main button is pressed, the welding cycle starts (Pre-Gas,
I_Start, upslope and welding).
T2 - The main button is released, the welding cycle is stopped
(downslope, I_Stop, Post-Gas).
For two-button torches in T2 only, the secondary button is treated as
the main button.
• 4T
t t
t t
t
t
T2
T1
Main button
T3
T1
Main button
T2
T4
T3
T1
Main button
T2
T4
>0.5s<0.5s<0.5s
T1 - The main button is pressed, the cycle starts from Pre-Gas and
stops at the I_Start phase.
T2 - The main button is released, the cycle continues to upslope
and welding.
T3 - The main button is pressed, the cycle goes to downslope and
stops in the I_Stop phase.
T4 - The main button is released, the cycle ends with the Post-Gas.
NB: for torches, double buttons and double button + potentiometer
=> «up/weld current» button turns on the potentiometer, the «down»
button turns it o.
For dual button or dual trigger torches, the «high» trigger retains the same functionality as the single trigger torch . The «low» trigger is not active.
CONFIGURING THE SETTINGS
Units
End current % This idling current is the next phase after the current is lowered.
Starting current % This start-up bearing current is a warm-up phase before the current is raised.
Welding current A Welding current.
Cold current % Second welding current known as a «cold» welding current.
Pulse duration s Manual or time-controlled spot pulse phase
Spot duration s Either manual or a set time.
Crater-ll feature s Avoids cratering at the end of welding and the risk of cracking, particularly in light alloys.
Frequency
frequency
Hz
Pulse frequency (setting guidelines):
- If welding with manual ller metal, then the F(Hz) is synchronised to the ller action,
- If the metal is thin and without ller (< 0.8mm), F(Hz) > 10Hz
- If welding in position, then F(Hz) < 100Hz
Rising current s Allows a gradual increase in welding current.
Post-Gas s
Duration of the gas protection after the arc is extinguished. It protects the workpiece and the electrode from
oxidation during cooling.
Pre-Gas s When the torch is bled and the gas shield is created before ignition.
Stopping time s This idling time is a phase that comes after the current is lowered.
Starting time s Starting time before the current is raised.
Cold weather % Pulsed hot current (I) time balance
Access to some of the welding parameters depends on the selected display mode: Settings/Display mode: Easy or Expert.
Refer to the HMI manual.
MANUAL GAS PURGE
The presence of oxygen in the torch can lead to a decrease in mechanical quality and can result in less corrosion resistance. To purge the gas from
the torch, press and hold push-button no. 1 and follow the procedure on the display, or press the purge switch (I-2) in the wire feeder.. Refer to the
HMI manual.
Bekijk gratis de handleiding van Gys WF 51, stel vragen en lees de antwoorden op veelvoorkomende problemen, of gebruik onze assistent om sneller informatie in de handleiding te vinden of uitleg te krijgen over specifieke functies.
Productinformatie
| Merk | Gys |
| Model | WF 51 |
| Categorie | Niet gecategoriseerd |
| Taal | Nederlands |
| Grootte | 16060 MB |


