Handleiding
Je bekijkt pagina 19 van 36
18
After the set time expires, the oven will automatically stop operating. Signs “End“ and 00:00 will alternate on the
display unit. An acoustic signal will be emitted, which you may turn off by touching any key. After one minute, the
acoustic signal will be switched off automatically.
WARNING!
This function is not suitable for food requiring a preheated oven. Perishable food should not be kept in the
oven for a long time. Before using this mode, check whether the clock on the appliance is accurately set.
Minute minder setting
The minute minder can be used independently of oven operation. The longest possible setting is 24 hours. During the
last 10 minutes, the minute minder is displayed in one-second steps. Touch the “multi time“ twice (double-tap it) until
the symbol appears on the display unit. Touch the or to set the minute minder.
INFORMATION!
• If a delayed start is set, you can set the minute minder by triple-tapping the “multi time“ key.
• When setting a timer function, you can reset the value by simultaneously touching the keys and . Confirm the
setting by pressing the “start I stop“ key.
The most recently used timer function values will be stored and offered as preset values the next time you use the
timer. These settings may also be deactivated (see chapter Choosing the general settings, Adaptive function).
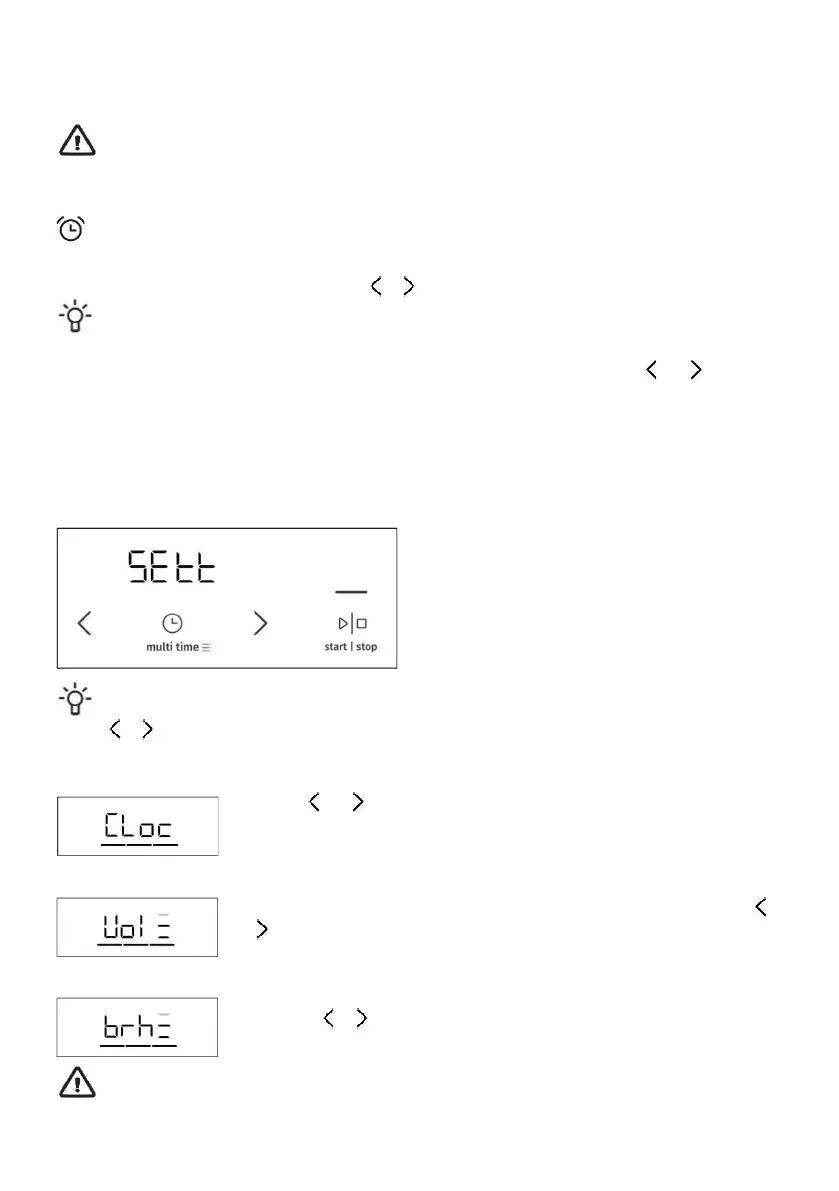
CHOOSING THE GENERAL SETTINGS
Turn the COOKING SYSTEM SELECTOR KNOB to position "0". To activate a function, press the “multi time“ key
and hold it for 3 seconds. “SEtt“ will appear on the display unit for a few seconds. Then, the extra functions menu
will appear.
INFORMATION!
Use the or keys to navigate the menu. Confirm the setting by pressing the “start I stop“ or “multi time“ key. To
exit the extra functions menu, touch the “gratin“ key.
CLOCK DISPLAYED
Use the and keys to set the clock. “CLoc“ will appear on the display unit. After
you confirm, you can toggle between 12-hour and 24-hour display. Confirm, the set
the clock/time of day. First, set and confirm the minutes; then set and confirm the
hours.
ACOUSTIC SIGNAL VOLUME
Choose between three beep volume levels. Choose the “Vol“ setting. Touch the or
key to select the desired level, and confirm. Acoustic signals can also be switched
off.
DISPLAY ILLUMINATION
Choose between three levels of display light intensity. Choose the “brh“ setting.
Touch the or key to select the desired level, and confirm. Use the value setting
keys to increase or decrease light intensity.
Increasing the brightness of the LED may increase standby power consumption.
Bekijk gratis de handleiding van Gorenje GEIT6E63XPG, stel vragen en lees de antwoorden op veelvoorkomende problemen, of gebruik onze assistent om sneller informatie in de handleiding te vinden of uitleg te krijgen over specifieke functies.
Productinformatie
| Merk | Gorenje |
| Model | GEIT6E63XPG |
| Categorie | Fornuis |
| Taal | Nederlands |
| Grootte | 4701 MB |


