Handleiding
Je bekijkt pagina 16 van 80
16
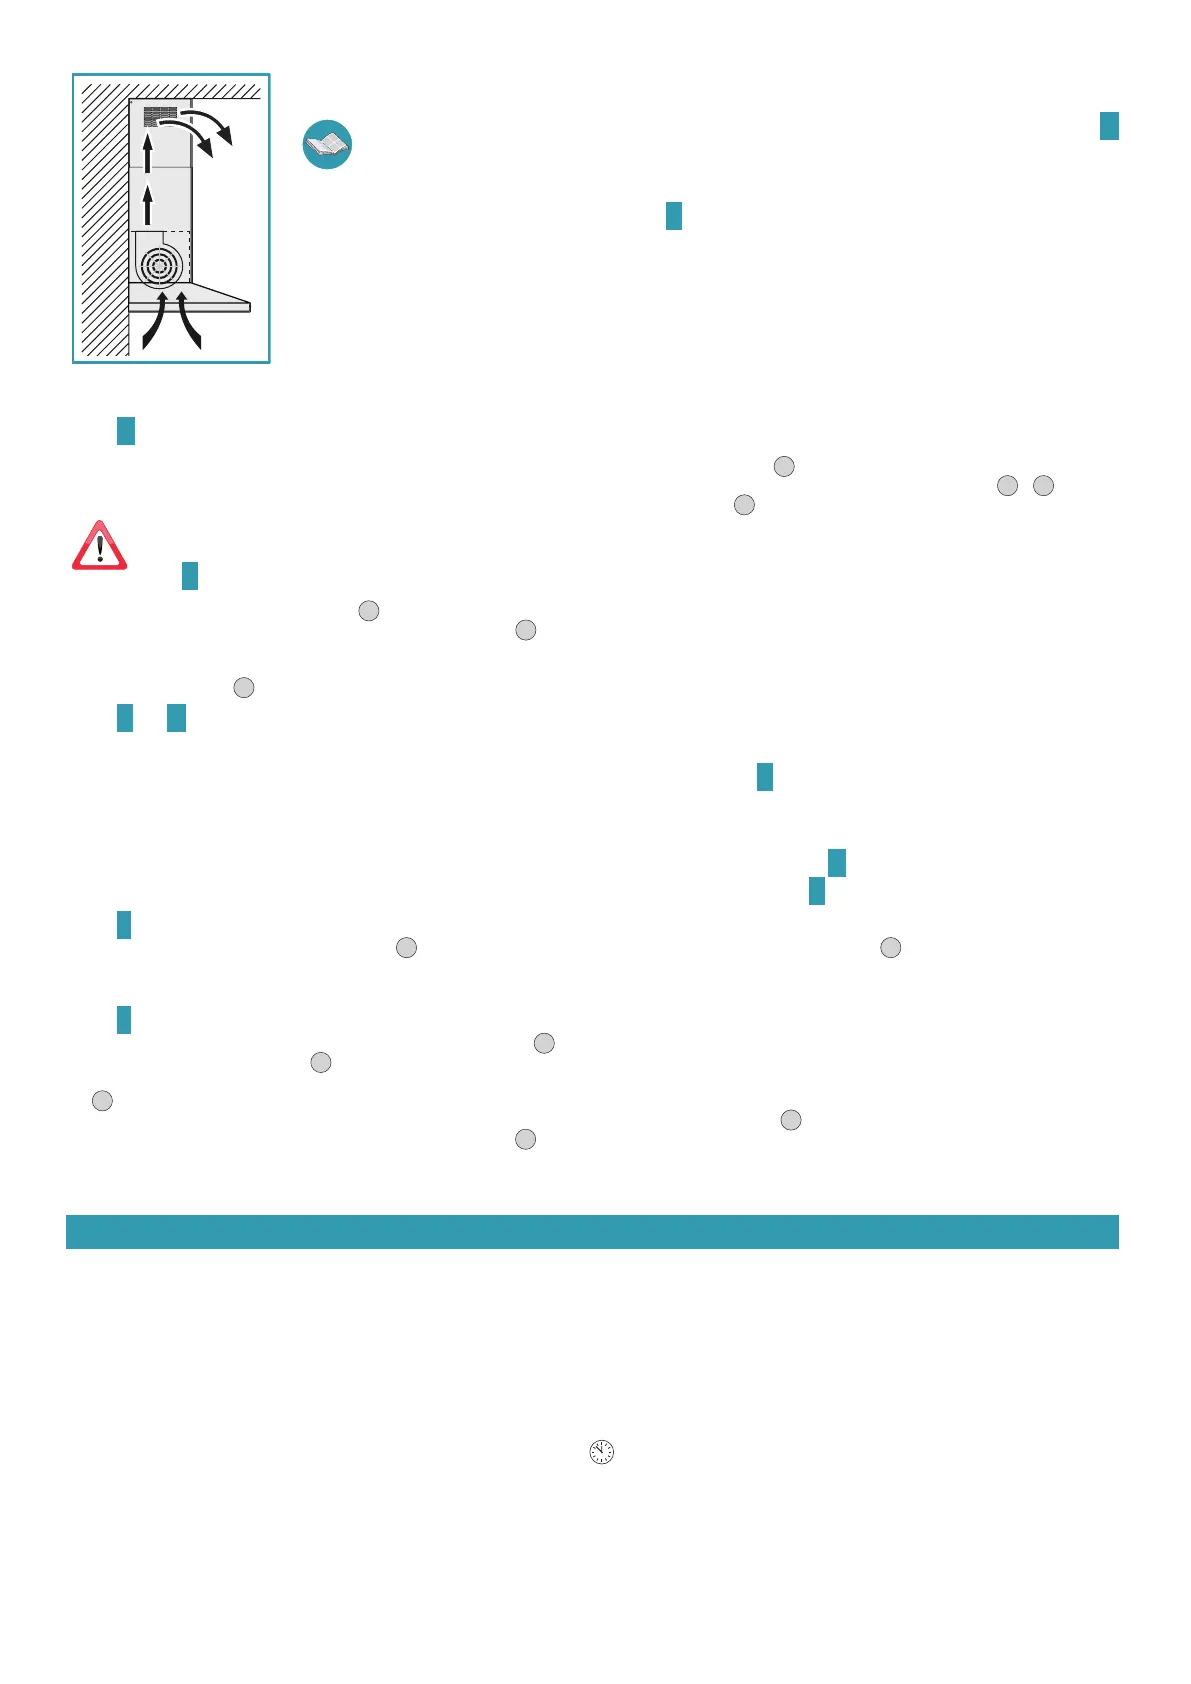
HOOD VERSION WITH INTERNAL RECIRCULATION FILTERING
In this model, air passes through the active carbon lters to be puried and is then recycled into the kitchen environment.
Check that the active carbon lters are assembled onto the hood, if not, install them as indicated in the instructions H
on page 6.
If the hood is set up with a ltering version, the check valve must not be assembled: remove it if it is on the air outlet tting of the
motor (carry out operations described in the instructions C on page 4 in reverse order).
ASSEMBLY INSTRUCTIONS (only intended for personnel qualied to assemble the hood)
Phase A page 4
• Place the support bar (S) on the installation wall at a height (H) from the cooker indicated in the gure (Fig.
1
).
• Use a spirit level to check the horizontal alignment and draw 2 marks at each end of the support bar, this is where the holes will be drilled (Fig.
2
-
3
).
• Drill the holes, insert 2 expansion plugs (ø 8mm) and fasten the bar with the relative screws (V1) (Fig.
4
).
The xing kit (screws, plugs, and brackets) supplied with the hood can only be used on masonry walls: should it be necessary to install the hood
onto walls in a dierent material, assess other xing systems keeping the wall resistance and weight of the hood in mind (indicated on page 2).
Phase
B page 4
• Hook the hood onto the support bar (Fig.
1
).
• Adjust the alignment of the hood by using the xing screws (Fig.
2
). The upper screw (B) adjusts the distance from the wall, the lower one (C) adjusts vertical
scrolling.
• To prevent the hood from falling due to a pressure below, fasten it to the wall with expansion plugs and relative screws (V2) using the appropriate holes on the
back of the hood (Fig.
3
).
Phase C and D page 4
EXTERNAL EXHAUST HOOD VERSION SUCTION
• Only for versions with an 800 m
3
/h motor: if you wish, install the check valve (M) as indicated in gure C.
•
Connect the air outlet connection of the hood to the external discharge with a suitable pipe.
HOOD VERSION WITH INTERNAL RECIRCULATION FILTERING
• Check that the active carbon lters are assembled onto the hood, if not, install them as indicated in the instructions H on page 6.
• If installed, remove the check valve assembled on the hood air outlet tting (carry out the instructions described
C
on page 4 in reverse order).
Phase E page 5
• Insert the extension (H) in the chimney (G) (Fig.
1
) and fasten the assembly to the body of the hood using screws (V3)(Fig.
2
).
• With external exhaust (suction) versions, it is possible to insert extension (H) with the slots facing downwards so that they are not visible when the installation
height allows it.
Phase F page 5
• Slide the extension (H) until it is positioned at the desired height (Fig.
1
).
• Following what is indicated in Fig.
2
, draw a line on the wall that will be used to position the bracket (L) correctly.
• Place the bracket (L) on the wall by following the line drawn on it. With a spirit level, check the horizontal alignment and mark the 2 drilling points at the ends (Fig.
3
).
• Drill the holes, insert 2 expansion plugs (ø 6mm) and fasten the bracket (L) with the relative screws (V4) (Fig.
4
).
• Tighten the extension (H) to the bracket (L) using screws (V5) (Fig.
5
).
• Electrically power the hood in accordance with regulations in force.
OPERATION
WHEN SHOULD THE HOOD BE SWITCHED ON AND OFF?
Switch on the hood at least one minute before starting to cook: this enhances the airow to convey fumes and vapours towards the suction surface. After cooking,
leave the hood operating until complete extraction of all vapours and odours. If required, by means of the Timer function, it is possible to set hood auto switch-o
after 15 minutes of operation.
WHICH SPEED IS TO BE SELECTED?
The rst speed is a low consumption energy-saving way of keeping the air clean, the second speed is used in normal conditions, and the third speed is used when
there are strong odours and vapours.
WHEN SHOULD THE FILTERS BE WASHED OR REPLACED?
The hood is assembled with two dierent types of lters: metal ones (washable) and active carbon ones (non-washable). The former must be cleaned every 30 hours
of use (for versions with electronic push button control panel, the xed red light indicates that they need to be washed), the latter are to be replaced every 3-4
months, depending on the use of the hood. For further information, please read the chapter regarding "Maintenance" on page 17.
Bekijk gratis de handleiding van Falmec Mizar 90, stel vragen en lees de antwoorden op veelvoorkomende problemen, of gebruik onze assistent om sneller informatie in de handleiding te vinden of uitleg te krijgen over specifieke functies.
Productinformatie
| Merk | Falmec |
| Model | Mizar 90 |
| Categorie | Afzuigkap |
| Taal | Nederlands |
| Grootte | 11118 MB |


