Extron NBP VC1 D handleiding
Handleiding
Je bekijkt pagina 29 van 73
Network Button Panels • Hardware Features and Installation — Wall-mountable Models 19
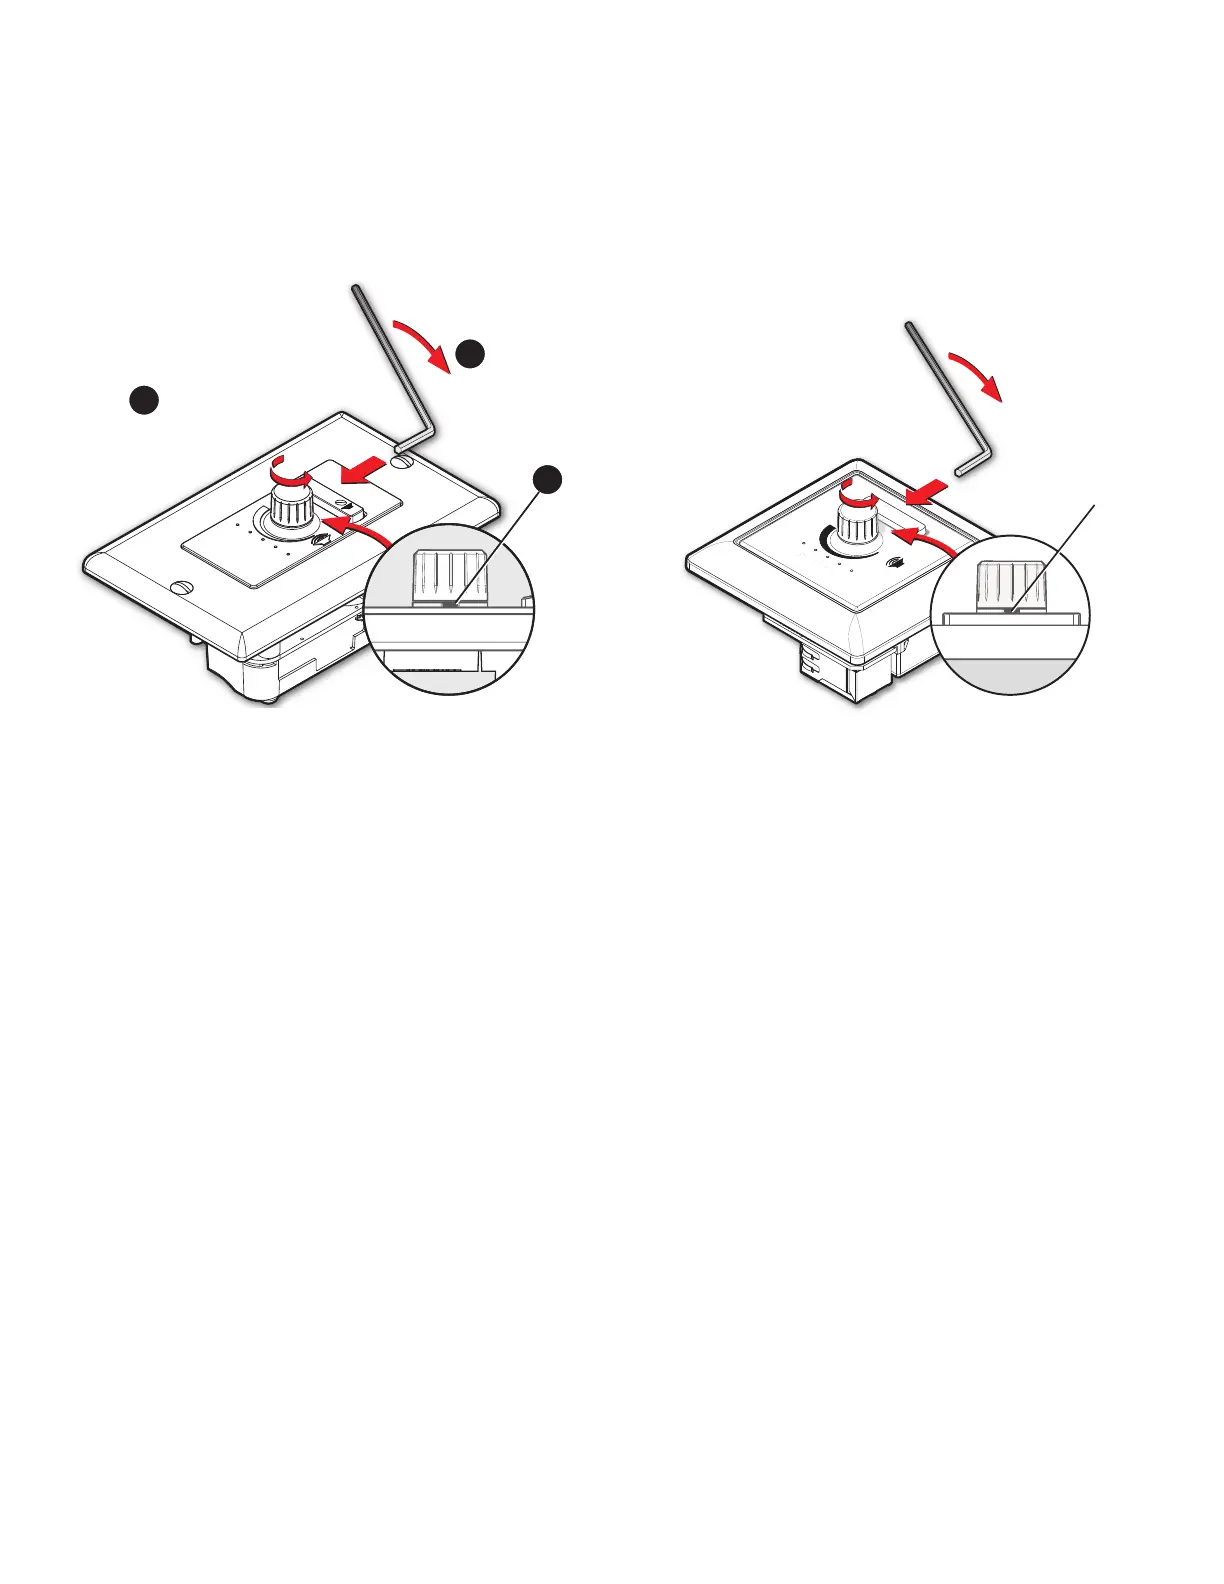
Removing the knob (NBP VC1 models)
The NBP VC1 D and NBP VC1 EU have a rotary knob for volume control. Before replacing buttons, remove the
knob, as shown here.
1. Turn the knob (see gures 21 and 22,
1
) to expose the hex screw (see
A
) holding the knob in place. You
may need to view the unit from the bottom and look through the faceplate notch below the
Volume
knob
VOLUME
MUTE
1
2
A
Turn the knob to
expose the screw.
Use an Allen wrench
to loosen the screw.
Hex
Screw
Figure 21. Removing the Knob From an NBP VC1 D
2. Insert the provided 0.05 inch (
1
/20") Allen wrench and turn the wrench in the direction shown (
2
) to loosen the
screw.
3. Pull the knob straight out away from the faceplate to remove it.
Once the knob is removed, the wallplate and faceplate can be removed and the buttons replaced as described in
the preceding sections.
Replacing the knob (NBP VC1 models)
To replace the knob, align the knob and press it straight down onto the rotary shaft, then use the Allen wrench to
gently tighten the hex screw to secure the knob to the unit.
21
MUTE
VOLUME
MUT
E
VOLUME
1
1
1
Turn Knob to
Expose Screw
Use Allen Wr
ench
to Loosen Screw
2
2
2
Notch
Figure 22. Removing the Knob From an
NBP VC1 EU
22
Rev. G:
Added EU
model.
Bekijk gratis de handleiding van Extron NBP VC1 D, stel vragen en lees de antwoorden op veelvoorkomende problemen, of gebruik onze assistent om sneller informatie in de handleiding te vinden of uitleg te krijgen over specifieke functies.
Productinformatie
| Merk | Extron |
| Model | NBP VC1 D |
| Categorie | Niet gecategoriseerd |
| Taal | Nederlands |
| Grootte | 12926 MB |


