ErgoAV ERMCM1-01B handleiding
Handleiding
Je bekijkt pagina 11 van 18
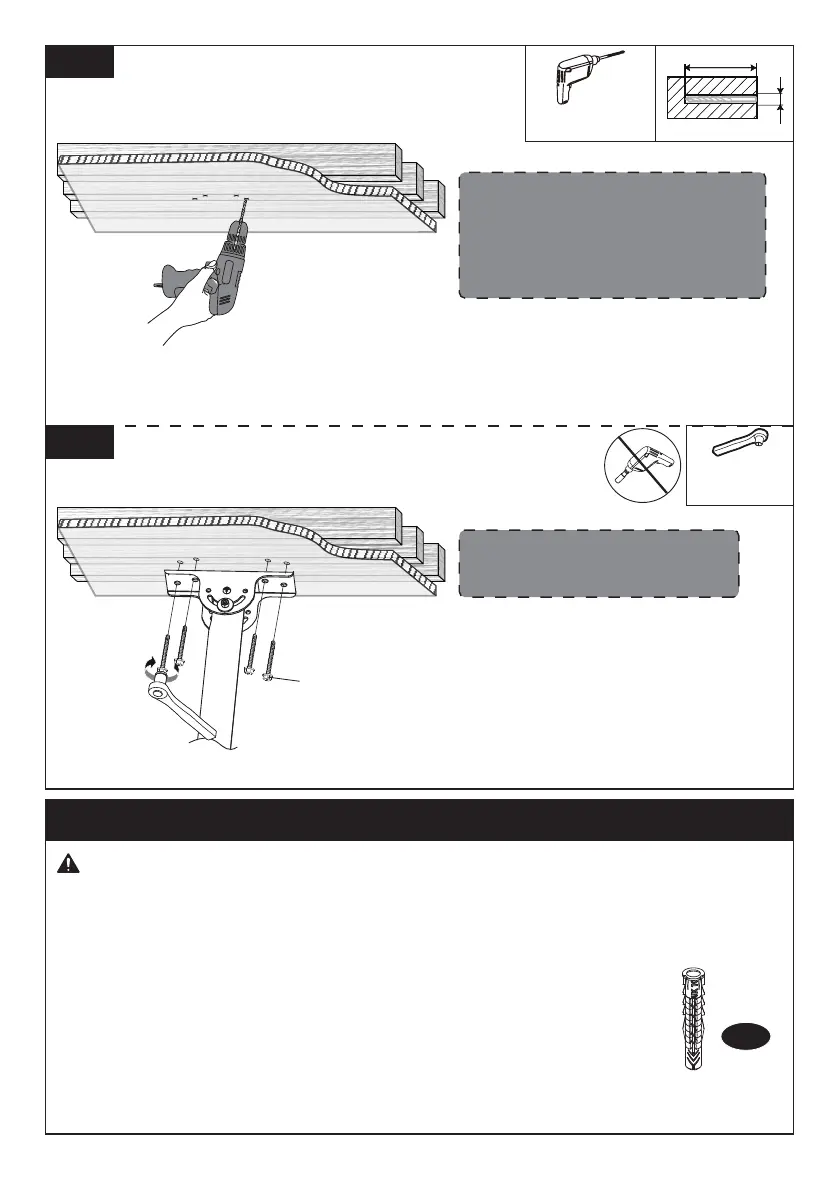
Install the Ceiling Plate [02] using
Lag Screws [A1]. Tighten the Lag
Screws [A1] only until they are
pulled firmly against the Ceiling
Plate. DO NOT over-tighten the
Lag Screws.
3A-4
CAUTION: DO NOT use a drill to
tighten the Lag Screws. Only use
a Socket Wrench.
1/2" (13mm)
Socket Wrench
(NOT Included)
Drill 4 pilot holes using a 7/32"
(5.5mm) diameter drill bit. Make
sure the depth of the pilot holes
is at least 2 3/4" (70mm) deep.
3A-3
2 3/4" (70mm)
7/32" (5.5mm)
WARNING:
Step 3B Solid Concrete Ceiling Option
● To avoid personal injury or property damage, Do Not over-tighten the Lag
Screws [A1]. Using a self-supplied Socket Wrench, tighten the Lag Screws [A1]
only until they are pulled firmly against the Ceiling Plate and ceiling.
● Ensure the Ceiling Plate is securely fastened to the ceiling
before continuing to the next step.
● Mount the Ceiling Plate [02] directly onto the concrete
surface without any covering.
● The thickness of the ceiling must exceed 5 1/2" (140mm).
● Do not use a drill for tightening the lag screws! Only use a socket wrench.
Anchor
A2
CAUTION:
DO NOT drill the holes at the
edge of the ceiling joist. Make
sure the holes are drilled on the
center location of the ceiling joist.
Electric Drill
(NOT Included)
A1
11
Bekijk gratis de handleiding van ErgoAV ERMCM1-01B, stel vragen en lees de antwoorden op veelvoorkomende problemen, of gebruik onze assistent om sneller informatie in de handleiding te vinden of uitleg te krijgen over specifieke functies.
Productinformatie
| Merk | ErgoAV |
| Model | ERMCM1-01B |
| Categorie | Niet gecategoriseerd |
| Taal | Nederlands |
| Grootte | 2457 MB |


