ErgoAV ERMCM1-01B handleiding
Handleiding
Je bekijkt pagina 10 van 18
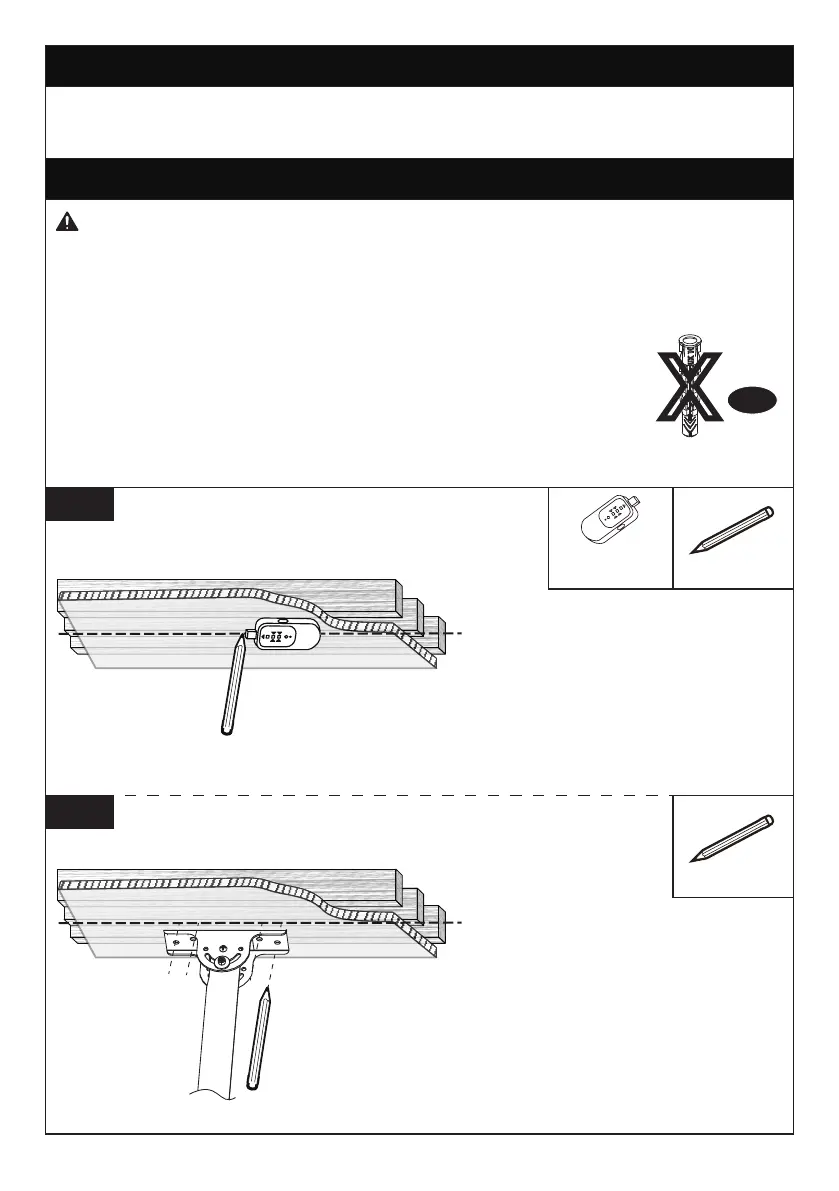
Step 3 Secure the Ceiling Plate to the Ceiling
For wood stud installation, follow STEP 3A
For concrete installation, follow STEP 3B
Use a Stud Finder (not included)
to locate ceiling joist to verify
the edges. Mark the edge and
center locations.
3A-1
Step 3A Wood Stud Option
● To avoid personal injury or property damage, Do Not over-tighten the Lag
Screws [A1]. Using a self-supplied socket wrench, tighten the Lag Screws [A1]
only until they are pulled firmly against the Ceiling Plate and ceiling.
● DO NOT USE ANCHOR FOR THIS STEP.
● Ensure the Ceiling Plate is securely fastened to the ceiling
before continuing to the next step.
● Nominal ceiling joist size: common 2” x 8” (51mm x 203mm) .
● Stud center must be verified.
● Do not use a drill for tightening the Lag Screws!
● Only use a Socket Wrench.
WARNING:
Anchor
X
A2
Position the Ceiling Plate [02]
at your desired position, and
mark the pilot hole locations.
3A-2
Stud Finder
(NOT lncluded)
Pencil
(NOT Included)
Pencil
(NOT Included)
10
Bekijk gratis de handleiding van ErgoAV ERMCM1-01B, stel vragen en lees de antwoorden op veelvoorkomende problemen, of gebruik onze assistent om sneller informatie in de handleiding te vinden of uitleg te krijgen over specifieke functies.
Productinformatie
| Merk | ErgoAV |
| Model | ERMCM1-01B |
| Categorie | Niet gecategoriseerd |
| Taal | Nederlands |
| Grootte | 2457 MB |


