Eizo ColorEdge ColorNavigator 7 handleiding
Handleiding
Je bekijkt pagina 29 van 99
29
Chapter 3 Basic Usage
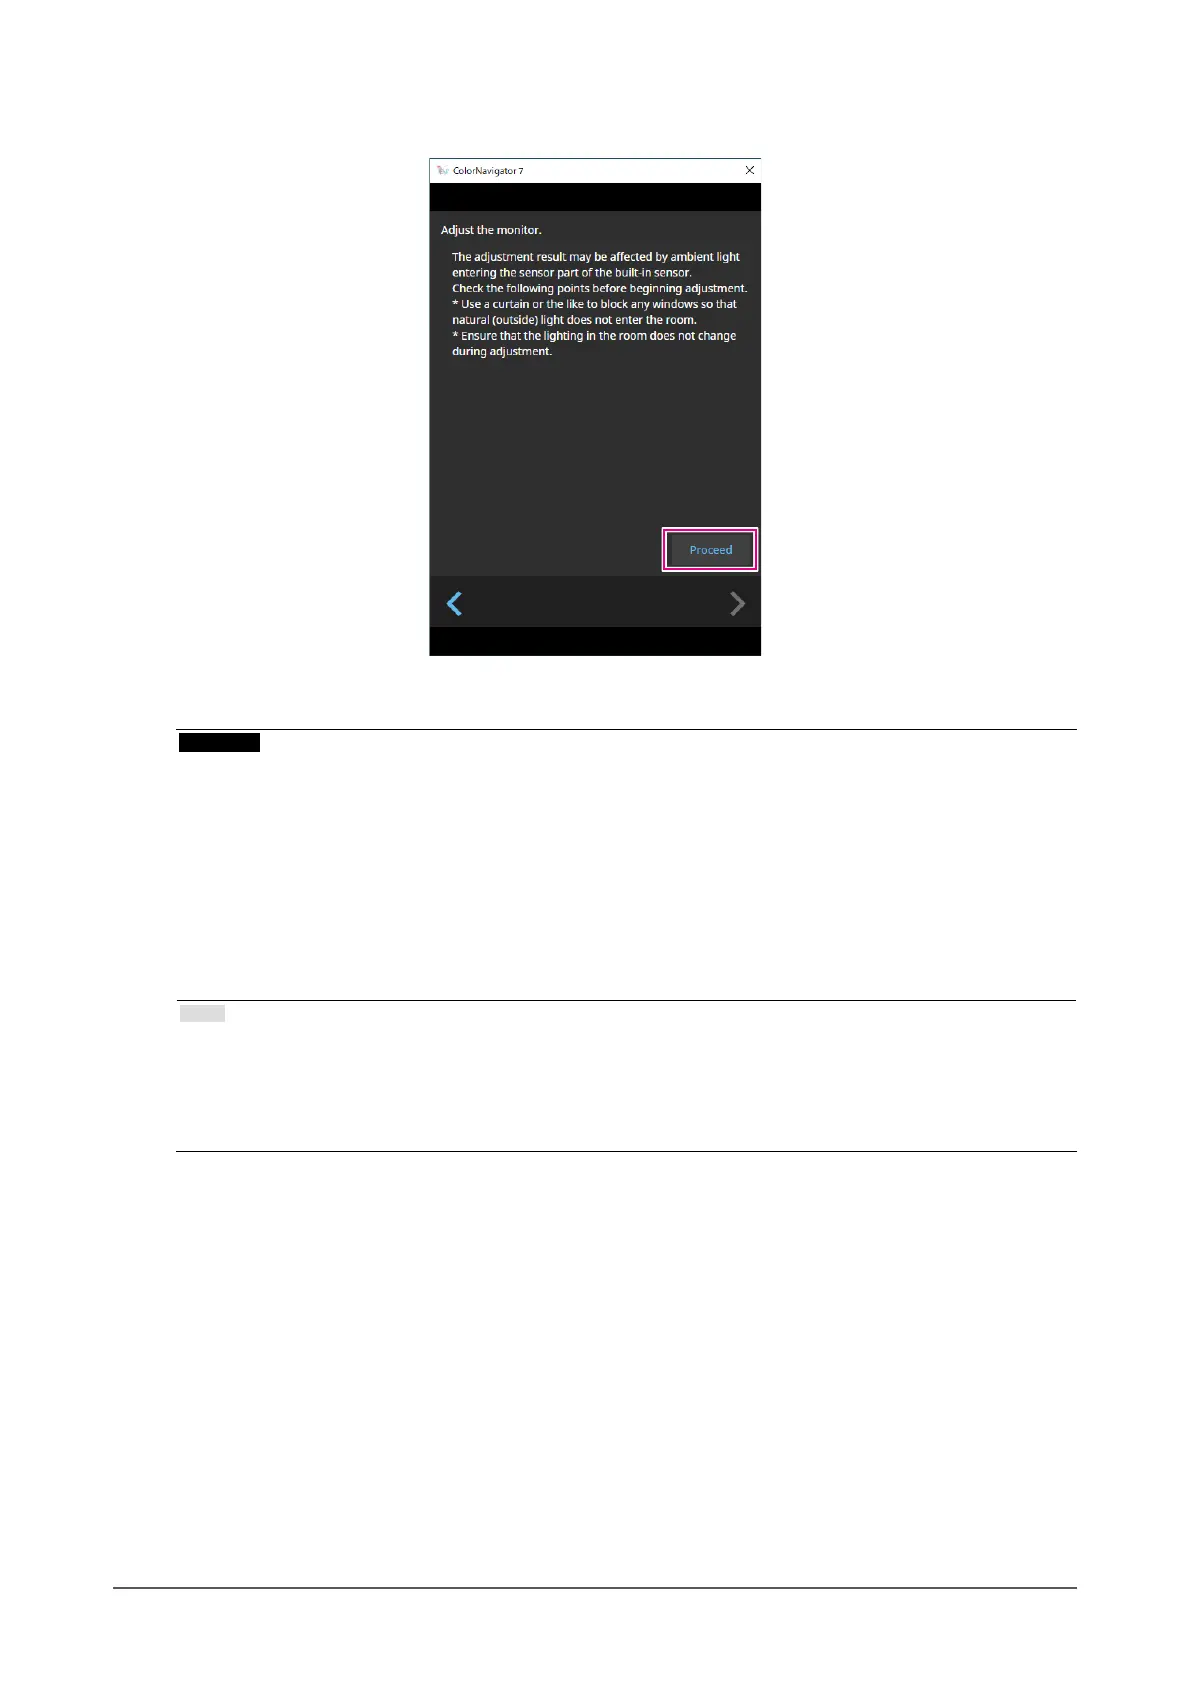
6.
Click the “Proceed” button.
The measurement pattern appears and calibration starts automatically.
Attention
• If the built-in calibration sensor is used, the measurement results may be aected by ambient light entering
into the sensor unit. Check the following points before taking measurements.
- Block natural light from entering the room by closing the window curtain, etc.
- Do not change the room lighting during measurement.
- Attaching the light-blocking hood is recommended.
• The shape of the displayed measurement device will vary by the measurement device you use.
• When the color mode type on CG3146 / CG1 is set to Standard (STD) or Sync Signal (SYNC) it will take some
time for the calibration to nish due to the following reason:
- Chromaticity at high brightness and low brightness is adjusted during calibration. After switching brightness,
the monitor requires some time to warm up in order to stabilize the display status.
Note
• For the following models, the “Use Measurement Position Marker” checkbox appears.
- CG2700S, CG2700X, CG3146, CG1, CG2400S, CG3100X
• For models with a built-in correction sensor, the white point is measured with the built-in correction sensor
after the monitor adjustment is performed by the measurement device. The measurement result is referenced
when SelfCorrection is executed.
During calibration, the progress status is displayed in the lower-right corner of the screen.
Once calibration is complete, the “Calibration completed” window appears.
Bekijk gratis de handleiding van Eizo ColorEdge ColorNavigator 7, stel vragen en lees de antwoorden op veelvoorkomende problemen, of gebruik onze assistent om sneller informatie in de handleiding te vinden of uitleg te krijgen over specifieke functies.
Productinformatie
| Merk | Eizo |
| Model | ColorEdge ColorNavigator 7 |
| Categorie | Niet gecategoriseerd |
| Taal | Nederlands |
| Grootte | 10756 MB |


