Handleiding
Je bekijkt pagina 43 van 49
Page 43
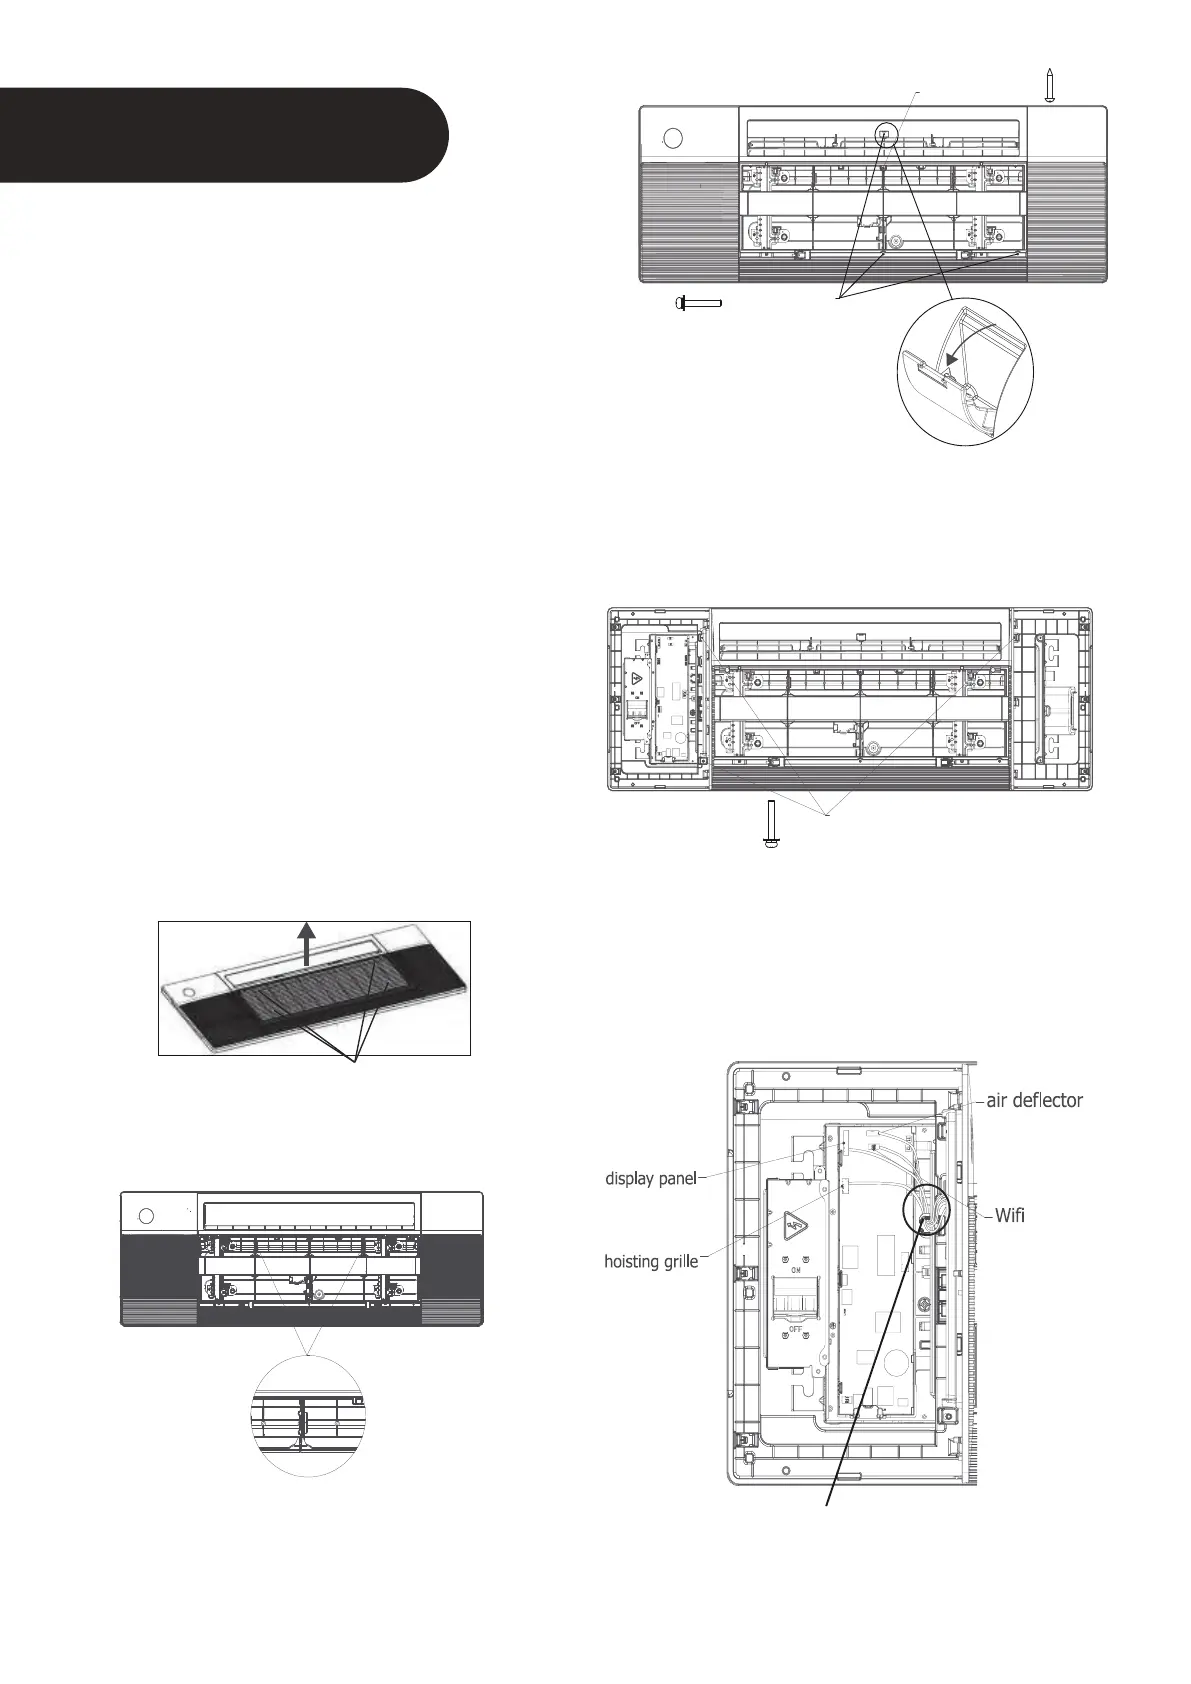
Grab at these locations
• Open the two covers on both sides of the panel,
fix the panel to the cassette by using3× M4*22
screws.
• Connect the display board to the main control
board, up to four wires are required to connect.
NOTICE
Eight M4*22 screws are
supplied, two of which are
spare. Two ST3.9*16 screws
are supplied, one of which is spare.
M4*22 screw
ST3.9*16 screw
Panel Installation
Step 1 Prepare and Install Ceiling
• Drill 430 mm x 1300 mm( 16.93’’x51.18’’ )
hole into the ceiling based on the layout of
the installation board. The centre of the
ceiling opening should match the centre of
the body of the indoor unit.
NOTICE
In order to keep the ceiling level and prevent
vibrations, reinforce the strength of the
ceiling when necessary.
• Once the ceiling is cut, remove the installa-
tion board.
• Then install the ceiling.
Step 2 Panel Installation
Model A
NOTICE
• The air grille received by the customer is
not tightened by the wire rope, but is special-
ly designed to be loose for easy installation.
• Grab air grille with your fingers and pull it
out slowly in the direction of the arrow.
• Manually rotate the air deflector, fix the
panel to the cassette by using 3×M4*22
screws and a ST3.9*16 screw.
M4*22 screw
when connection is completed, please clip
the wires to the buckle.
(white 10-core)
(white 5-core)
(red 5-core)
( 4 core)
Before fixing this screw, you need to open the screw cover;
and after fixing screw, please close the cover.
NOTICE
The corresponding colors or corresponding pins
are connected each other.
Bekijk gratis de handleiding van Daizuki DX1C18426-21, stel vragen en lees de antwoorden op veelvoorkomende problemen, of gebruik onze assistent om sneller informatie in de handleiding te vinden of uitleg te krijgen over specifieke functies.
Productinformatie
| Merk | Daizuki |
| Model | DX1C18426-21 |
| Categorie | Airco |
| Taal | Nederlands |
| Grootte | 6253 MB |


