Daikin RXM35N2V1B9 handleiding
Handleiding
Je bekijkt pagina 33 van 68
6 | Installation
Installer reference guide
33
ARXM50~71+RXM42~71N2V1B(9) + RXP50~71M2V1B +
RXA42+50+RXF50+60B2V1B + RXF71A2V1B + RXJ50N2V1B +
ARXF50~71A2V1B
R32 split series
4P513661-7H – 2019.12
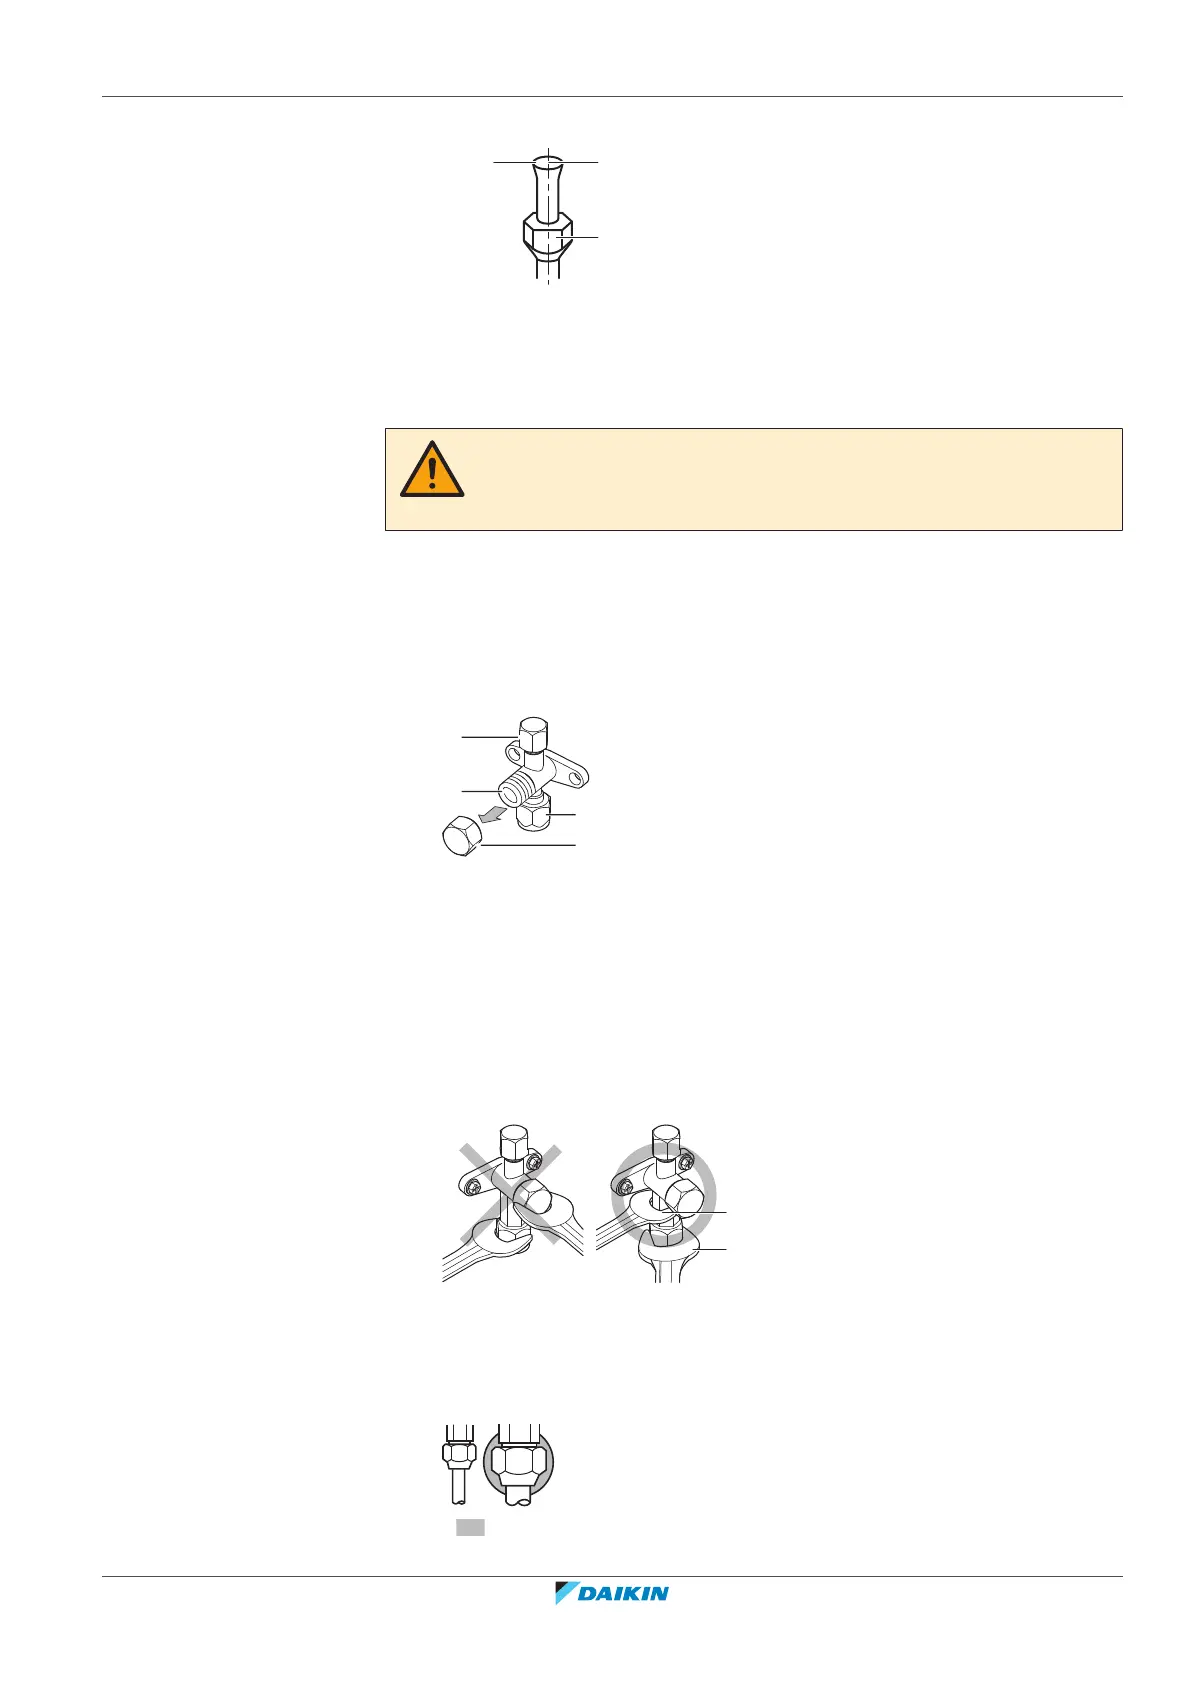
5 Check that the flaring is properly made.
a b
c
a Flare’s inner surface MUST be flawless.
b The pipe end MUST be evenly flared in a perfect circle.
c Make sure the flare nut is fitted.
6.4.6 Using the stop valve and service port
CAUTION
Do NOT open the valves before flaring is complete. This would cause refrigerant gas
leakage.
To handle the stop valve
Take the following guidelines into account:
▪ The stop valves are factory closed.
▪ The following figure shows the stop valve parts required when handling the
valve.
c
d
a
b
a Service port and service port cap
b Valve stem
c Field piping connection
d Stem cap
▪ Keep both stop valves open during operation.
▪ Do NOT apply excessive force to the valve stem. Doing so may break the valve
body.
▪ ALWAYS make sure to secure the stop valve with a spanner, then loosen or
tighten the flare nut with a torque wrench. Do NOT place the spanner on the
stem cap, as this could cause a refrigerant leak.
a
b
a Spanner
b Torque wrench
▪ When it is expected that the operating pressure will be low (e.g. when cooling
will be performed while the outside air temperature is low), sufficiently seal the
flare nut in the stop valve on the gas line with silicon sealant to prevent freezing.
Silicon sealant, make sure there is no gap.
Bekijk gratis de handleiding van Daikin RXM35N2V1B9, stel vragen en lees de antwoorden op veelvoorkomende problemen, of gebruik onze assistent om sneller informatie in de handleiding te vinden of uitleg te krijgen over specifieke functies.
Productinformatie
| Merk | Daikin |
| Model | RXM35N2V1B9 |
| Categorie | Niet gecategoriseerd |
| Taal | Nederlands |
| Grootte | 8936 MB |


