Daikin RXM35N2V1B9 handleiding
Handleiding
Je bekijkt pagina 32 van 68
6 | Installation
Installer reference guide
32
ARXM50~71+RXM42~71N2V1B(9) + RXP50~71M2V1B +
RXA42+50+RXF50+60B2V1B + RXF71A2V1B + RXJ50N2V1B +
ARXF50~71A2V1B
R32 split series
4P513661-7H – 2019.12
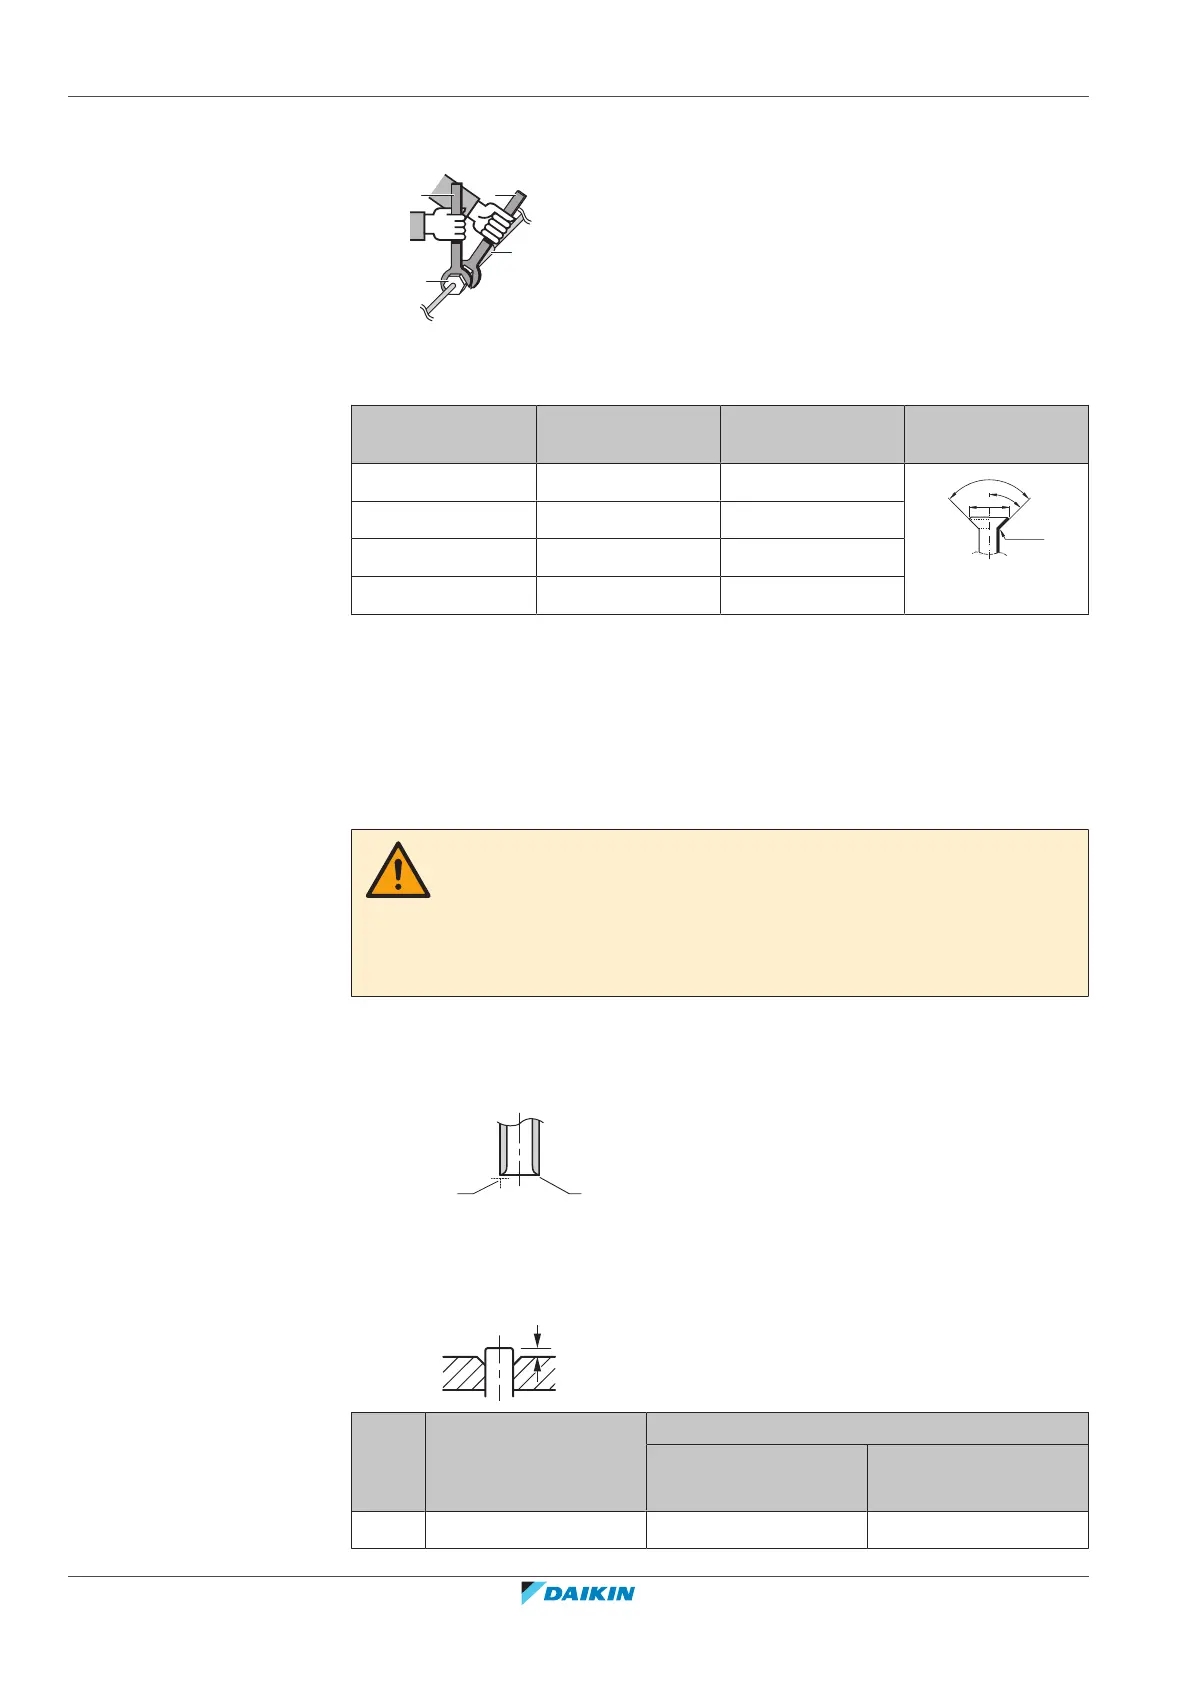
▪ ALWAYS use a spanner and torque wrench together to tighten the flare nut when
connecting the piping. This to prevent nut cracking and leaks.
a
b
c
d
a Torque wrench
b Spanner
c Piping union
d Flare nut
Piping size (mm) Tightening torque
(N•m)
Flare dimensions
(A) (mm)
Flare shape (mm)
Ø6.4 15~17 8.7~9.1
R=
0.4~0.8
±2
45°
90°
±2
ØA
Ø9.5 33~39 12.8~13.2
Ø12.7 50~60 16.2~16.6
Ø15.9 62~75 19.3~19.7
6.4.4 Pipe bending guidelines
Use a pipe bender for bending. All pipe bends should be as gentle as possible
(bending radius should be 30~40mm or larger).
6.4.5 To flare the pipe end
CAUTION
▪ Incomplete flaring may cause refrigerant gas leakage.
▪ Do NOT re-use flares. Use new flares to prevent refrigerant gas leakage.
▪ Use flare nuts that are included with the unit. Using different flare nuts may
cause refrigerant gas leakage.
1 Cut the pipe end with a pipe cutter.
2 Remove burrs with the cut surface facing down so that the chips do NOT enter
the pipe.
a b
a Cut exactly at right angles.
b Remove burrs.
3 Remove the flare nut from the stop valve and put the flare nut on the pipe.
4 Flare the pipe. Set exactly at the position as shown in the following figure.
A
Flare tool for R32
(clutch type)
Conventional flare tool
Clutch type
(Ridgid-type)
Wing nut type
(Imperial-type)
A 0~0.5mm 1.0~1.5mm 1.5~2.0mm
Bekijk gratis de handleiding van Daikin RXM35N2V1B9, stel vragen en lees de antwoorden op veelvoorkomende problemen, of gebruik onze assistent om sneller informatie in de handleiding te vinden of uitleg te krijgen over specifieke functies.
Productinformatie
| Merk | Daikin |
| Model | RXM35N2V1B9 |
| Categorie | Niet gecategoriseerd |
| Taal | Nederlands |
| Grootte | 8936 MB |


