Daikin RXM35N2V1B9 handleiding
Handleiding
Je bekijkt pagina 34 van 68
6 | Installation
Installer reference guide
34
ARXM50~71+RXM42~71N2V1B(9) + RXP50~71M2V1B +
RXA42+50+RXF50+60B2V1B + RXF71A2V1B + RXJ50N2V1B +
ARXF50~71A2V1B
R32 split series
4P513661-7H – 2019.12
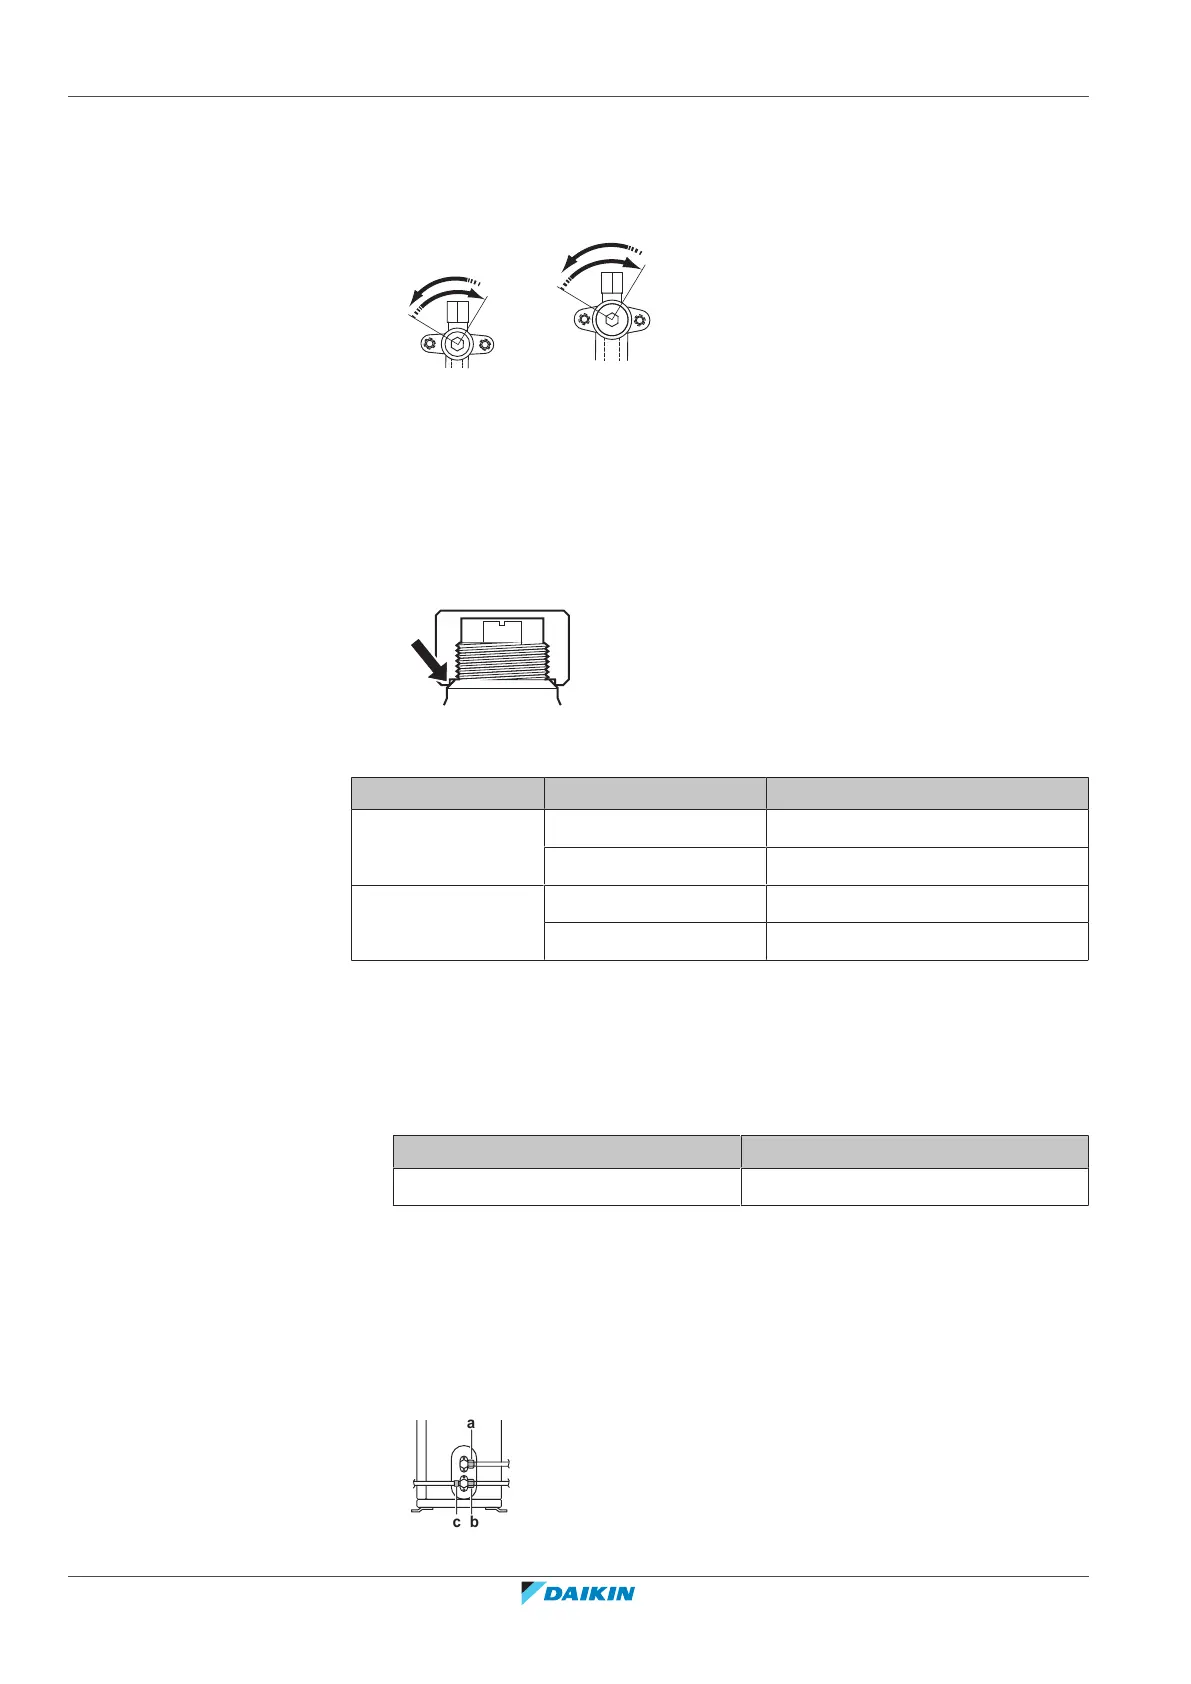
To open/close the stop valve
1 Remove the stop valve cover.
2 Insert a hexagon wrench (liquid side: 4 mm, gas side: 4 mm) into the valve
stem and turn the valve stem:
Counterclockwise to open
Clockwise to close
3 When the stop valve CANNOT be turned any further, stop turning.
4 Install the stop valve cover.
Result: The valve is now open/closed.
To handle the stem cap
▪ The stem cap is sealed where indicated with the arrow. Do NOT damage it.
▪ After handling the stop valve, tighten the stem cap, and check for refrigerant
leaks.
Stem cap Piping Ø (mm) Tightening torque (N∙m)
Liquid side 6.4 22~28
9.5 33~39
Gas side 12.7 49~59
15.9 61~74
To handle the service cap
▪ ALWAYS use a charge hose equipped with a valve depressor pin, since the service
port is a Schrader type valve.
▪ After handling the service port, tighten the service port cap, and check for
refrigerant leaks.
Item Tightening torque (N∙m)
Service port cap 11~14
6.4.7 To connect the refrigerant piping to the outdoor unit
▪ Piping length. Keep field piping as short as possible.
▪ Piping protection. Protect the field piping against physical damage.
1 Connect the liquid refrigerant connection from the indoor unit to the liquid
stop valve of the outdoor unit.
a
bc
a Liquid stop valve
Bekijk gratis de handleiding van Daikin RXM35N2V1B9, stel vragen en lees de antwoorden op veelvoorkomende problemen, of gebruik onze assistent om sneller informatie in de handleiding te vinden of uitleg te krijgen over specifieke functies.
Productinformatie
| Merk | Daikin |
| Model | RXM35N2V1B9 |
| Categorie | Niet gecategoriseerd |
| Taal | Nederlands |
| Grootte | 8936 MB |


