Cigweld Transmig 4RT handleiding
Handleiding
Je bekijkt pagina 32 van 62
TRANSMIG 4RT INSTALLATION/SETUP
INSTALLATION/SETUP 3-16 Manual 0-5245
3.09 Advanced Features Details
See Operating Manual for Transmig 250i for details.
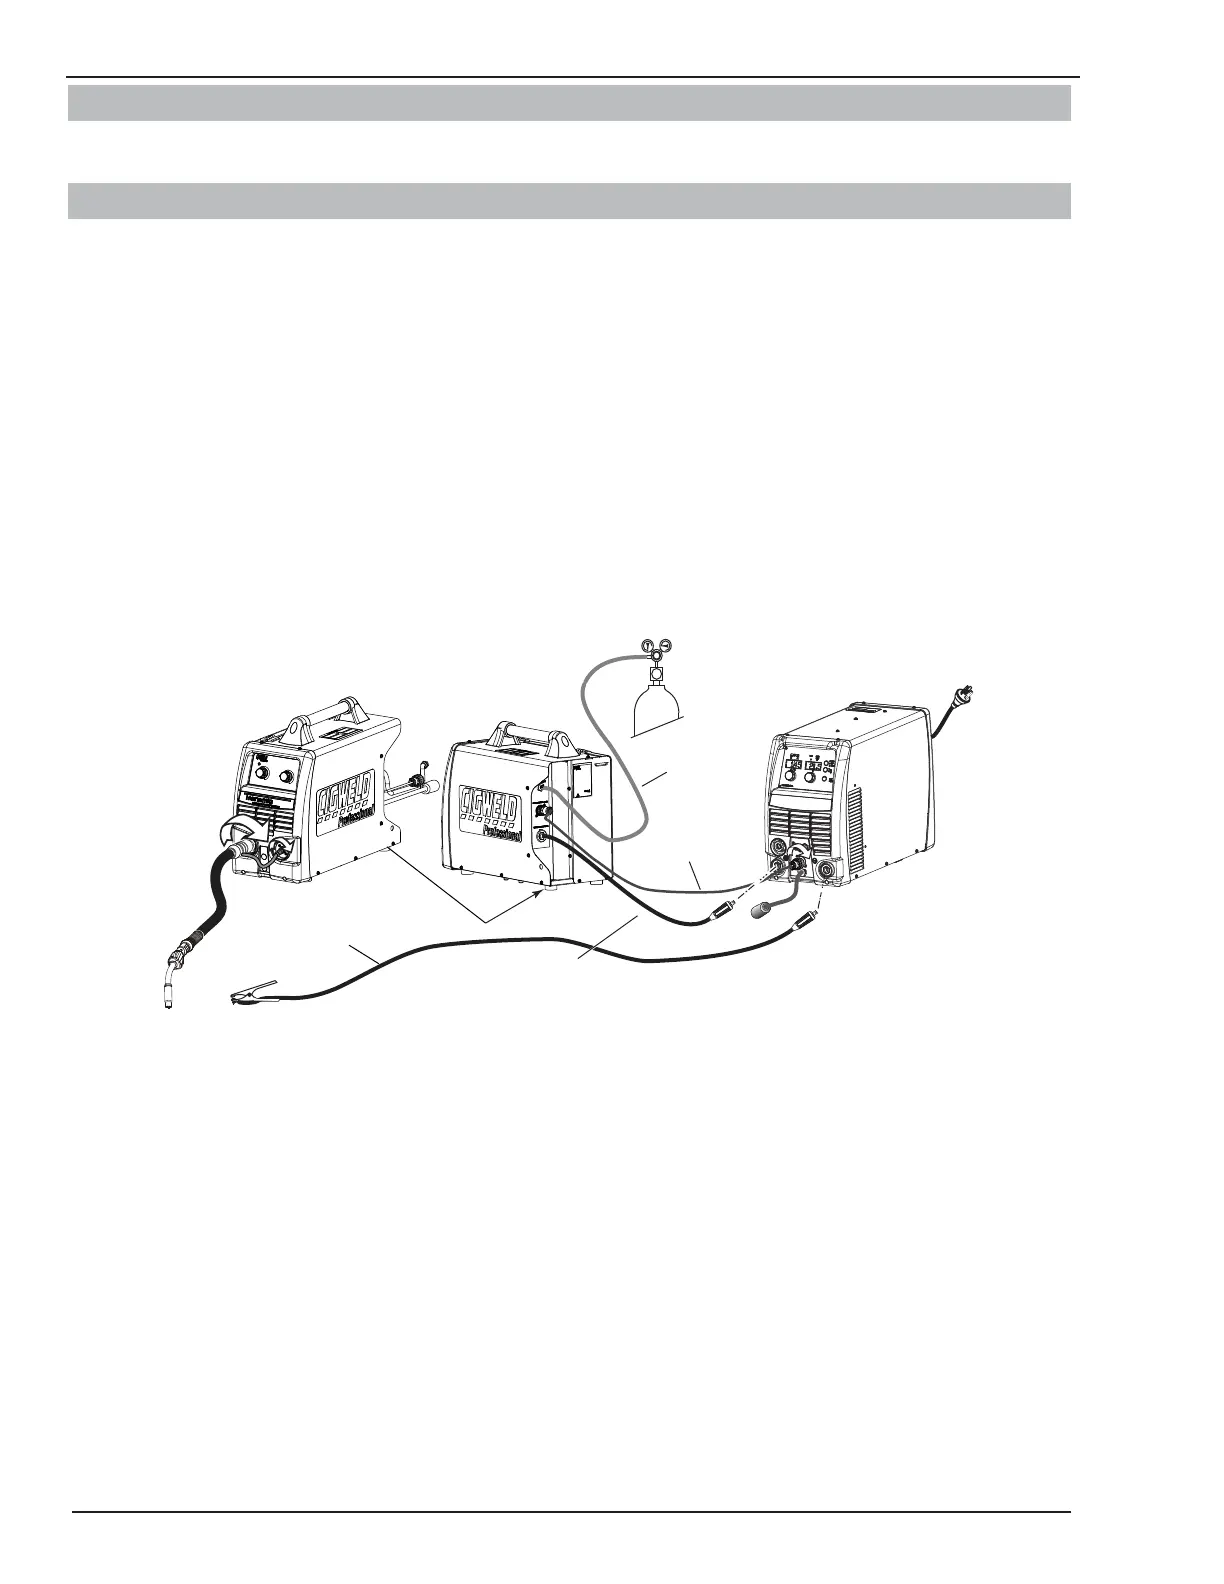
3.10 Wire Feeder Set Up MIG (GMAW) Welding with Gas Shielded MIG Wire
Connection to Transmig 250i
The Transmig 250i is supplied with a Tweco Fusion 250 AMP air-cooled MIG Torch that can be used with the 4RT Wire
Feeder. The Fusion MIG Torch is designed with an ergonomic handle and fewer parts to cause performance problems.
The Fusion MIG Torch uses standard readily available Tweco Fusion consumable parts.
When using a Gas Shielded wire with the 4RT Wire Feeder, you need to have an external gas source attached to the 4RT.
For most Gas Shielded wire, connect the Work Lead to the negative - terminal on the front of the Transmig 250i and
connect the Welding Power Cable from the back of the 4RT to the positive + terminal on the front of the Transmig
250i. Check with wire manufacturer for recommended polarity.
The 4RT Wire Feeder requires an interconnection cable assembly to connect from the back of the 4RT to the front of
the Transmig 250i welding power source. 2, 8 and 15M lengths are available.
Connect the MIG Torch to the front of the 4RT as you would to the front of the Transmig 250i. See Figure 3-6 below
and Section 3.11.
Front View 4RT
Rear View 4RT
+
-
Front View 250i
Control Cable
Art # 11286
Gas Hose
Welding Power Cable
from Wire Feeder
Work Lead
Figure 3-6: Setup for 4RT Wirefeeder with Gas Shielded MIG Wire
Bekijk gratis de handleiding van Cigweld Transmig 4RT, stel vragen en lees de antwoorden op veelvoorkomende problemen, of gebruik onze assistent om sneller informatie in de handleiding te vinden of uitleg te krijgen over specifieke functies.
Productinformatie
| Merk | Cigweld |
| Model | Transmig 4RT |
| Categorie | Niet gecategoriseerd |
| Taal | Nederlands |
| Grootte | 8070 MB |
