Chief DVM27U2E handleiding
Handleiding
Je bekijkt pagina 18 van 24
DVM27U Series Installation Instructions
18
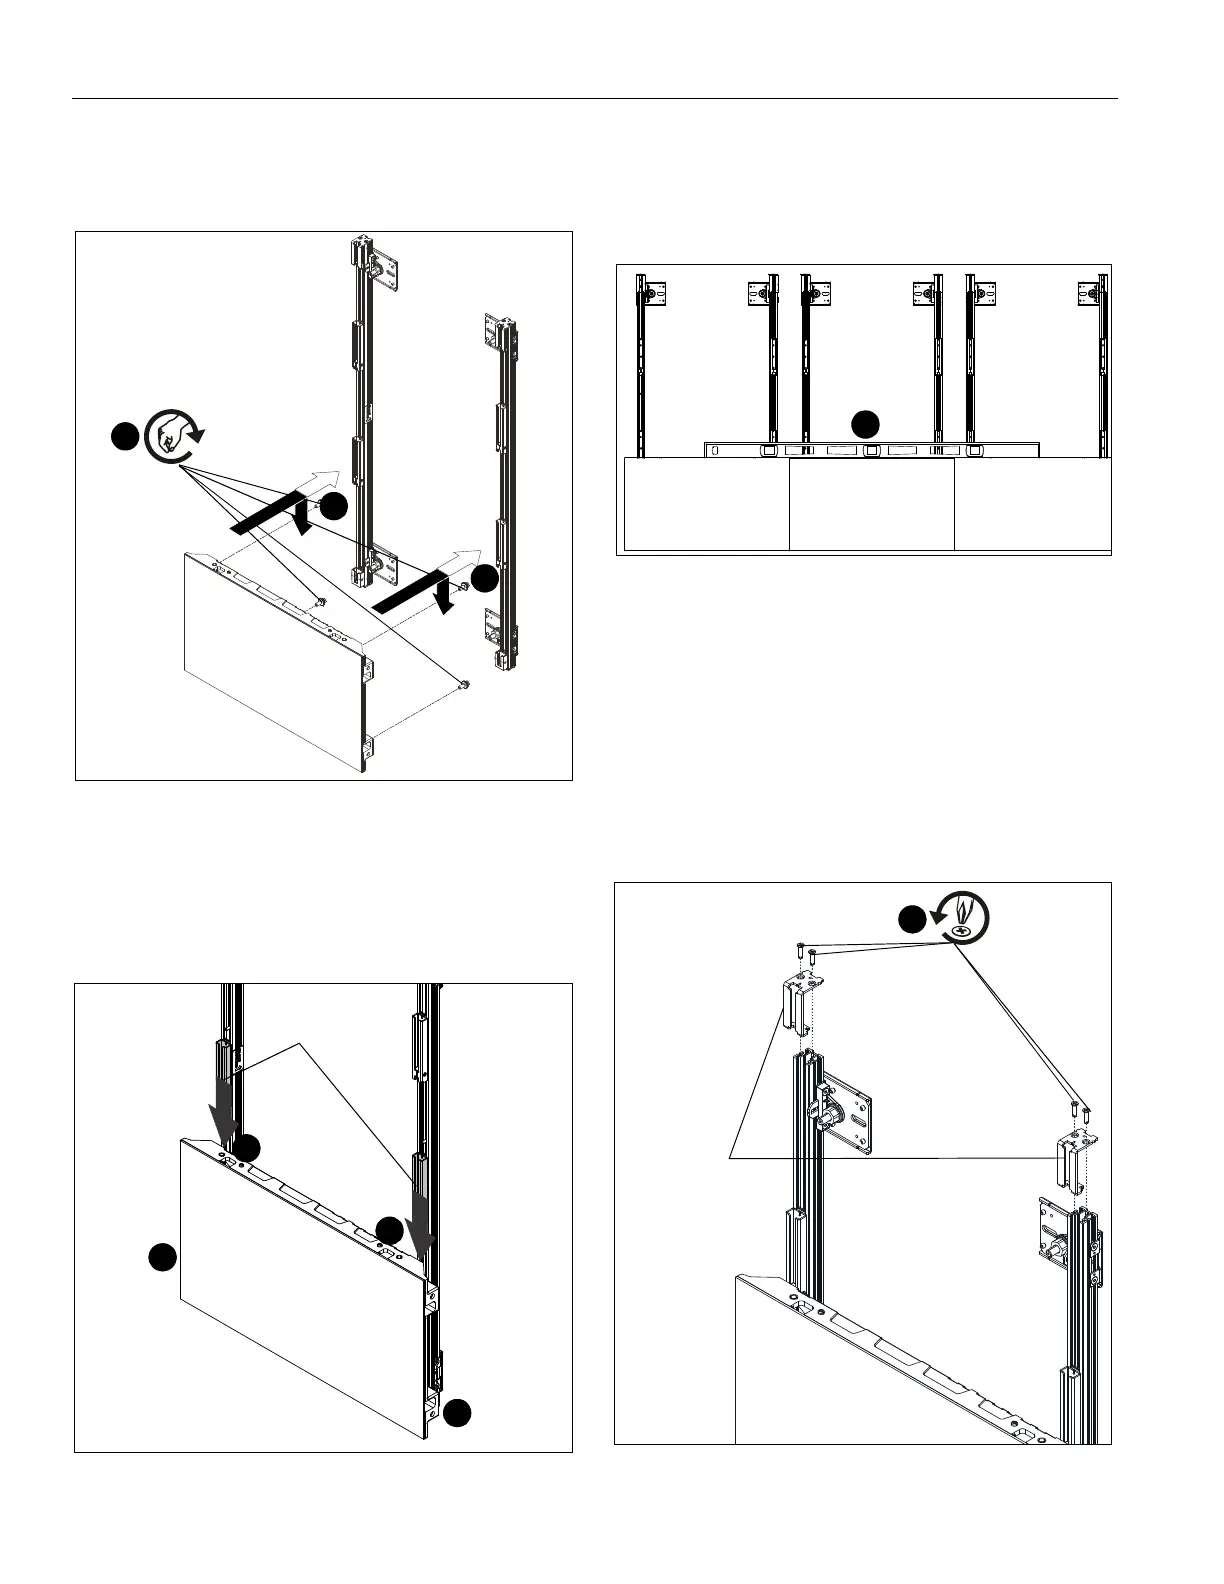
Displays Installation (First Row)
1. Install mounting buttons (D or E) into displays to be
installed. (See Figure 16)
Figure 16
2. Install display to mount by inserting lower mounting buttons
into the base carriages. (See Figure 16) and (See Figure
17)
3. Slide the H-blocks down the extrusion to enclose the upper
mounting buttons. (See Figure 17)
Figure 17
4. Make any necessary adjustments using the height/leveling
adjustment screws on the bottom of the mounts. (See
Figure 12)
5. Use a 4-foot level or laser level to ensure bottom row of
displays are horizontally level. (See Figure 18)
Figure 18
6. Continue installing displays following Steps 1-5 until the first
row is full.
IMPORTANT ! : If NOT using extender kit (DVM27U2E/
DVM27U3E/DVM27U4E), proceed to Building
Remaining Wall Section.
Installing Extender Kit (DVM27UE)
1. Remove the top button capture bracket by removing two
screws on top of starter uprights (A and B). Set bracket and
screws aside for re-use. (See Figure 22)
Figure 19
(D or E) x 4
2
2
1
3
3
2
2
H-blocks
5
top button
capture brackets
x 2
1
Bekijk gratis de handleiding van Chief DVM27U2E, stel vragen en lees de antwoorden op veelvoorkomende problemen, of gebruik onze assistent om sneller informatie in de handleiding te vinden of uitleg te krijgen over specifieke functies.
Productinformatie
| Merk | Chief |
| Model | DVM27U2E |
| Categorie | Niet gecategoriseerd |
| Taal | Nederlands |
| Grootte | 3836 MB |


