Bora MS 140 handleiding
Handleiding
Je bekijkt pagina 32 van 40
EN
78
Installation
www.bora.com
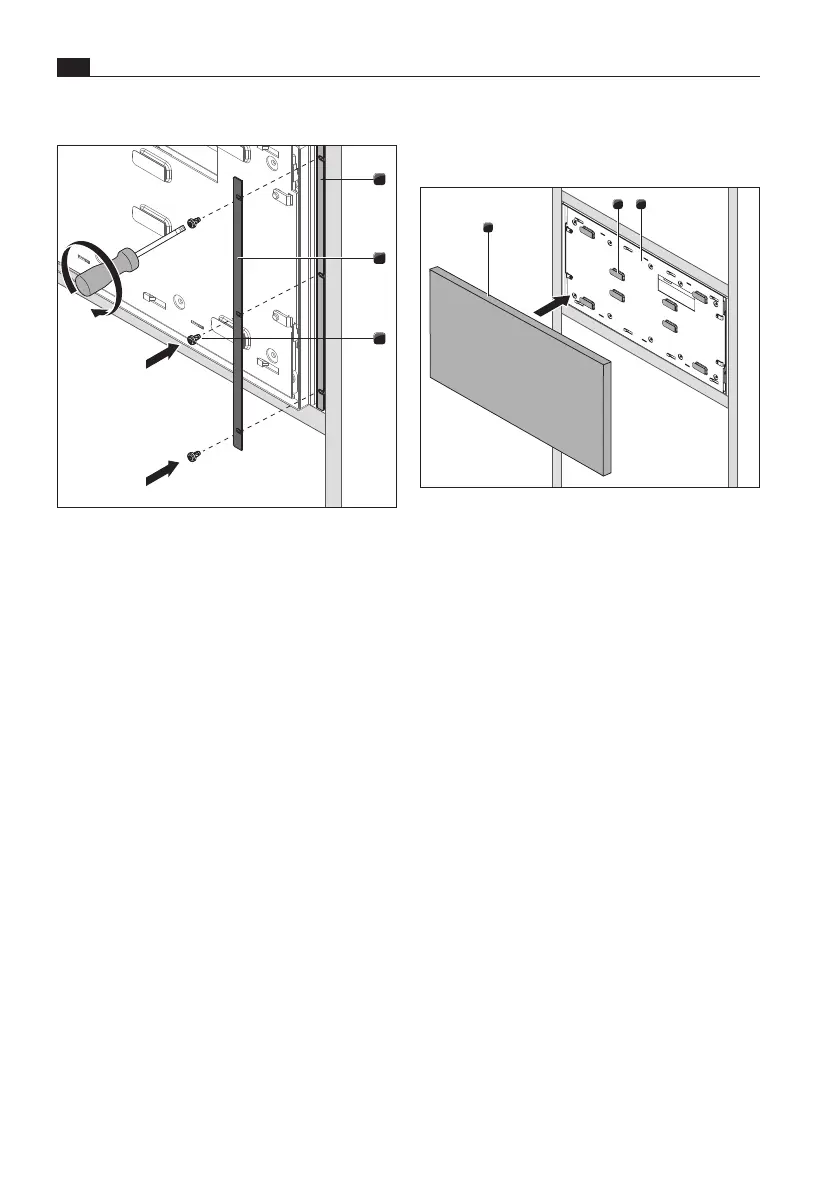
9.5.1 Fitting the unit front
Positioning the unit front
2
1
3
Fig. 9.10 Adhesive pads on the front support
[1] Unit front
[2] Adhesive pads
[3] Front support
X Remove the protective strips from the adhesive
pads [2] on the front support [3].
X With the drawer installed and closed, position the
unit front [1] correctly on the front support.
X Please observe the clearance when doing so.
X Press lightly on the unit front [1].
O
The unit front will stick to the front support.
i
To correct the position, the unit front can be
removed by cutting the adhesive pads from
the sides.
i
This adhesive seal is only temporary and may
become unstuck in time. Therefore, the front
must be screwed into place.
Installing the appliance
1
2
3
Fig. 9.9 Securing the appliance
[1] Mounting angle (1 x right, 1 x left)
[2] Decorative trim (1 x right, 1 x left)
[3] Black M4 x 8, TX20 screws (3 x right, 3 x left)
X Insert the appliance in the installation recess.
X Align the appliance in the centre of the
installation recess.
X Select decorative trim [2] of an appropriate width.
X Attach the appliance and decorative trim [2] to
the mounting angles [1] on each side with three
black M4 x 8, TX20 screws [3] (included in the
scope of delivery) (torque: 2.2 Nm ±10%).
9.5 Fitting the front
i
If the BORA multi-drawer is installed with a
BORAXBO steam oven, the BORAXBO must
be installed before fitting the front.
When fitting the front, two different procedures
must be taken into account:
O
fitting the unit front
O
fitting the BORA multi-drawer glass front
Bekijk gratis de handleiding van Bora MS 140, stel vragen en lees de antwoorden op veelvoorkomende problemen, of gebruik onze assistent om sneller informatie in de handleiding te vinden of uitleg te krijgen over specifieke functies.
Productinformatie
| Merk | Bora |
| Model | MS 140 |
| Categorie | Niet gecategoriseerd |
| Taal | Nederlands |
| Grootte | 4589 MB |